Outbound call
Use this block to configure an outbound call to a customer. Within a campaign, the system retrieves phone numbers from the Phone column of the uploaded .xlsx file.
- Connect the block via the Fail, Success, and Voicemail ports.
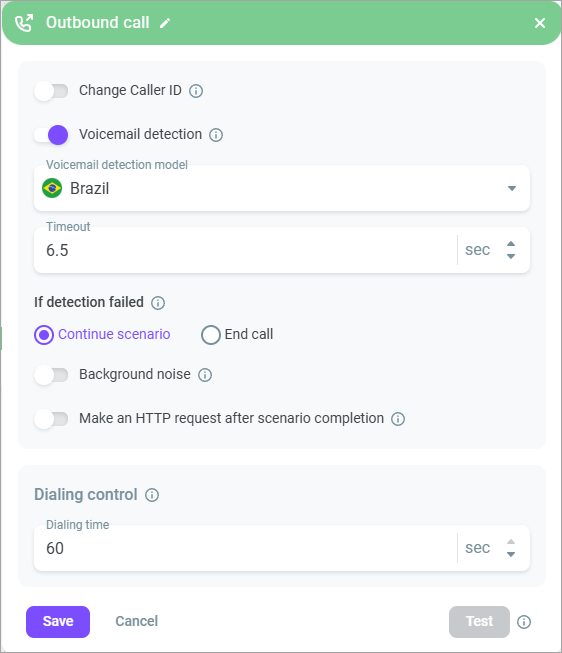
- Enable the Change Caller ID switch if you need to change the variable used as a Caller ID in your scenario. Select a variable from the drop-down list or add a new one.
- Enable the Voicemail detection switch if you want to distinguish whether you reached a live person or a pre-recorded voicemail prompt during a call. Select the Voicemail detection model from the drop-down list.
Currently, the following voicemail detection models are available:
Brazil
Colombia
Mexico
Philippines
Peru
USA
Europe
Kazakhstan
Russia
If your country is not on the list and you need the voicemail/answering machine detection feature, please contact support.
Configure the maximum detection time and define what to do with the call if the system fails to detect whether it reached a live person or voicemail. If you select Continue scenario, the call leaves the scenario through the Success port, if you choose the End call option - through the Voicemail port.
- Enable the Background noise switch to play contact center background sounds during a call to simulate that a call is handled by an agent. Select an audio recording from the library or upload a media file from your PC.

- In the Dialing control field, define how long the system should keep on dialing a customer before the call gets the Callee has not answered status. The minimum time is 15 seconds, the maximum time is 60 seconds.
- Enable the Make an HTTP request after scenario completion if you want to send an HTTP request upon completion of each call in the session. You can select a template or create a new request.
Select a request from the Select the template drop-down list or add a new one.
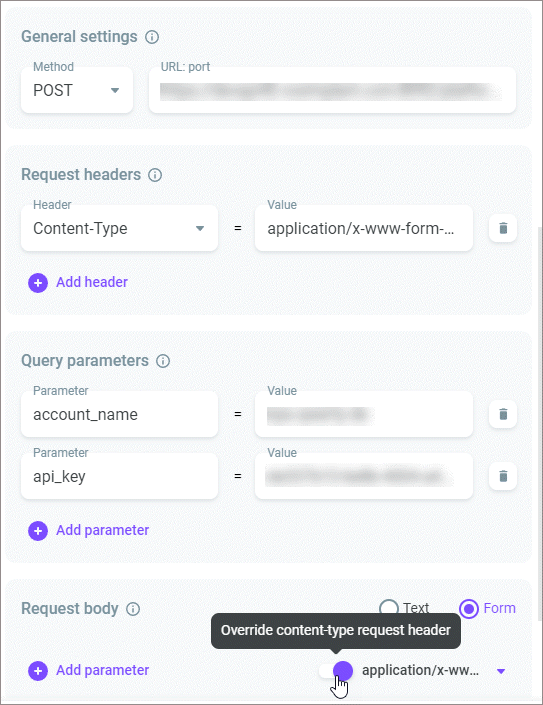
In the General settings section, configure the HTTP method and address of the service to which the request will be made.
In the Request headers section, add response headers needed to request your service.
Add query parameters and their values in the Query parameters section. You can use scenario variables, if required.
If applicable, add a request body (for example, for POST, PUT, or PATCH methods). For that, define the request body type (Text/Form) and add text (for Text) or parameters+values (for Form).
If required, override the Content-type request header and select the type you need for the request body from the drop-down list.
Click the Test button to check the response status code.

- Click Save.
