Call to queue
Use this block to transfer a call to a queue. After the transfer, the call is waiting in a queue for an available contact center agent.
To route a call to a queue, do the following:
- Connect the block via the Fail and Success ports.
- Double-click the Call to queue block.
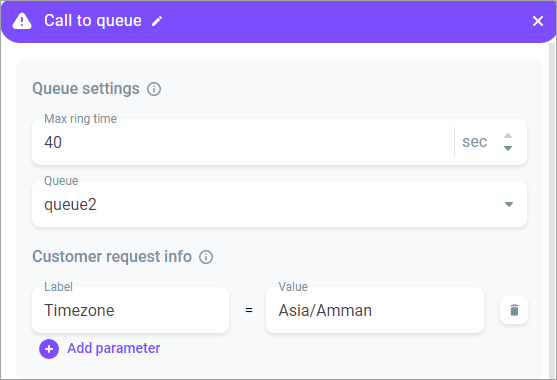
- Select the required queue in the Queue field.
- Specify the period within which an agent should answer a call in the Max ring time field. If the agent does not answer, the call moves to another agent.
- In the Customer request info section, enter additional information about the customer. This information will display to the agent who will receive the call. It can be additional phone number, timezone, comments, etc.
Click Add parameters.
Enter what type of data you want to add in Label field, for example timezone, and enter the Value, for example, Asia/Amman.
- In the Waiting time settings section, configure the audio playback while a customer is waiting in the queue.
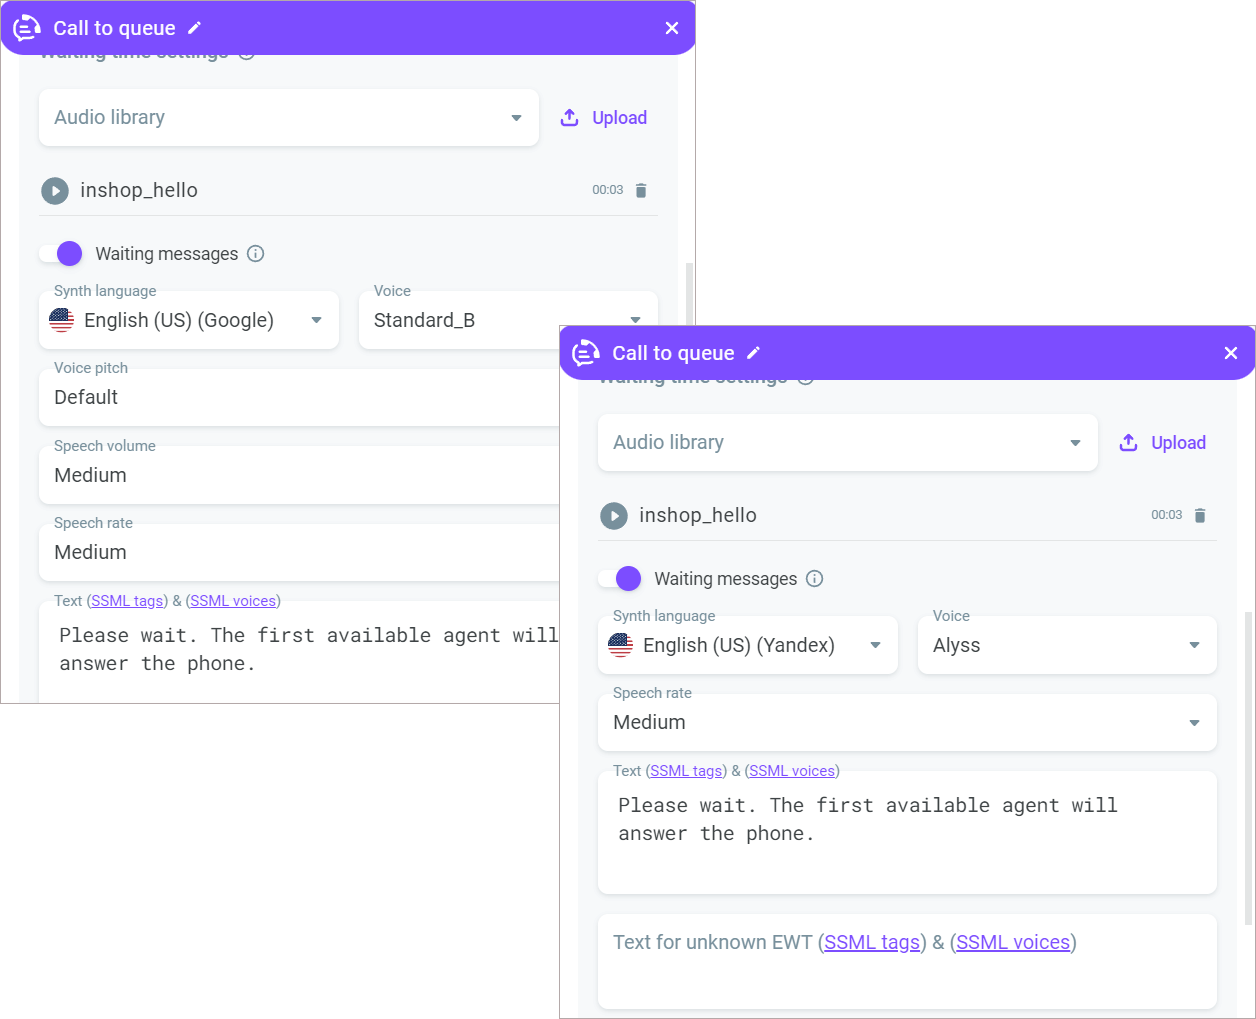
Select an audio file from the Audio library drop-down list. Click Upload to upload an audio file from your computer.
Enable the Waiting message switch to activate customer queueing position notifications. Use the {{queue_ewt}} and {{queue_position}} variables in the messages to determine the customer's waiting time and position in the queue.
The {{queue_ewt}} variable stores the estimated waiting time (EWT) value in seconds. The value is calculated every 15 seconds once the call is placed in a queue. The calculation is based on the number of calls handled in the contact center in the last 30 minutes. The waiting time calculation includes the current queue state (the number of calls in process, the number of queueing calls, and the number of agents available), the time agents spent processing calls in the last 30 minutes, and the number of calls in queue in the last 7 minutes. If there is no historical data, the calculation is not possible and the {{queue_ewt}} variable is not filled.
Select the TTS language from the Synth language drop-down list.
Select the preferred voice from the Voice drop-down list.
Enter the message text in the Text and Text for unknown EWT fields. You can use SSML tags.
Configure the time after which the system repeats the message in the Repeat every field.
For specific TTS-providers, you can also configure advanced settings:
Voice pitch - Configure the synthesized voice pitch (Google). Available options: x-low, low, medium, high, x-high, default.
Speech volume - Set the speech volume (Google). Available options: silent, x-soft, soft, medium, loud, x-loud, default.
Speech rate - Set the synthesized speech speed (Google, Yandex). Available options: x-slow, slow, medium, fast, x-fast, default.
Emotions - Configure the synthesized voice sentiment (applicable for specific Yandex voices). Available options: neutral, good, evil.
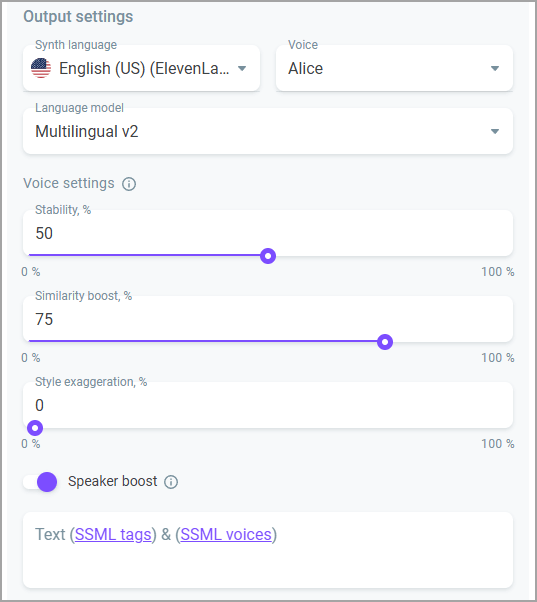
If you select the ElevenLabs TTS-provider, additional speech synthesis settings are available:
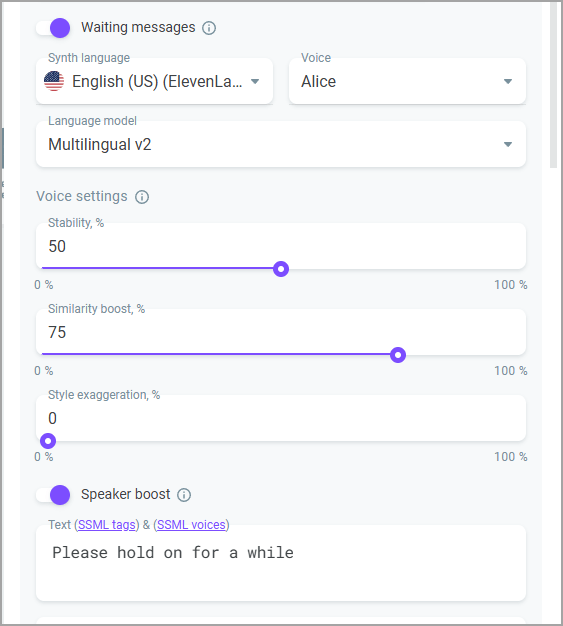
Language model - The model understands which language you use and generates audio accordingly.
Stability - Allows you to adjust the degree of the voice emotionality. The higher the stability, the more restrained and calm the voice becomes. Lowering the setting introduces a broader emotional range.
Similarity boost - Allows you to adjust the level of clarity and similarity of the voice. If similarity is set too high, the AI may reproduce artifacts from low-quality audio.
Style exaggeration - Allows you to amplify the style of the original speaker.
Speaker boost - When enabled, allows you to make TTS speech sound more human-like. Enabling the setting may slightly increase the speech synthesis time.
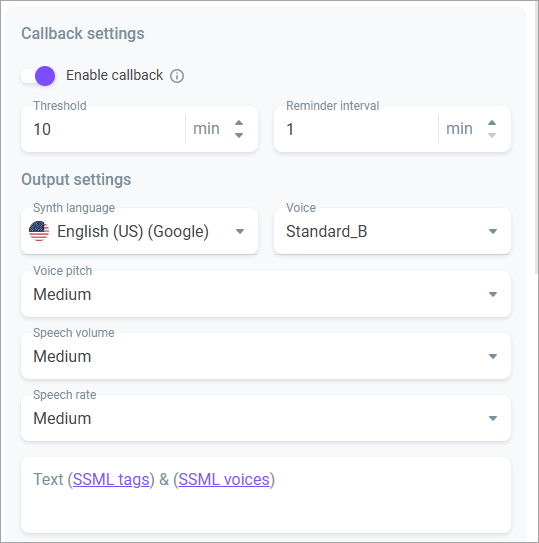
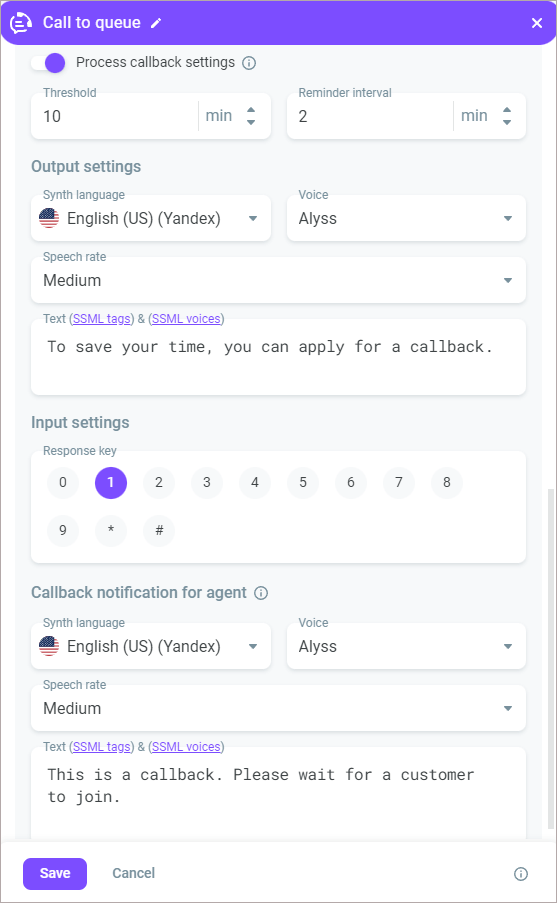
- In the Callback settings section, define whether the system should offer a callback to a customer if they do not want to wait in the queue for too long. A customer can agree by pressing a certain key. After that an available agent calls the customer back.
How does a callback work? When a customer call arrives to the Call to queue block, the system calculates how long it will take an agent to answer the phone and writes this value to the {{queue_ewt}} variable. If there are no agents available in the queue, the customer is waiting until the threshold queueing time is reached. If the calculated {{queue_ewt}} time exceeds the threshold, the customer receives a system message that they can be called back by the first available agent. If the customer agrees, the call is ended and a callback is queueing until the first available agent handles it. Note that the scenario does not end, it remains pending in the Call to queue block until the callback is processed.
In the Threshold field, specify the threshold queueing time.
Enter the time after which the system reminds a customer about the callback opportunity in the Reminder field.
Select the synthesized language in the Synth language field.
Select the preferred voice in the Voice field.
Enter the text of the message in the Text field. You can use SSML tags.
For specific TTS-providers, you can also configure advanced settings:
Voice pitch - Configure the synthesized voice pitch (Google). Available options: x-low, low, medium, high, x-high, default.
Speech volume - Set the speech volume (Google). Available options: silent, x-soft, soft, medium, loud, x-loud, default.
Speech rate - Set the synthesized speech speed (Google, Yandex). Available options: x-slow, slow, medium, fast, x-fast, default.
Emotions - Configure the synthesized voice sentiment (applicable for specific Yandex voices). Available options: neutral, good, evil.
If you select the ElevenLabs TTS-provider, additional speech synthesis settings are available:
Language model - The model understands which language you use and generates audio accordingly.
Stability - Allows you to adjust the degree of the voice emotionality. The higher the stability, the more restrained and calm the voice becomes. Lowering the setting introduces a broader emotional range.
Similarity boost - Allows you to adjust the level of clarity and similarity of the voice. If similarity is set too high, the AI may reproduce artifacts from low-quality audio.
Style exaggeration - Allows you to amplify the style of the original speaker.
Speaker boost - When enabled, allows you to make TTS speech sound more human-like. Enabling the setting may slightly increase the speech synthesis time.
- In the Input settings section, configure the response keys a customer can use to reply to the system.
- In the Callback notification for agent, configure the TTS language, voice, advanced settings if applicable (see advanced and ElevenLabs settings' description above), and the text of the message for an agent who will call the customer back.
- Use the Call routing settings to route calls to a specific agent. The functionality is useful if the customer service scheme involves communication between a customer and a personal manager or employee who last consulted them.
The routing settings are mutually exclusive. You can choose either routing to the last agent or to the personal manager. When one of the two settings is enabled, the other is automatically disabled, keeping the specified parameters intact.
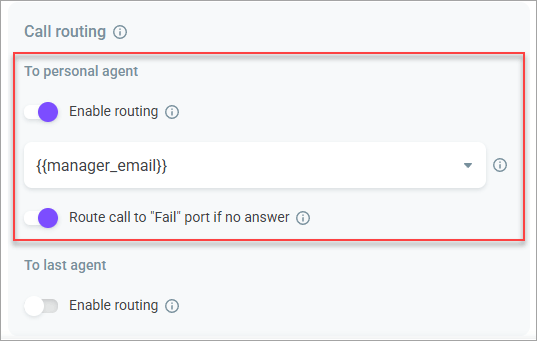
- Enable call routing to the personal agent so that calls are distributed to the customer's personal manager.
To obtain information about the personal agent, use the HTTP request block. In the block, retrieve the personal manager's email via API and store it in a variable. As a result, when a call comes into the queue, the system checks the customer's personal manager email, matches it with the agents' email addresses, and, if there is a match, directs the call to that specific employee. If there are no matches or if the agent is unavailable, the call is distributed according to the general queue settings.
Enter or select a variable name to retrieve the email of the employee to whom the call will be assigned.
Enable the Route call to Fail port if no answer switch to direct the call to the Fail port if the agent is unavailable or if the maximum ring time is exceeded. If the switch is disabled, the call is distributed according to the general queue settings.
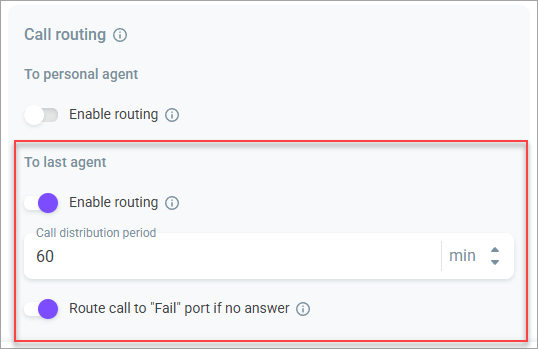
- Enable call routing to the last agent so that calls are distributed to the last employee who worked with the customer.
Select the Call distribution period to check the call history and find the last agent. When a customer call arrives, the system analyzes all calls handled during the selected period. If it finds calls handled by agents from this queue, the system identifies the most recent one and routes the customer call to that agent. If there are no calls during the specified period or if the agent is unavailable, the call is distributed according to the general queue settings.
Enable the Route call to Fail port if no answer switch to direct the call to the Fail port if the agent is unavailable or if the maximum ring time is exceeded. If the switch is disabled, the call is distributed according to the general queue settings.
- Click Save.
