WhatsApp Cloud API
Receive messages from your customers using a cloud-hosted version of the WhatsApp Business Platform. The Cloud API, hosted by Meta, allows you to implement WhatsApp Business APIs without the cost of hosting of your own servers and also allows you to more easily scale your business messaging.
WhatsApp Cloud API advantages:
API software is hosted on Meta’s servers.
API software upgrades are performed by Meta and new features and security updates are available automatically on the Cloud API.
No server chargers. You pay per messages (conversations) only.
In this article, learn how to set up access to the WhatsApp Cloud API and create a WhatsApp Cloud API channel in Voximplant Kit.
A WhatsApp Cloud API channel supports inbound messages only. If you want to send outbound WhatsApp messages using HSM templates, create a WhatsApp channel in Voximplant Kit as shown here.
Contents
Setting up developer assets and platform access
The WhatsApp Cloud API and WhatsApp Business Management API are part of Meta’s Graph API, so you need to set up a Meta developer account and a Meta developer app. To set that up:
Create a Facebook Business Manager account and enable two-factor authentication
Register as a Meta Developer
Creating a Facebook Business Manager account and enabling 2FA
- Create a Facebook Business Manager account as shown here.
Once created, enable the two-factor authentication for the account to protect it in addition to your password. If you set up two-factor authentication, you will be asked to enter a special login code or confirm your login attempt each time someone tries accessing Facebook from a browser or mobile device. You can also get alerts when someone tries logging in from a browser or mobile device not recognized by Facebook.
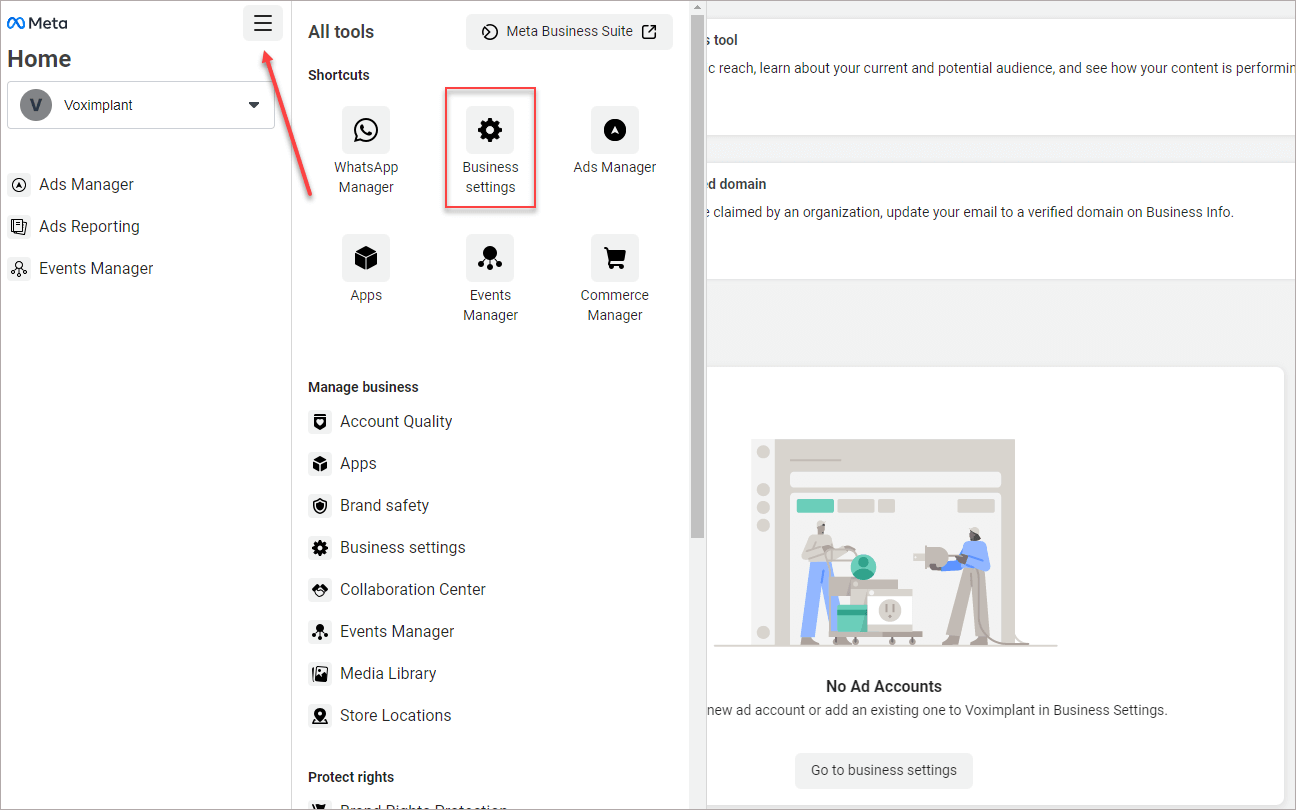
- In your Facebook Business Manager account, click the hamburger menu and select Business settings.
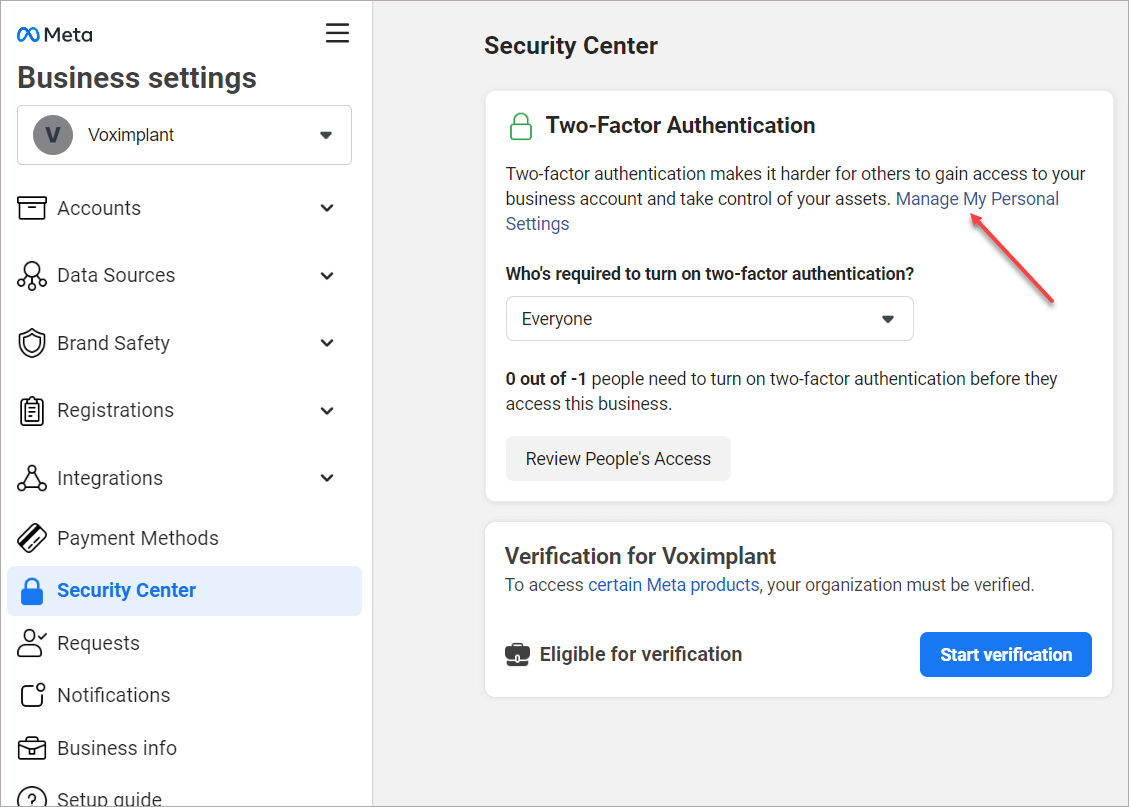
- In the left menu, select Security Center.
- On the Two-Factor Authentication tile, click Manage My Personal Settings.
- On the page that opens, choose the security method you want to add and follow the on-screen instructions.
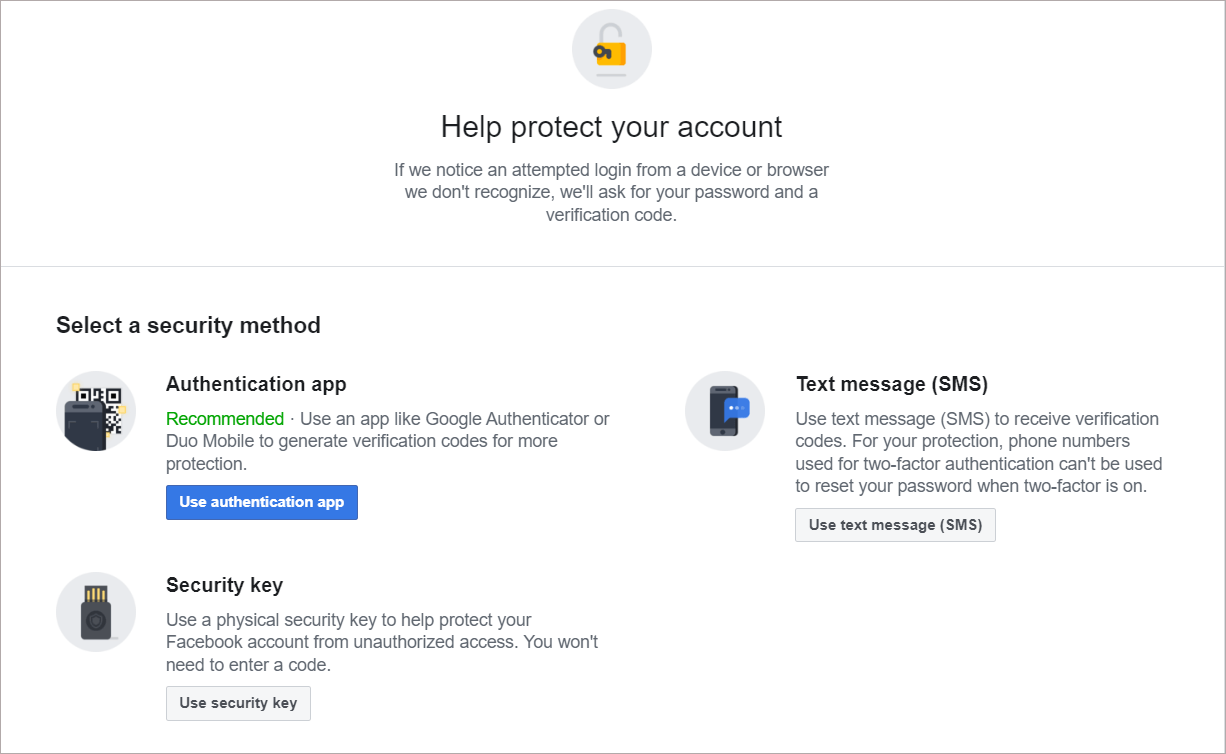
When you set up two-factor authentication on Facebook, the system will ask you to choose one of three security methods:
Tapping your security key on a compatible device
Login codes from a third party authentication app
Text message (SMS) codes from your mobile phone
Registering as a Facebook Developer
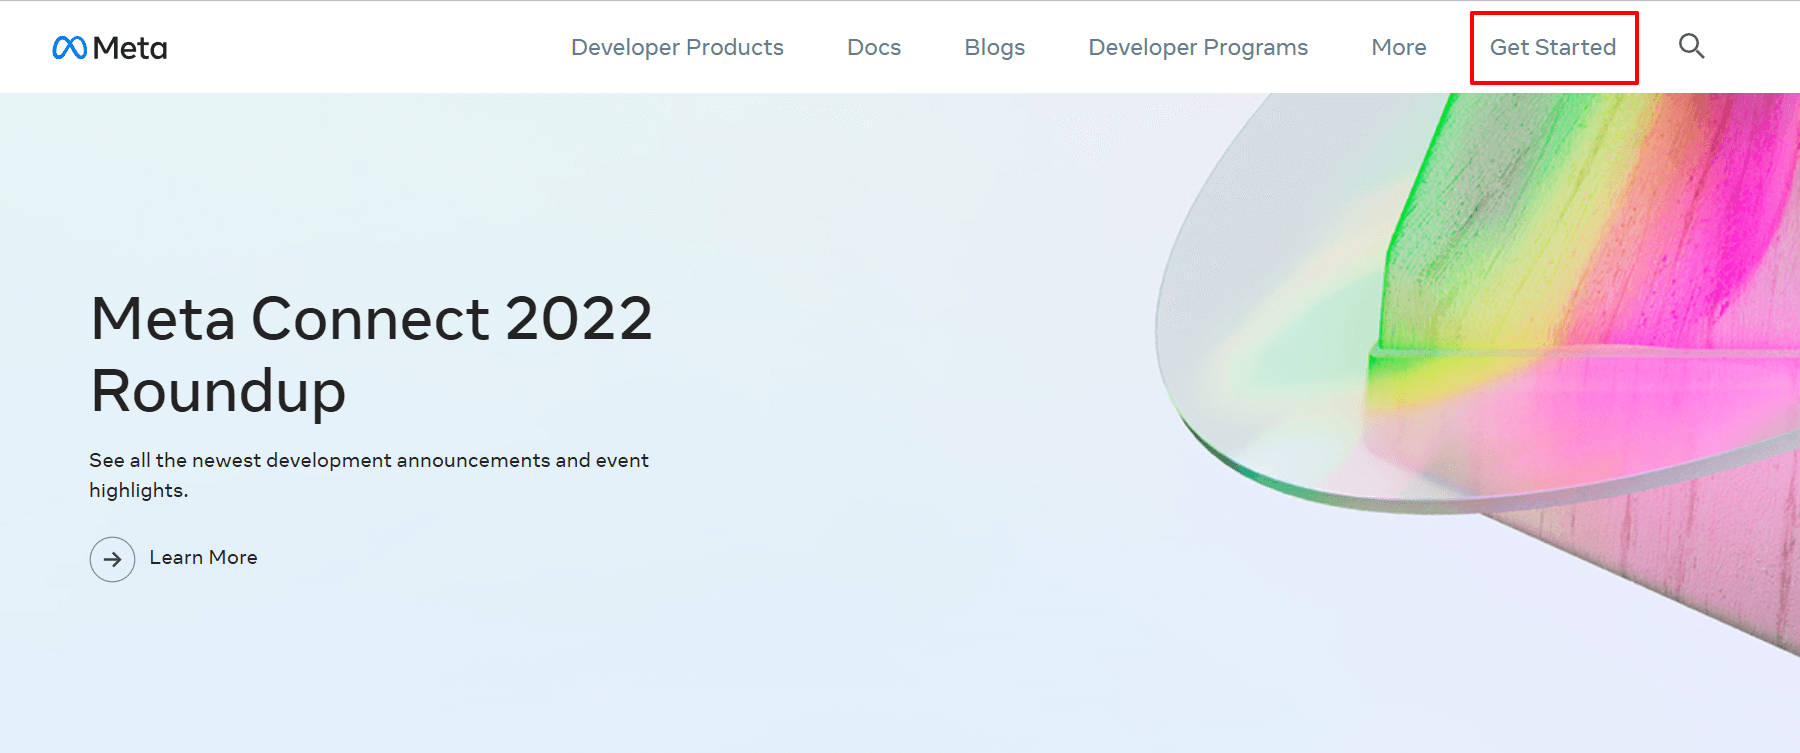
- Go to Facebook for Developers.
- Click Get Started.
- Click Next to agree to the Platform Terms and Developer Policies.
- In the Contact info window that opens, enter an email address and/or a phone number. Facebook will send a confirmation code to the phone number and email address that you provide to confirm that you have access to them. Your number and email will be used for important developer notifications of any changes that may impact your app.
- Select an occupation that most closely describes what you do for a living.
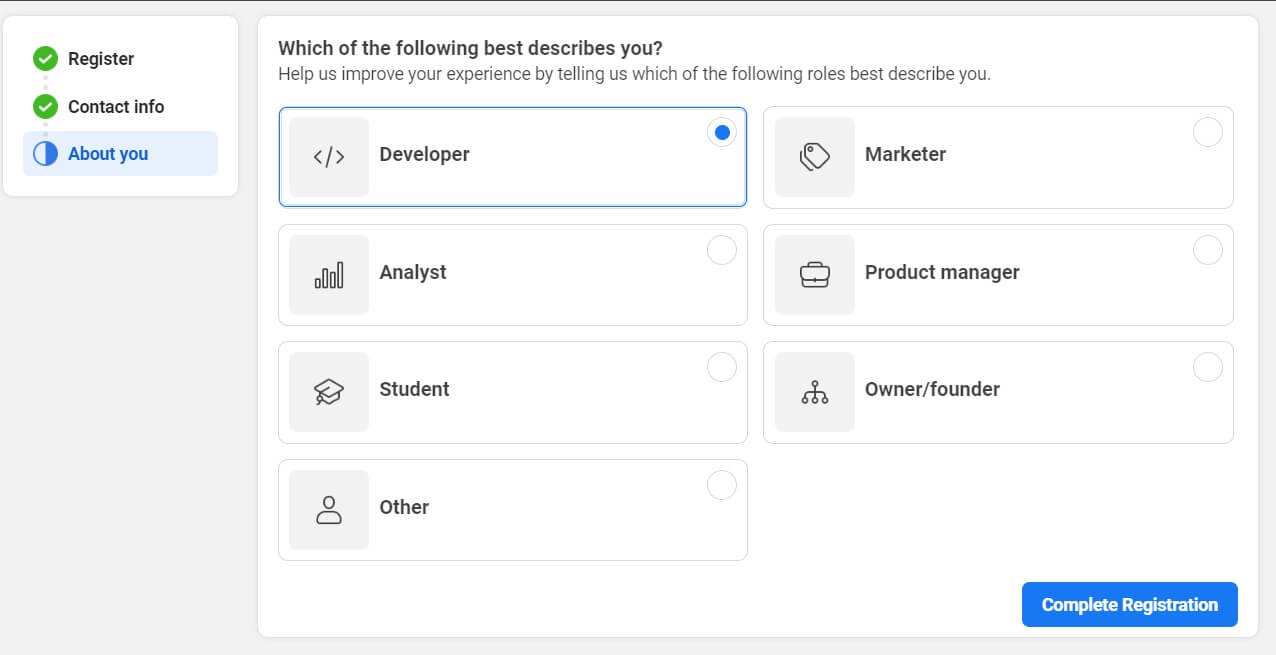
- Click Complete Registration.
Creating a Meta app
Now you need to create a Meta app you will use to connect to WhatsApp. The app creation flow gathers the minimum amount of information needed to generate a unique ID for your app. Once you complete the flow you will end up in the App Dashboard where you can provide additional information about your app, or start building and testing right away.
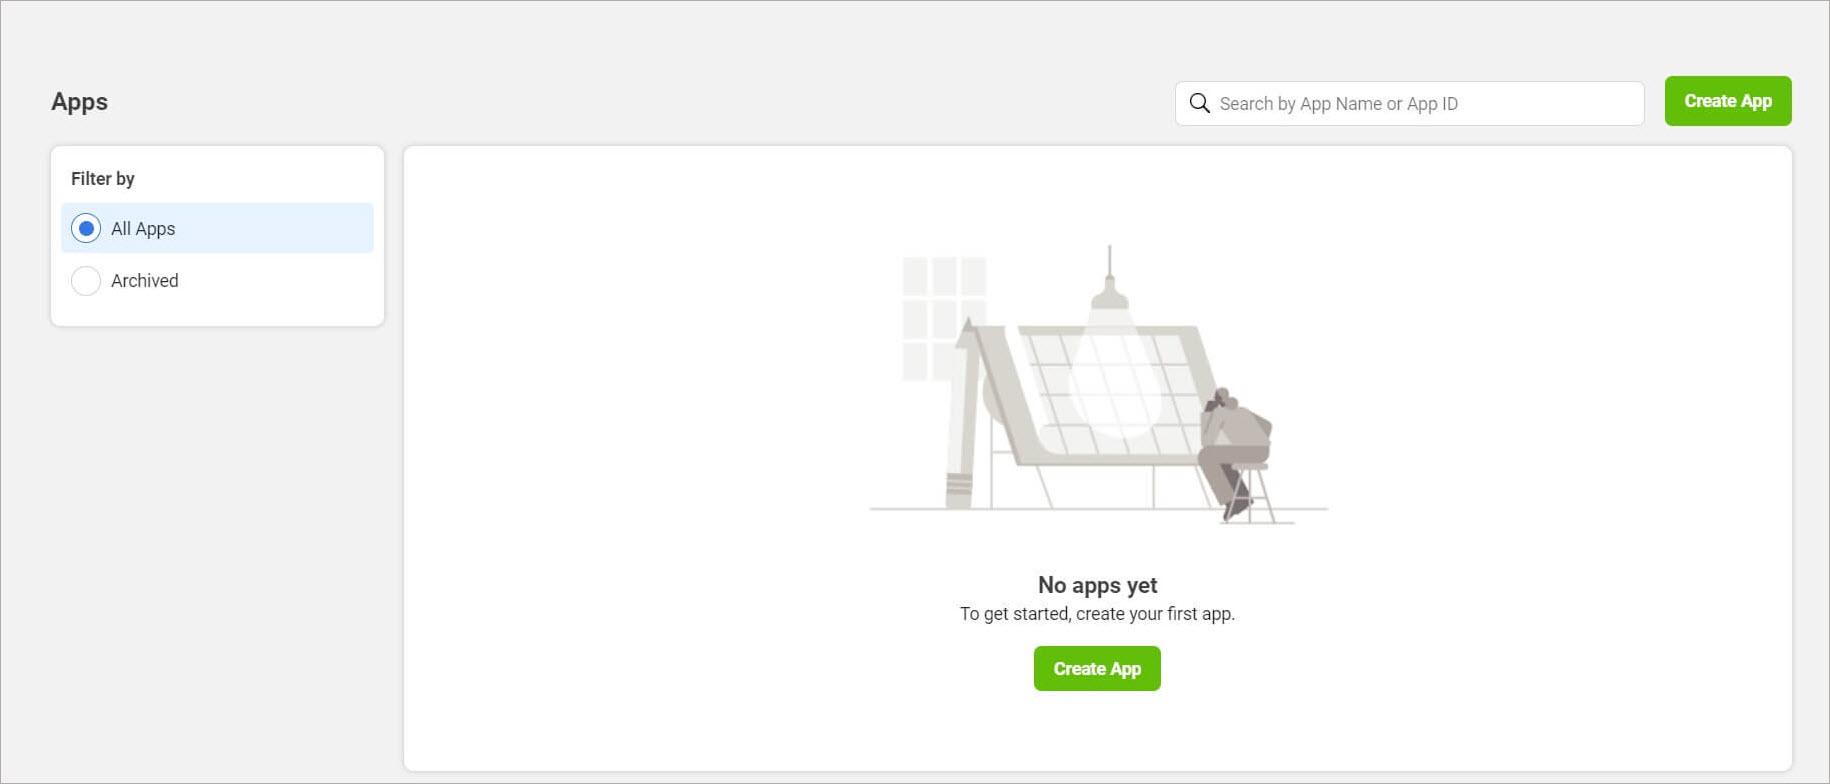
- In the previous workshop, you have registered your Facebook Developer account. Now in your newly created account, click Create App.
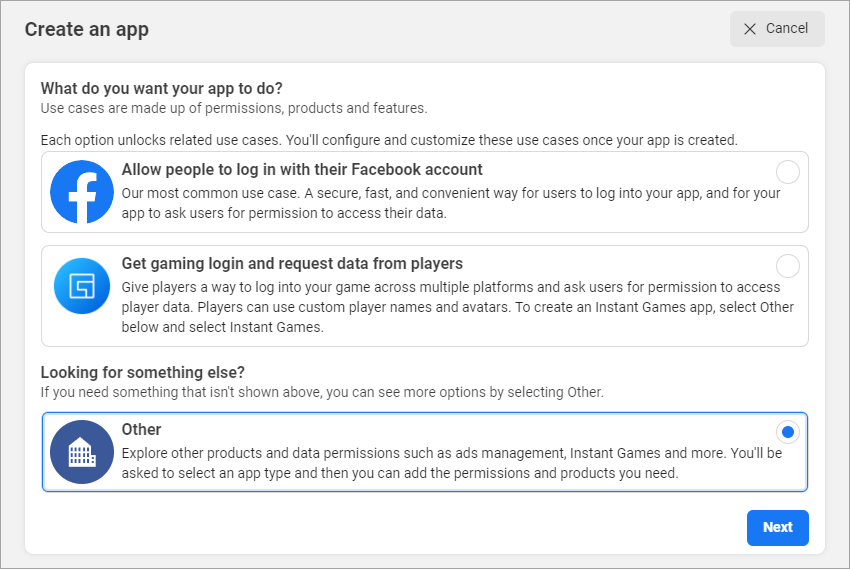
- On the Create an app page, select Other and click Next.
- Select Business from the available app types. Your app type determines which products and APIs are available to your app.
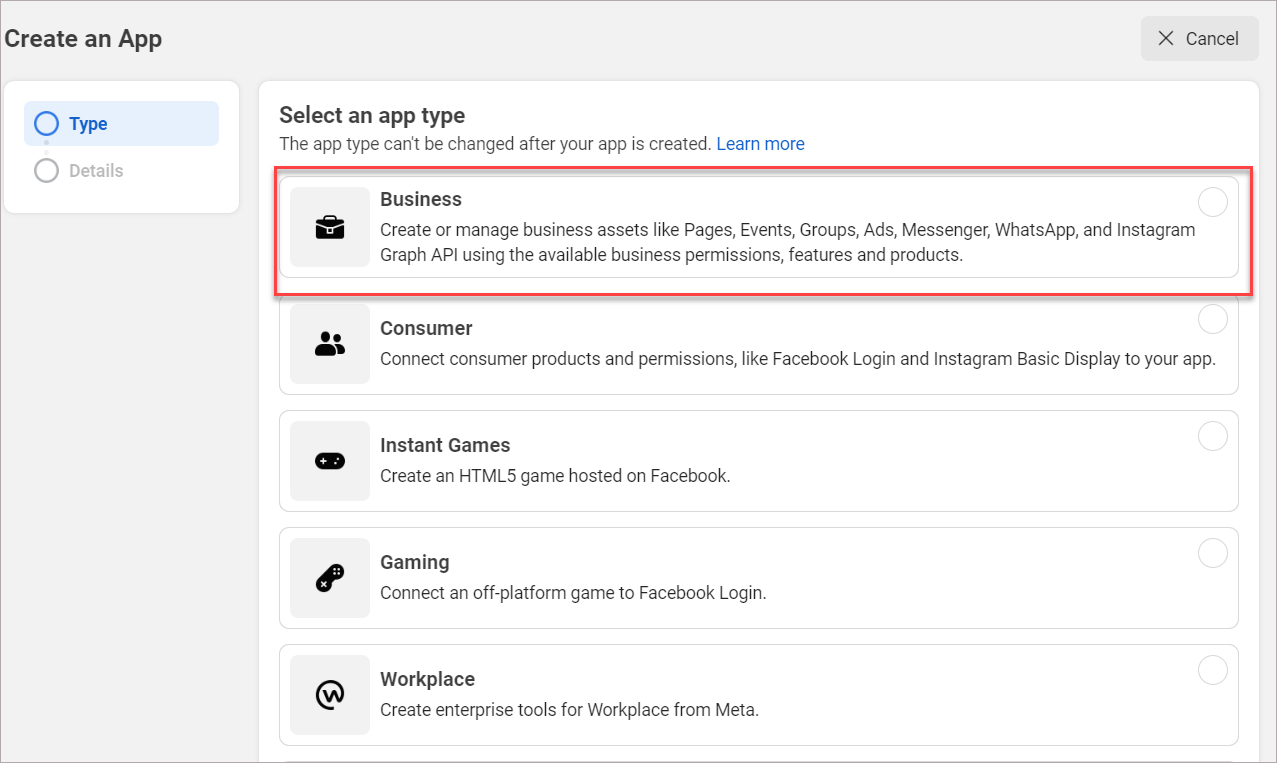
- Click Next.
- Enter the name of your app and an email address where Meta can send you any important developer notifications. The email address can be different from the email address associated with your Facebook account, just make sure it is valid and that you monitor it, since all important developer notifications will be sent there.
- In the Business Account field, select your Facebook Business Manager account to link your app to or skip this step to configure the account later.
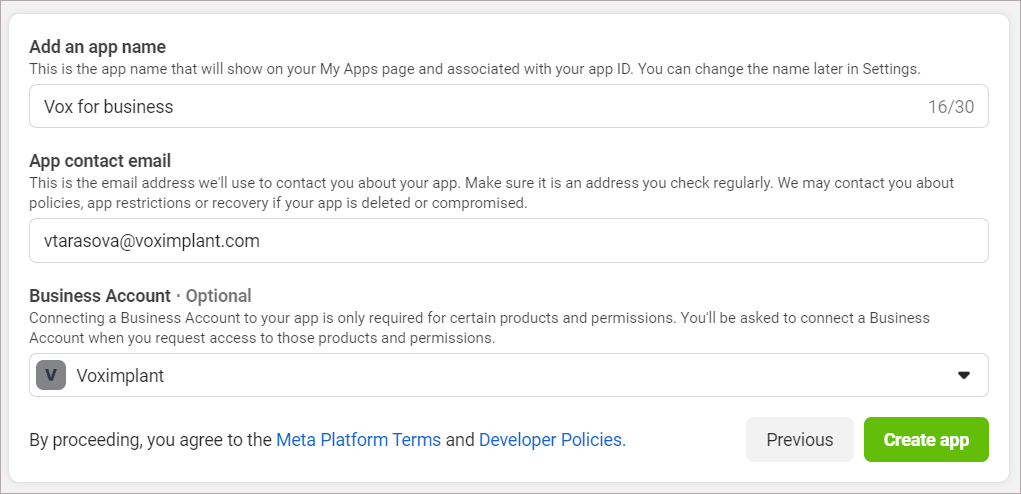
- Click Create app. You may be requested to re-enter your Facebook password on this step.
Once you have completed the app creation flow your app displays in the App Dashboard. Now you need to connect your new app to WhatsApp.
- Make sure you are on the page of your newly created app.
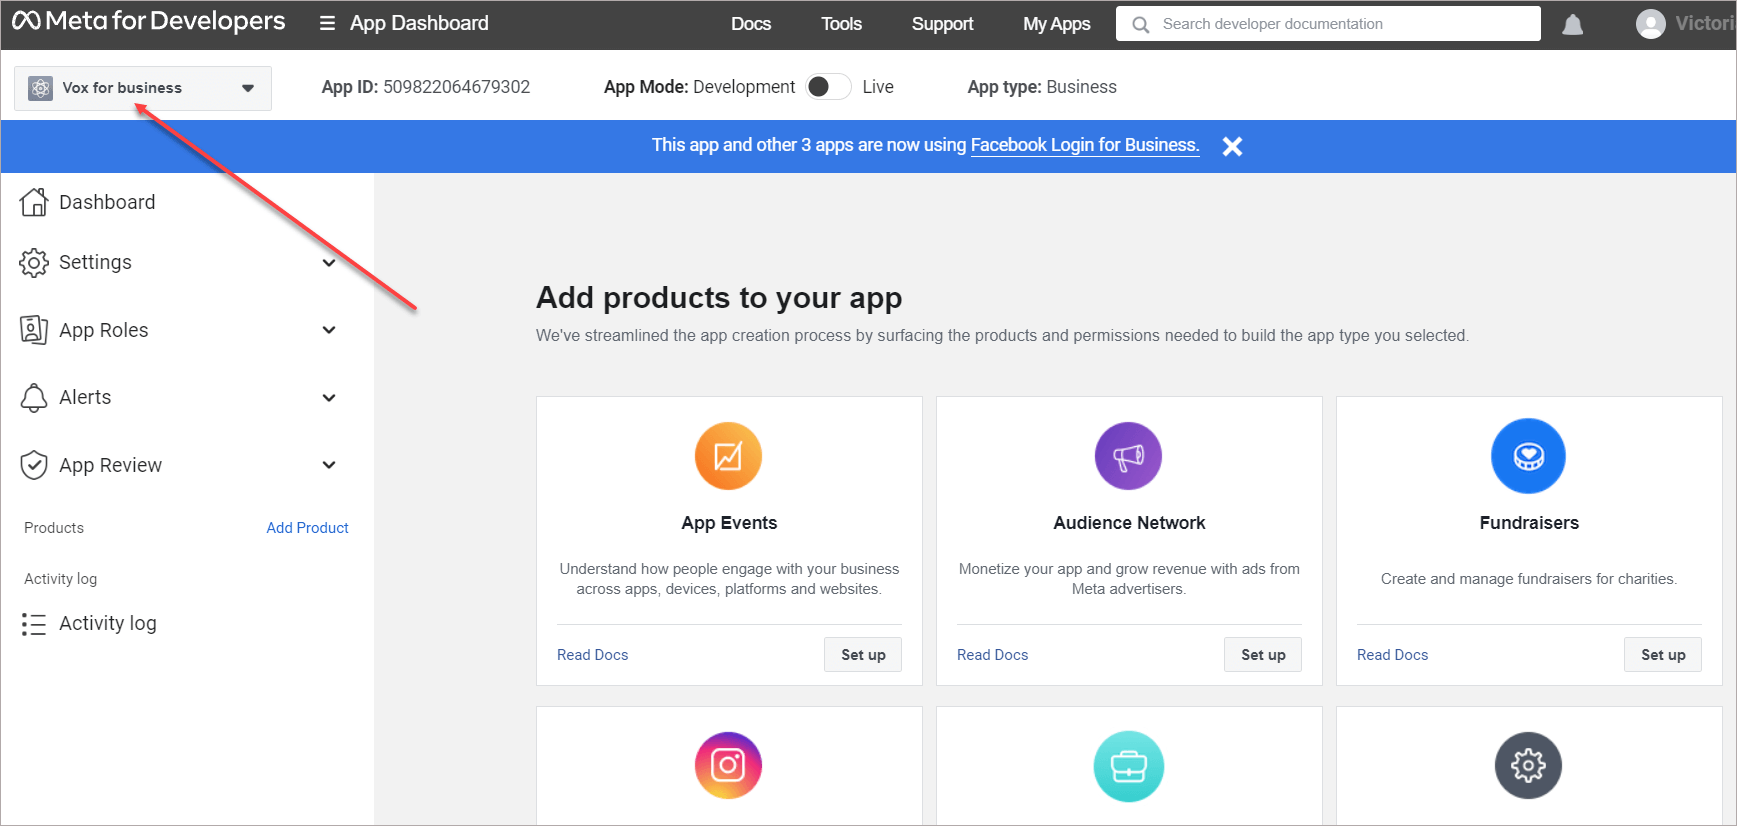
- Scroll down to locate the WhatsApp product and click Set up.
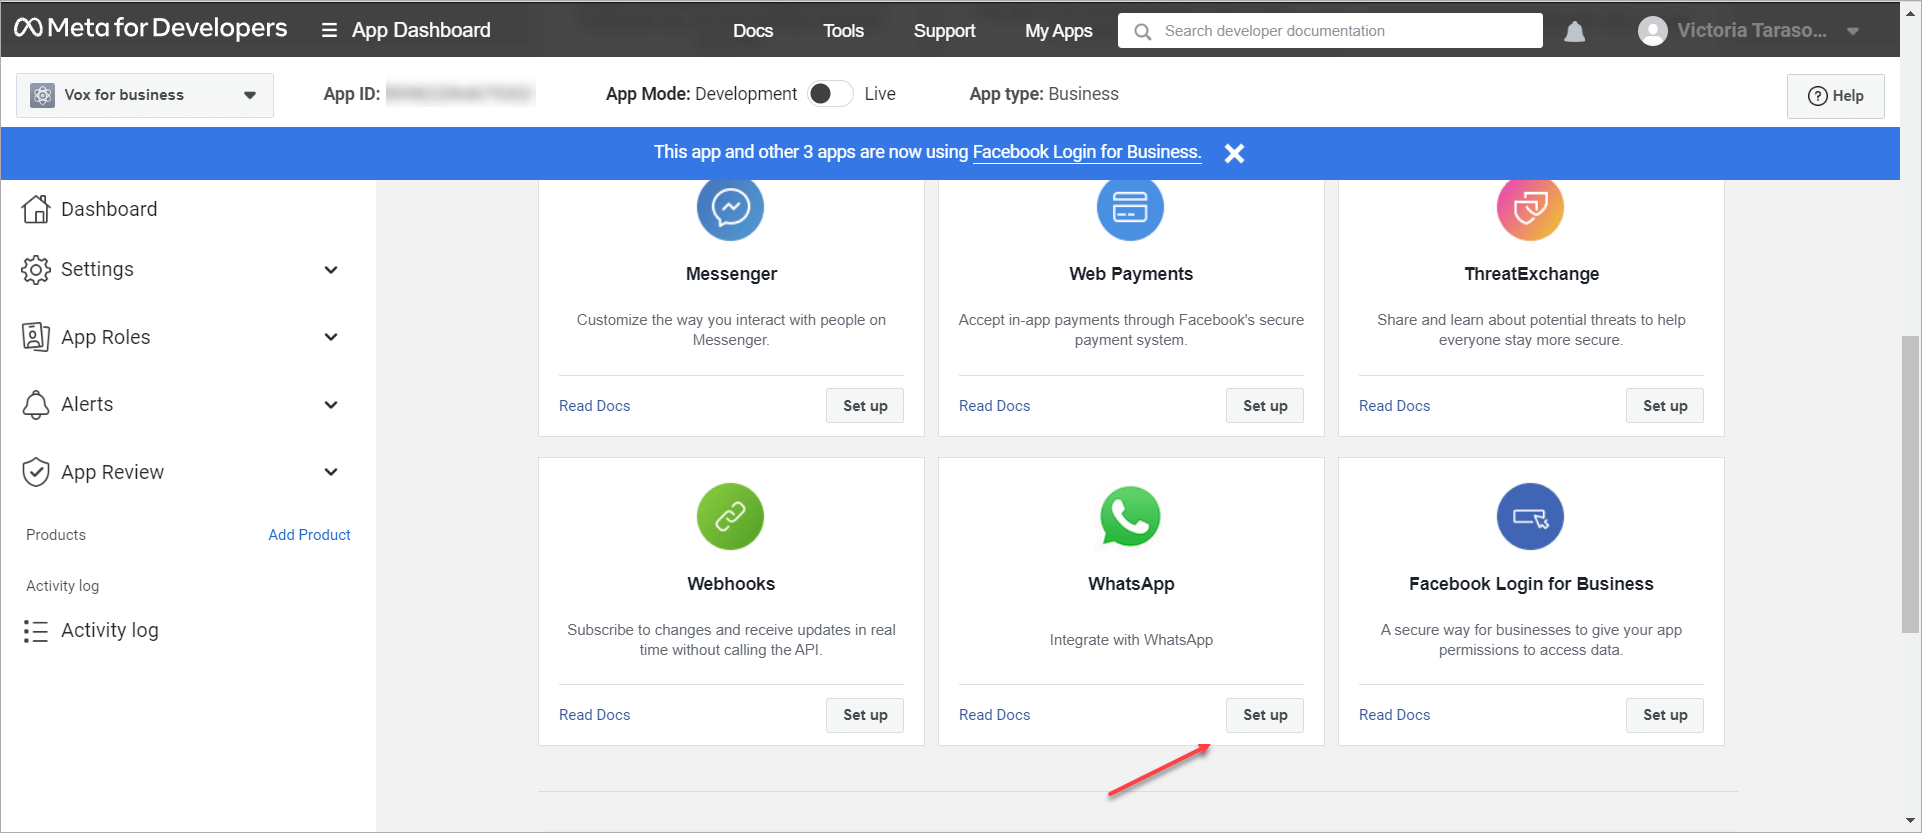
- Next, if you have not linked a Facebook Business Manager account to your app in step 5 of this workshop, you will see the option to select your existing Business Manager or, if you would like, the onboarding process can create one automatically for you (you can customize your business later, if needed).
- Select your newly created account (if you have not done that yet) and click Continue.
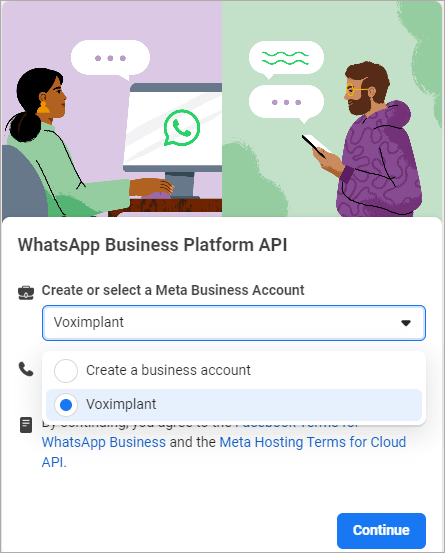
- Next click API Setup under WhatsApp in the sidebar.
- Here you can obtain a temporary access token. Copy the token as you will need it to create a channel in Voximplant Kit. This will need to be updated to a permanent access token later on, but for now let us continue with a temporary one.
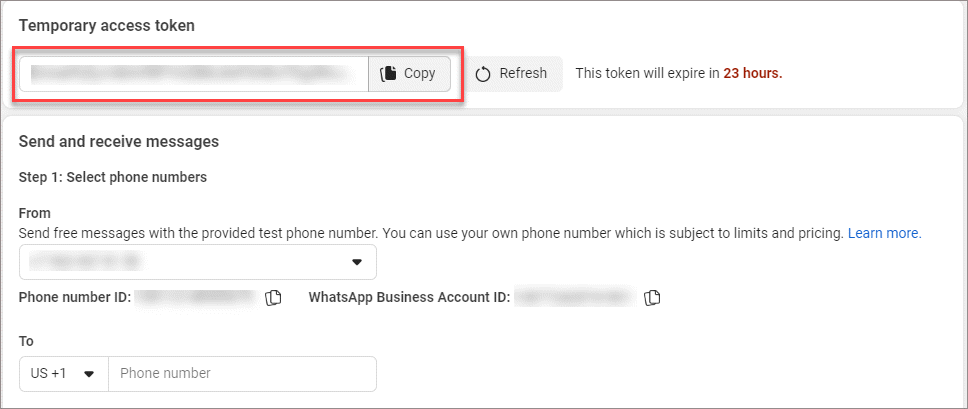
A temporary token is only valid for 24 hours so be sure to refresh it as required through development.
Adding a phone number
If your phone number is currently registered with WhatsApp Messenger or the WhatsApp Business App, you need to first delete it. If you want to use a phone number that is already on WhatsApp, see the instructions here.
- Go to the WhatsApp > API Setup section.
- On the right pane select Add phone number under Step 5: Add a phone number.
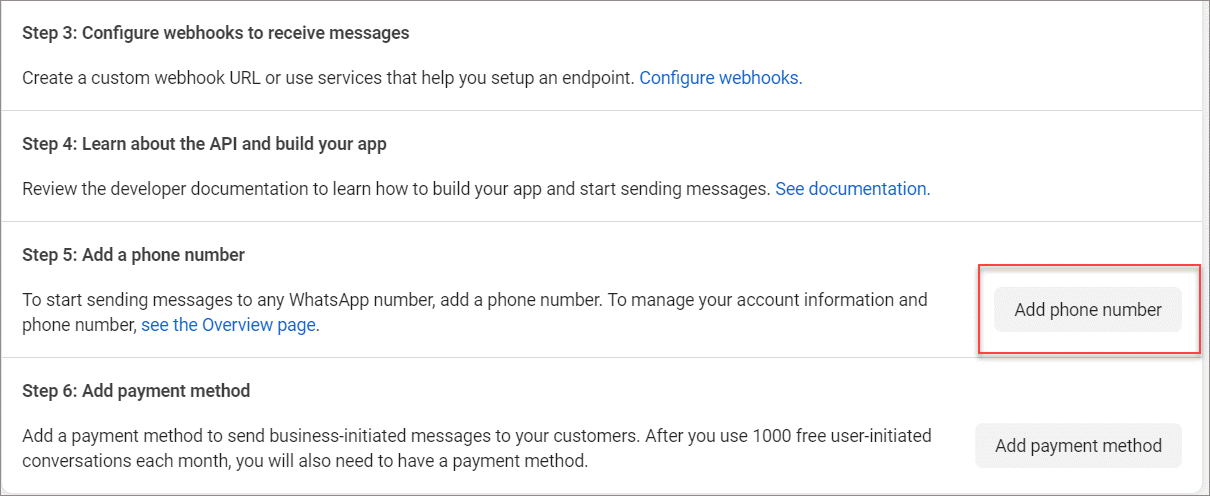
- Use the display name guidelines to enter a display name for your phone number. This is the name that will show for your business phone number once approved.
Display names should be related to your business and must not violate WhatsApp Commerce and Business policies. In addition, the display name must comply with Facebook display name guidelines to use the WhatsApp Business Platform or to qualify for the WhatsApp official Business Account.
- Select your Timezone. This will be used for WhatsApp billing and analytics.
- Select a Category for your business and enter a Business description.
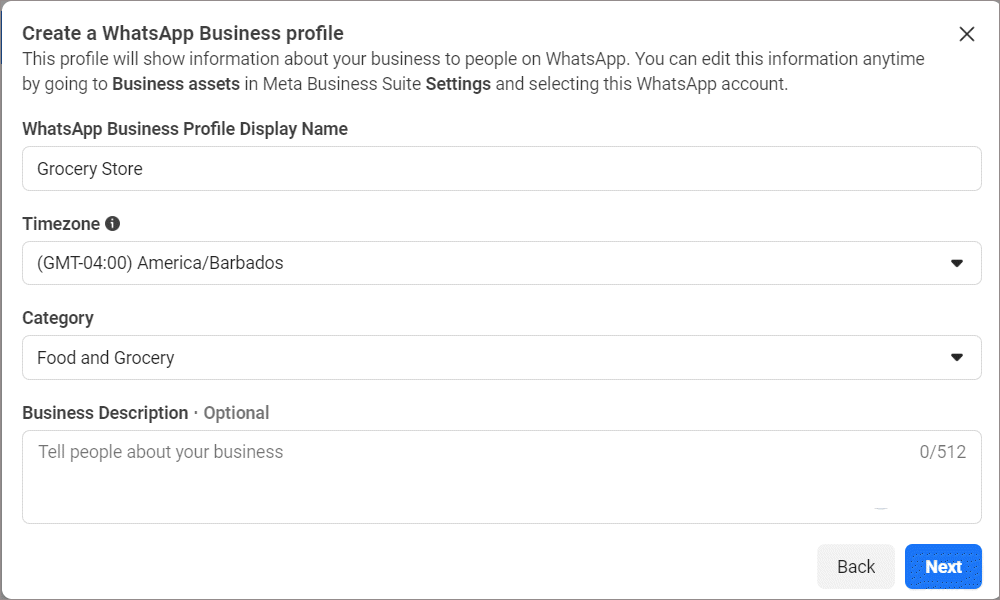
- Select Next to begin the phone number verification process.
- Select your country code from the drop-down list and enter the phone number you would like to register.
- Select how you would like to receive your verification code, either by Text message or Phone call and click Next to continue. You will need access to the phone number before selecting Next to receive the verification code.
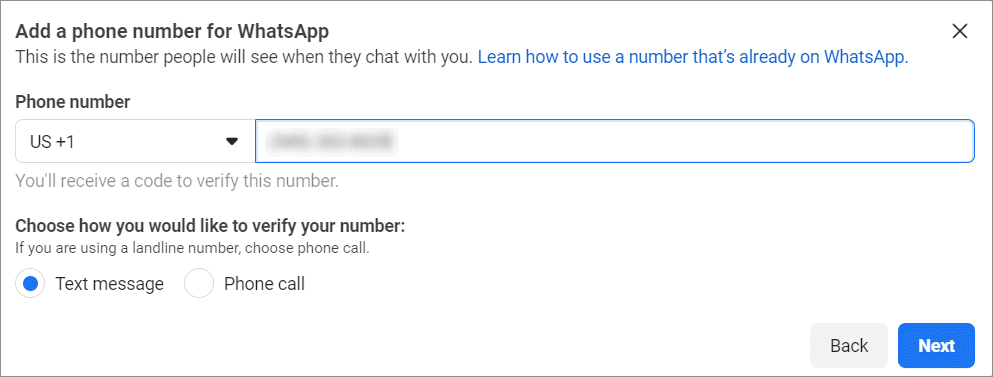
- Enter the verification code once received and click Next to continue.
- The phone number will display in the From drop-down menu of the Send and receive messages section.
- Copy the Phone number ID and use it for the channel configuration in Voximplant Kit.

Creating a WhatsApp Cloud API channel in Voximplant Kit
- Log in to your Voximplant Kit account.
- Go to Setup > Conversations > Channels.
- Select WhatsApp Cloud API.
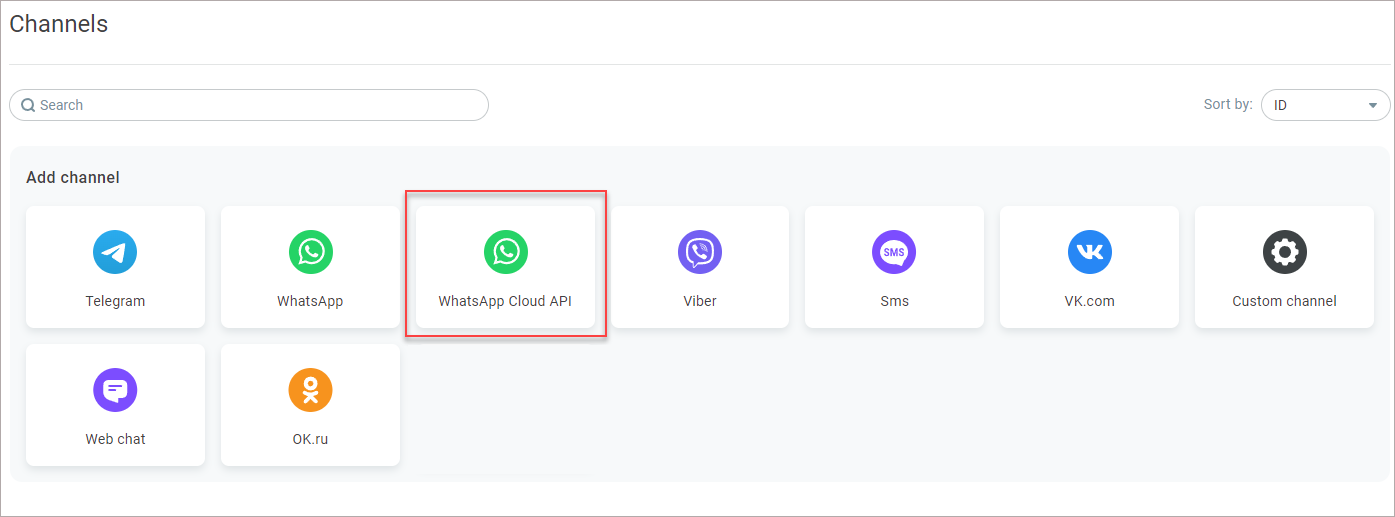
- Enter the Channel name.
- In the Channel access token field, enter the access token you copied on Facebook. WhatsApp Cloud API requires a token to be passed as a parameter in each API call from Voximplant Kit.
- In the Phone number ID field, enter the ID of the phone number you copied on Facebook.
- In the Verify token field, generate a string to use as a Verify token in the WhatsApp Cloud API webhook settings on Facebook in the next workshop.
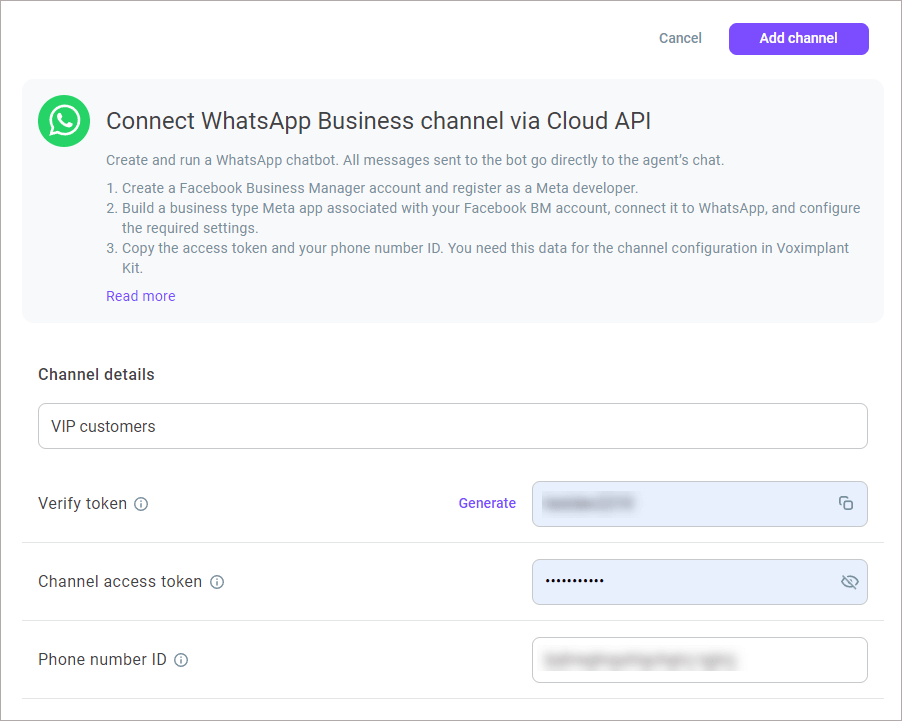
- In the Redirect channel messages field, select a queue or function to route customers’ messages.
- In the Close channel conversations group box, define the following settings:
Max. closing time for agent and unassigned conversations - Specifies the maximum time a conversation waits before closing. The timer applies to agent and unassigned conversations since the last activity or message. When the timer elapses, the conversation automatically closes. The setting value must be greater than the value defined in the Max. waiting time in the queue settings. The value applies to queues and functions. The maximum value is 14 days and the minimum is 60 sec.
Max. closing time for bot conversations - Specifies the time given to a customer to reply to the latest message of a bot. When the timer elapses, a conversation closes. The value applies to functions and Dialogflow bots. The maximum value is 7 days and the minimum is 60 sec.
- In the Conversation processing group box, define how the channel agents should classify customer conversations.
Enable the Use tags switch to allow the channel agents to use tags for conversations' classification. All tags added in the settings are available for the channel agents in their Workspace.
Enable the Use topic set switch to allow the channel agents to use a topic set for conversations' classification. Select a topic set from the drop-down list.
A channel can only have one topic set assigned. The assigned topic set is then available for the channel agents in their Workspace. When you select another set, it automatically replaces the previous one.
- Add skills if needed.
- Click the Add channel button.
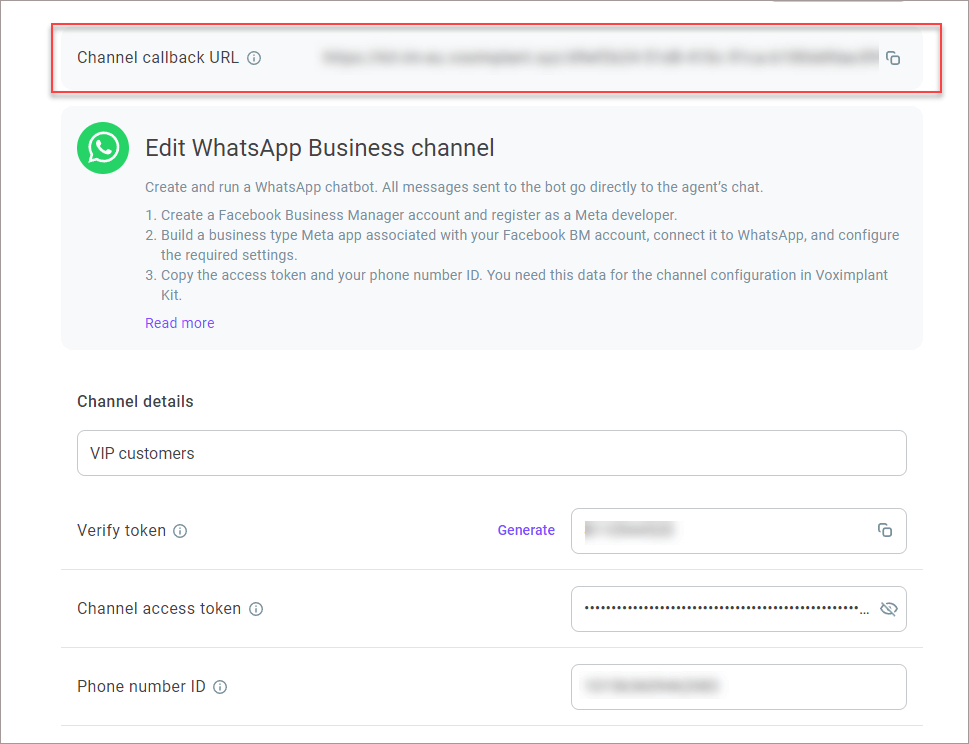
- Once you add the channel, you will see the Channel callback URL on top of the page. Copy the URL, you will need it for the WhatsApp Cloud API webhook configuration in the next workshop.
Configuring webhooks and receiving a test message
With the verify token and callback URL you obtained in the previous workshop, you can now configure the app endpoint on Facebook.
- Go back to Meta for Developers and select your app.
- In the left menu, expand the WhatsApp section and select API Setup.
- In Step 3, click Configure webhooks.
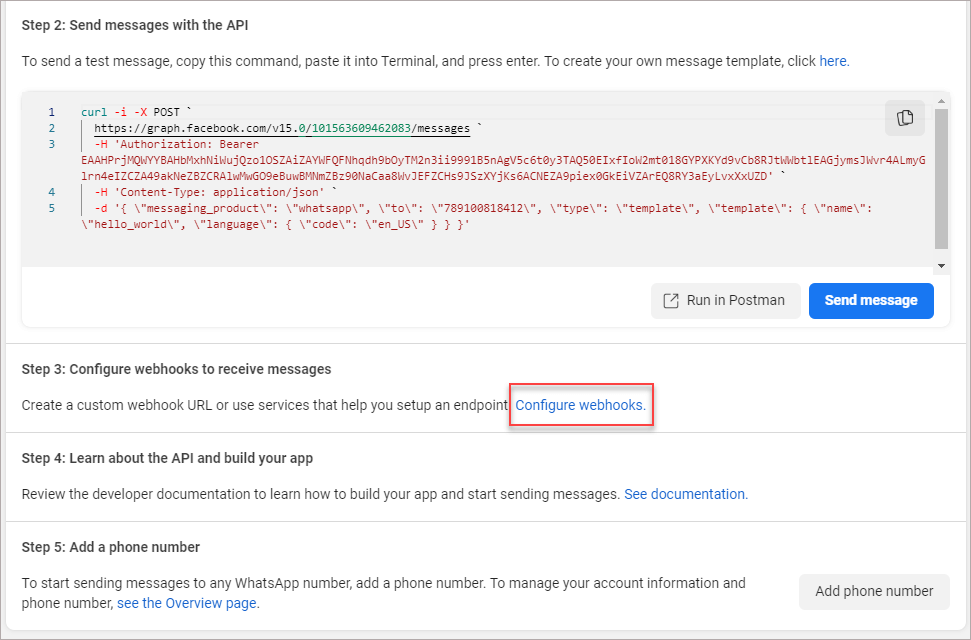
- In the window that opens, click Edit.
- In the Callback URL field, enter the Voximplant Kit channel URL you copied in the previous workshop. Meta will send the events to this address.
- In the Verify token field, enter the string you generated during the Voximplant Kit channel configuration.
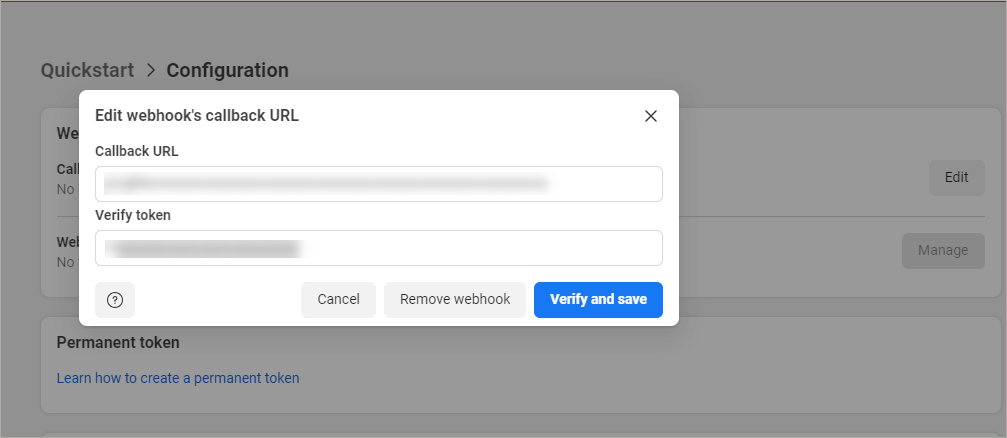
- Click Verify and save.
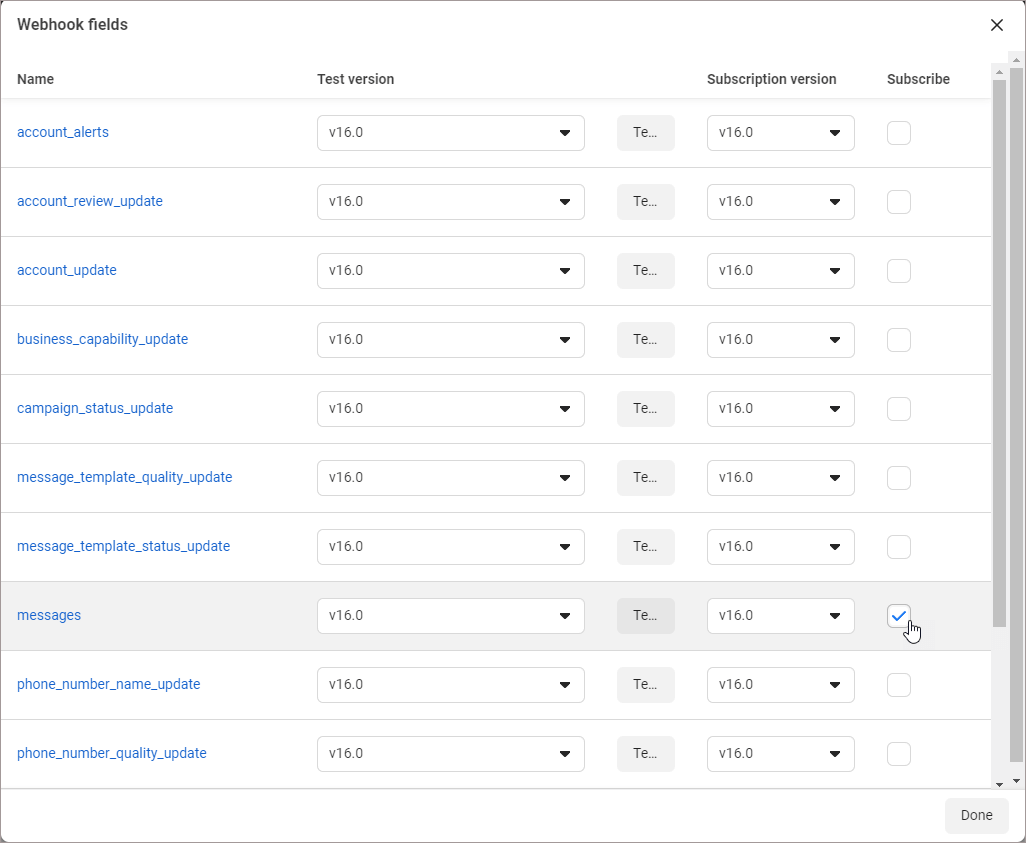
- In the Webhook fields section, click Manage. A dialog box opens with all the objects you can get notified about. To receive messages from your users, select the Subscribe checkbox for messages.
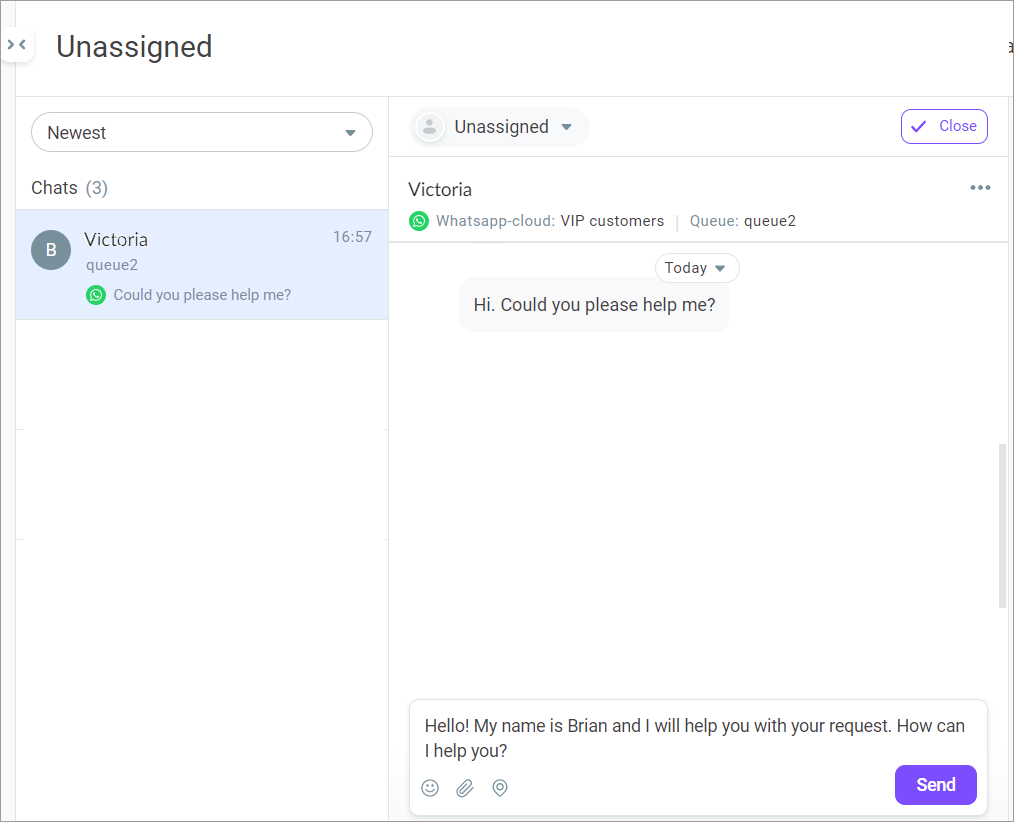
Now that you have created a channel in Voximplant Kit and set up your app webhooks on Facebook, send a message to the phone number you added earlier. You should immediately get a notification in Voximplant Kit with the content of your message.
Additional steps required for production integrations
In Development mode, your app can only request data from users with an app role. To request end user data, your app must have Advanced Access level permissions and be set to the Live mode. Before you can make your app live you will need to do the following:
request Advanced Access permissions
generate a permanent access token
put your application live
Obtaining required permissions
Permissions are a form of granular, user-granted Graph API authorization. Before your app can use an endpoint to access an app user's data, the app user must grant your app all permissions required by that endpoint.
Getting permissions from app users involves the following steps:
Request Advanced Access level for the following permissions: business_management and whatsapp_business_management.
Submit your app for review so Facebook can confirm that the app uses the data in intended ways and safeguards user privacy. Watch this video tutorial to learn how to submit an app for review.
After you receive your app review results, any app user will be able to grant your app any permissions for which you have been approved.
To pass app review, it is important that you ask for only the permissions your app needs to function. Asking for unnecessary permissions is a common reason for rejection during app review.
Obtaining a permanent access token for Voximplant Kit
The access token you are currently using from the Meta dashboard expires in 24 hours. You will need a token that never expires if your channel is to work continuously.
Meta provides information on how to get a permanent token here.
- Go to your Facebook Business Manager account.
- In the hamburger menu, select Business settings.
- Expand the Users section and select System users.
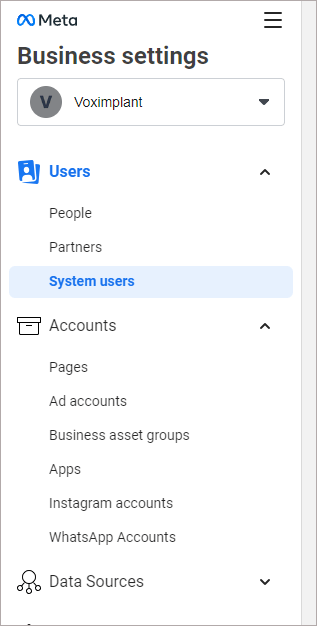
- Click Add.
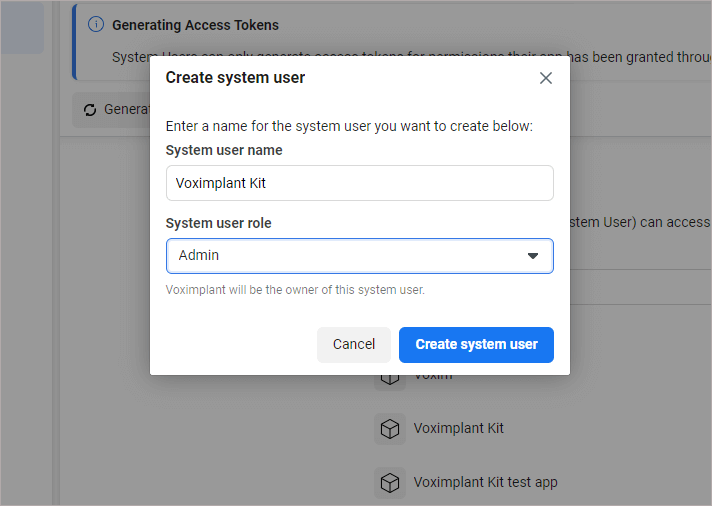
- Give a name to the system user and define the role.
- Click Create system user.
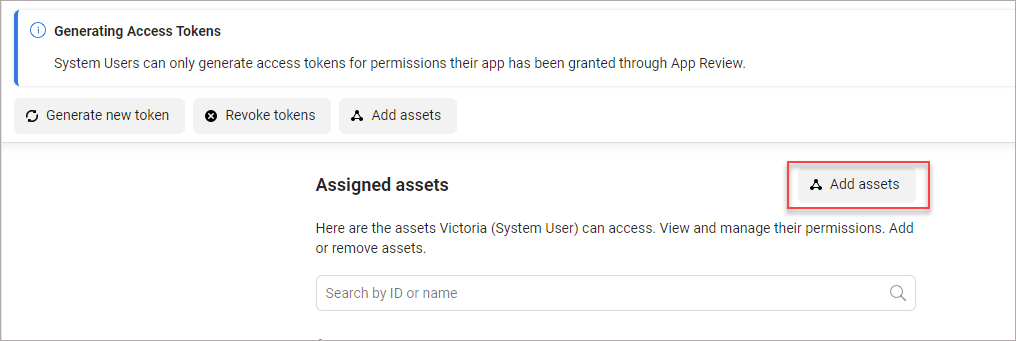
- Click Add Assets to add your app to the System User.
- In the window that opens, in the right panel, select Apps.
- Click your app name and define the system user permissions.
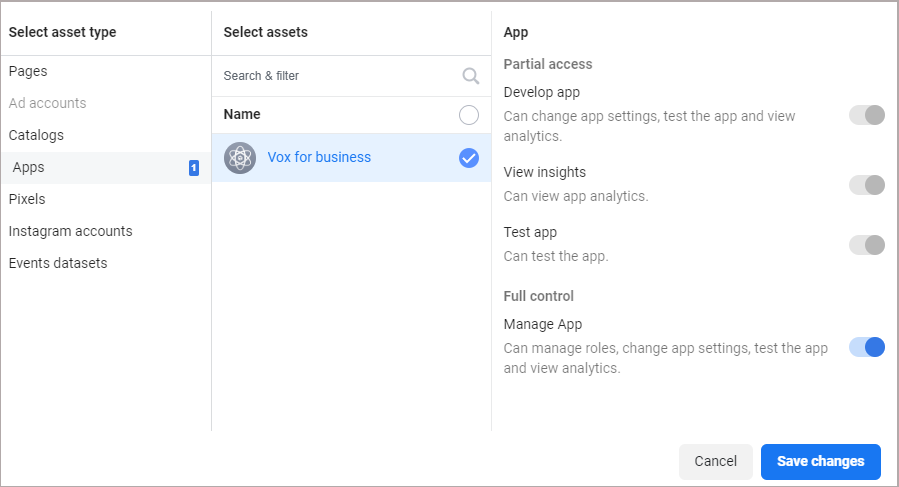
- Click Save Changes.
- To the Assets Added confirmation message, click Done.
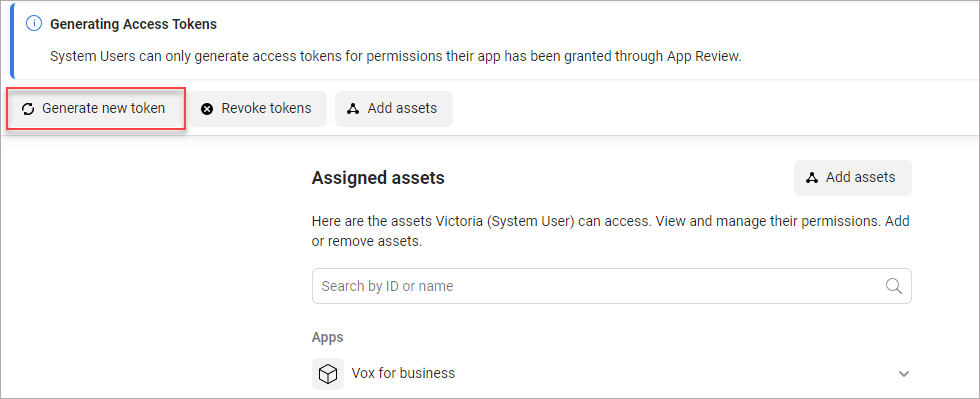
- Click Generate new token.
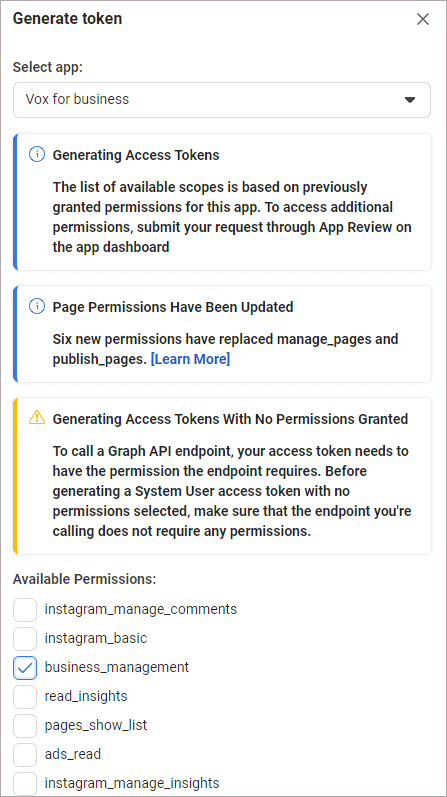
- Select your app and your permissions (whatsapp_business_management and business_management), then click Generate Token.
System users can only generate access tokens for the permissions their app has been granted during the app review.
- Copy the token.
- Go to the channel settings in Voximplant Kit and replace the old temporary access token with the new permanent one.
Putting the application live
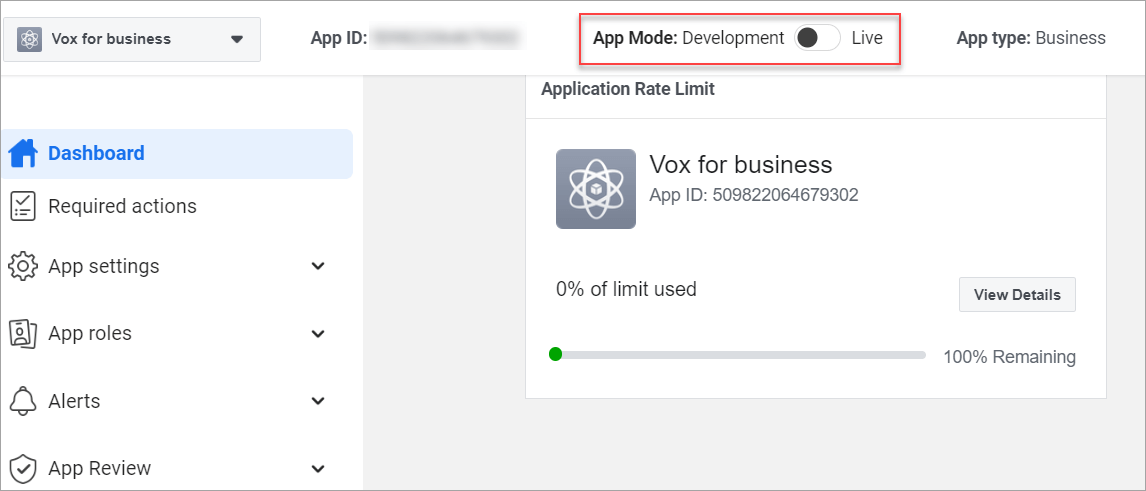
After you complete the app development and successfully pass the app review process, toggle the App Mode switch to Live.
