Creating DNC lists
A Do Not Call (DNC) list is a list that filters out customers who do not want to receive unsolicited calls. This feature helps ensure that the customers you contact in your campaigns are more likely to be receptive.
You can create global DNC lists or create separate DNC lists and bind them to campaigns.
To create a DNC list, do the following:
- Log in to your Voximplant Kit account.
- Select Setup > DNC lists.
- Click Create DNC list.
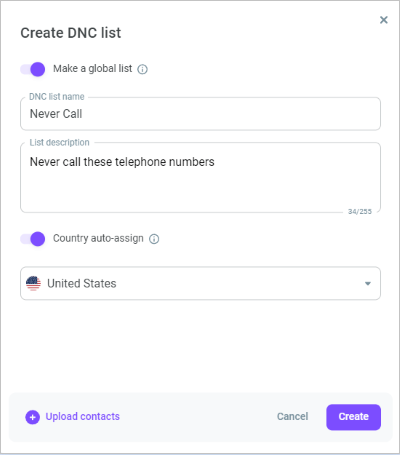
- Enter the DNC list name and description.
- Toggle the Make a global list switch if you want the list to apply to all outbound calls in Voximplant Kit. Otherwise, it will only apply to the campaigns it is attached to.
If the contact center functionaliy is disabled, the switch is display-only and defaults to always enabled. The DNC list is global by default and applies to all outbound calls.
- Enable the Country auto-assign switch if you want the system to automatically assign the national code of the selected country to incomplete telephone numbers. Then select the country.

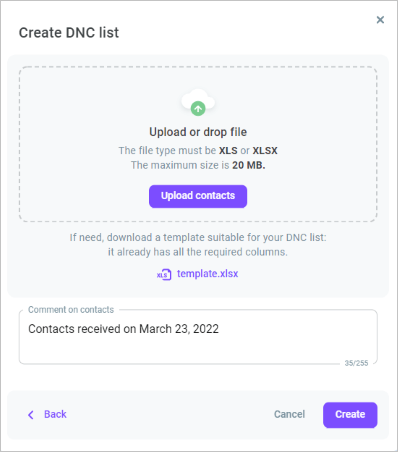
- Click Upload contacts to add contacts to the DNC list.
- Upload or drag and drop your file in .xls or .xlsx format. The file size should not exceed 20MB.
There is a template file with all the required columns that you can use to structure your contact list.
- Enter comments, if needed. Your comments then display in front of each contact.

You can choose not to upload contacts at this stage and do it later. You can also upload a blank contact list and fill it in as your agents work within the PDS campaign.
- Click Create.
- To edit the DNC list, click the Action menu icon and select Edit.
- If you need to add more contacts to the DNC list you just created, select it and click Upload contacts. Then repeat steps 8-9 and click Upload.
- You can download the DNC list in .xls or .csv format, if required.
