Web chat
Connect a web chat to the selected conversation. It allows you to route customer messages directly to an agent.
Contents
Connecting a web chat channel
- Log in to your Voximplant Kit account.
- Click Setup > Conversations > Channels and select Web chat.
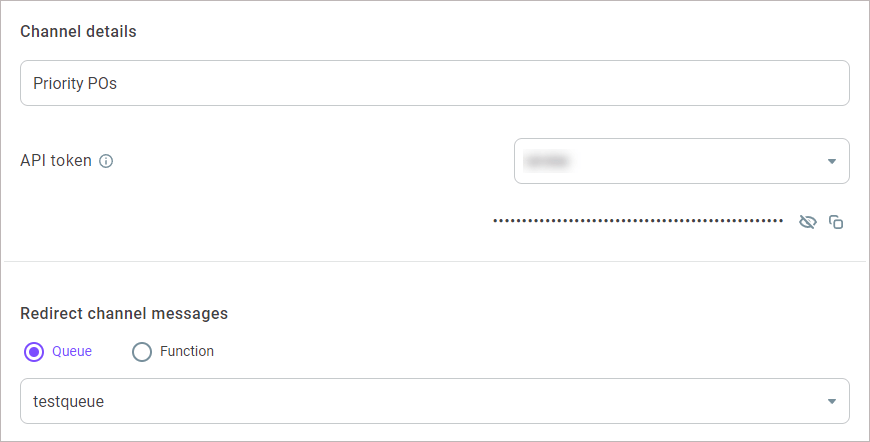
- On the General tab, enter the channel name.
- Select an API token from the drop-down list.
- In the Redirect channel messages field, select a queue or function to route customer messages.

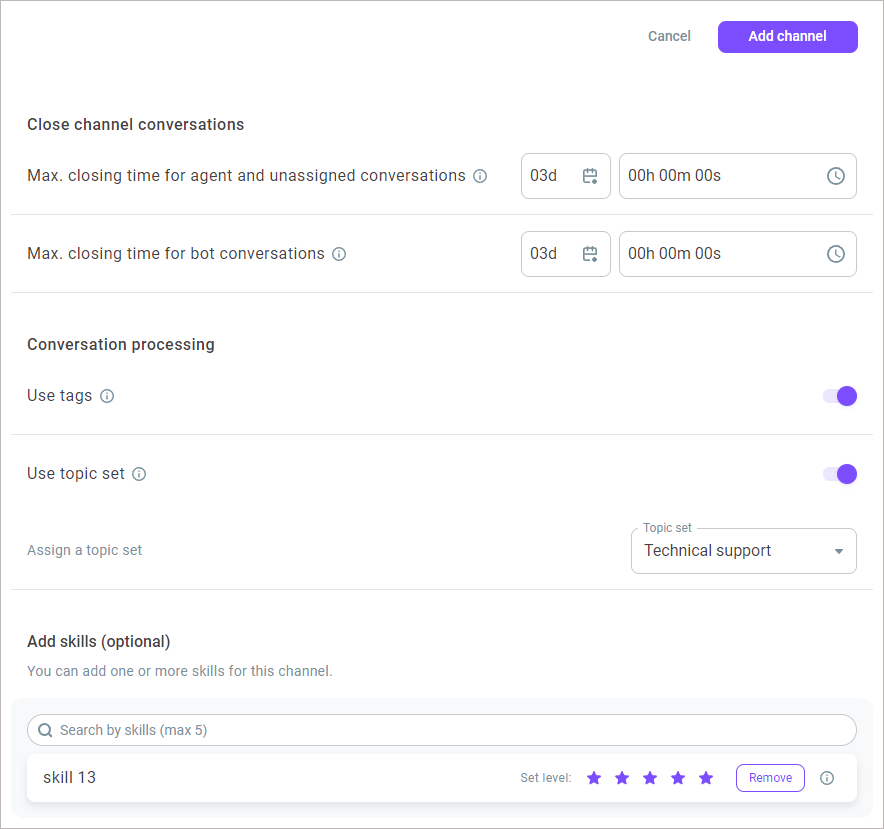
- In the Close channel conversations group box, define the following settings:
Max. closing time for agent and unassigned conversations - Specifies the maximum time a conversation waits before closing. The timer applies to agent and unassigned conversations since the last activity or message. When the timer elapses, the conversation automatically closes. The setting value must be greater than the value defined in the Max. waiting time in the queue settings. The value applies to queues and functions. The maximum value is 14 days and the minimum is 60 sec.
Max. closing time for bot conversations - Specifies the time given to a customer to reply to the latest message of a bot. When the timer elapses, a conversation closes. The value applies to functions and Dialogflow bots. The maximum value is 7 days and the minimum is 60 sec.
- In the Conversation processing group box, define how the channel agents should classify customer conversations.
Enable the Use tags switch to allow the channel agents to use tags for conversations' classification. All tags added in the settings are available for the channel agents in their Workspace.
Enable the Use topic set switch to allow the channel agents to use a topic set for conversations' classification. Select a topic set from the drop-down list.
A channel can only have one topic set assigned. The assigned topic set is then available for the channel agents in their Workspace. When you select another set, it automatically replaces the previous one.
- Add skills if needed.

Customizing your web chat
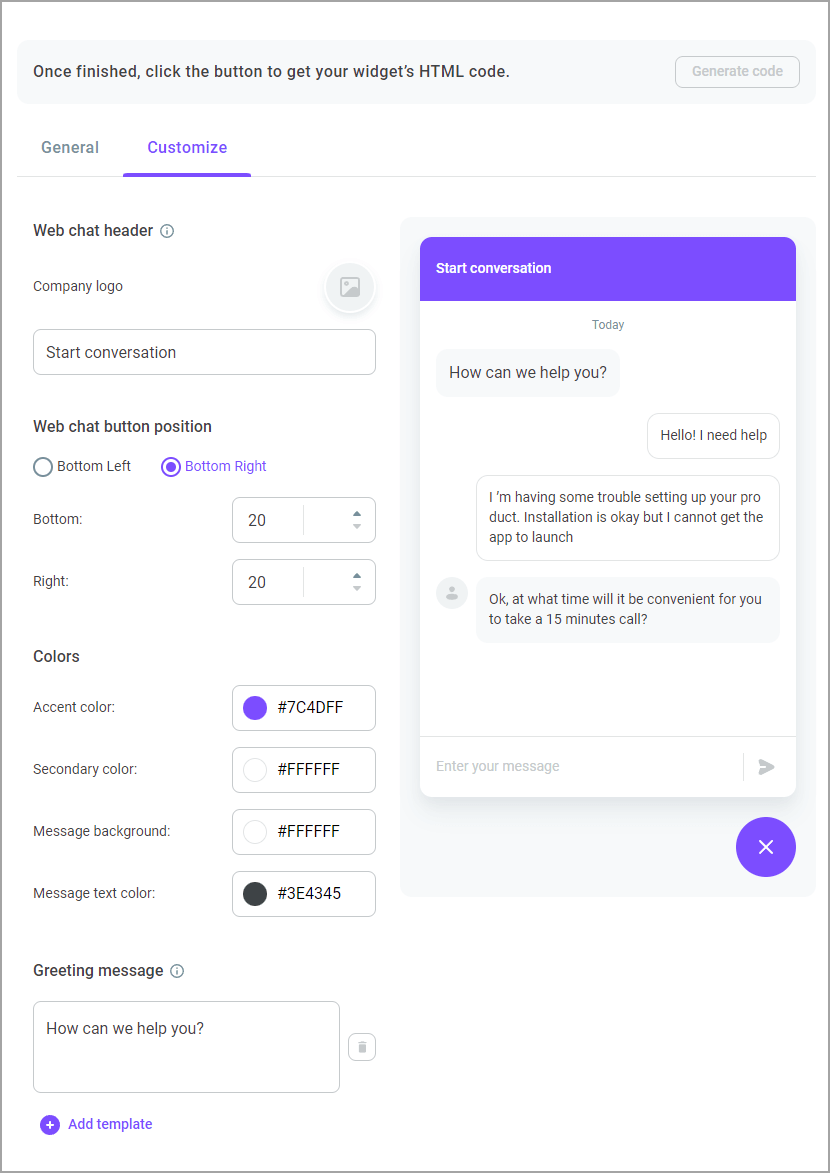
- Go to the Customize tab.
- Enter the text for the web chat header and upload your company logo.
- To upload a logo, click the image icon and select the file on your PC.
The following formats are supported: .JPEG, .JPG, .PNG.

- Configure the chat position, colors, and a greeting message.
- Click Add channel.
- Click Generate code to add the code directly to your site's HTML.
The generated code contains the client_data object that helps you configure data transfer to the widget settings at initialization and provide more information to your agents.
{
  "client_data": {
    "client_id": "xxx", // Customer ID
    "client_phone: "12345678", // Customer phone number
    "client_avatar: "https://storage", // Customer avatar link
    "client_display_name": "John Smith", // Customer name
    "client_email": "jsith@voximplant.com", // Customer email
    "client_language": "en" | "pt" | "es" // UI language
  }
}
This configuration allows you to make communication with your customers easier - the system fills in the form automatically based on the data in the client_data object.
client_id is a unique customer identification number. If you change it, the system creates a new chat not associated with the original one. If you edit any other properties, they will be updated in the current chat, no new chat is created.
- Click Copy to clipboard to copy the generated code and paste it where you want your button to display.
You can add buttons to a web chat to simplify navigation through the bot's scenario and allow your customers to select a specific topic or section. For example, a bot can prompt a customer to use the Yes or No buttons to select a quick answer to a question and route the request accordingly. In an online store, buttons can help customers select the desired section, for example, Clothing, Shoes, or Accessories.
The maximum number of buttons in a web chat is 13. Text is required for each button and must not be greater than 40 characters.
