Uploading push certificates
Push notifications are short messages from a mobile application that appear on the main screen of the user's smartphone. Mobile push notifications are delivered through push notification services, which act as intermediaries between message senders and app users.
To send push notifications to iOS and Android mobile devices, you need to connect to the push notification services of these platforms (Apple Push Notification service (APNs) for iOS and Google Firebase Cloud Messaging (FCM) for Android) and obtain certificates.
Contents
Obtaining a push certificate for iOS
To obtain a push certificate from Apple, ensure you have a Mac workstation and access to an Apple Developer account with permissions to access certificates and profiles.
- Open your project in XCode.
- Switch to the Project Navigator and click your project.
- Go to the Signing & Capabilities tab at the top panel. Check the Adding capabilities to your App Apple guide for more details.
- Enable Push Notifications and select Remote notifications in the Background Modes.
- Go to your Apple Developer account.
- Select the Certificates, Identifiers and Profiles section.
- Select Certificates, click the + sign and create a new certificate following the instructions.
- Click Download and save the certificate to your Mac.
- On your Mac workstation, locate the created certificate and double-click it to upload it to Keychain Access.
- Select My Certificates or Certificates.
- Right-click the certificate and select Export.
- Enter a name for the file, select the .p12 format, and click Save.
- Create a password to protect your exported .p12 file and click ОК.
- Enter your Keychain Access password to allow exporting the certificate and click Allow. Usually, it is the same password you use for your Mac workstation.
Upload the .p12 file to Voximplant Kit as shown below and use it in the mobile chat settings.
Obtaining a push certificate for Android
- Create a Google service account in the Google Cloud console.
- Log in to the Firebase console with the Google service account you have connected earlier.
- Go to Project Settings and select the Service accounts tab.
- Click Manage service accounts permissions.
- Open the Keys tab and select Add key > Create new key.
- Select the JSON key type.
- Click Create to download the JSON file to your PC.
Upload the JSON file to Voximplant Kit as shown below and use it in the mobile chat settings.
Uploading push certificates to Voximplant Kit
- Log in to your Voximplant Kit account.
- In the left sidebar, select Setup > Conversations > Push-certificates.
Only users with the Owner and Administrator roles can upload and work with push certificates.
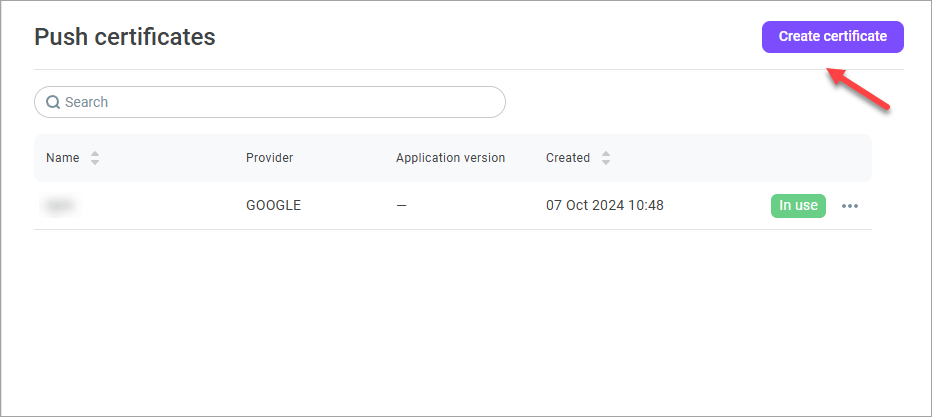
- Click the Create certificate button.
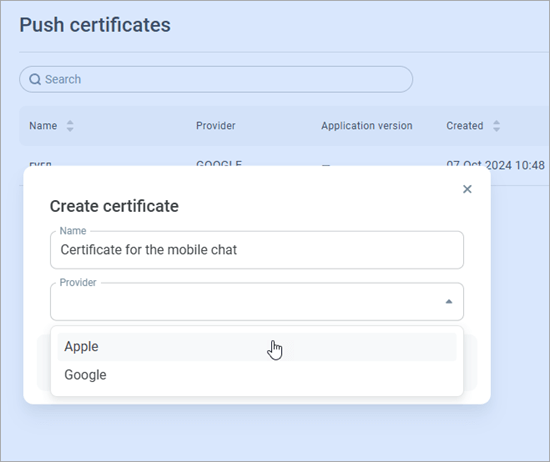
- Enter a Name for the certificate.
The maximum number of symbols is 250.
- Select the Provider from the drop-down list: Apple or Google.
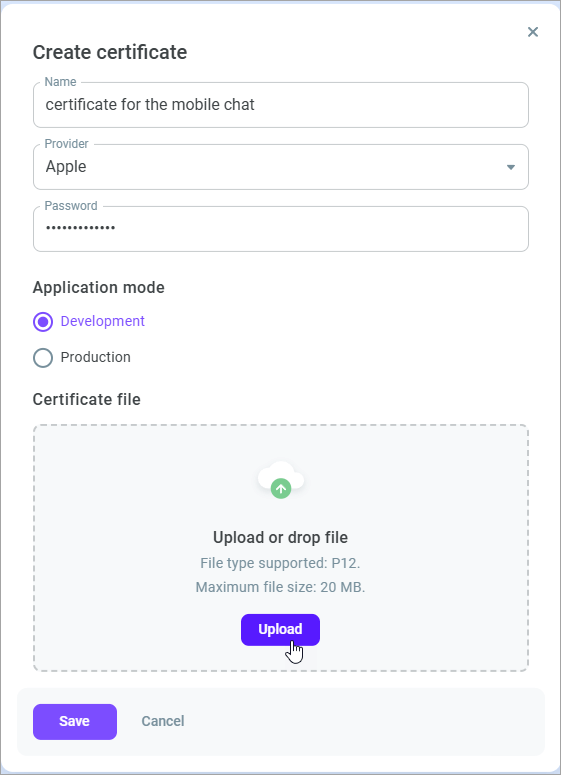
If you select Apple:
- Enter the Password you created to protect your .p12 file.
- Select the application mode: Development or Production.
- Upload the certificate in the .p12 format. The maximum file size is 20 MB.
If you select Google:
- Upload the JSON file of your Google service account.
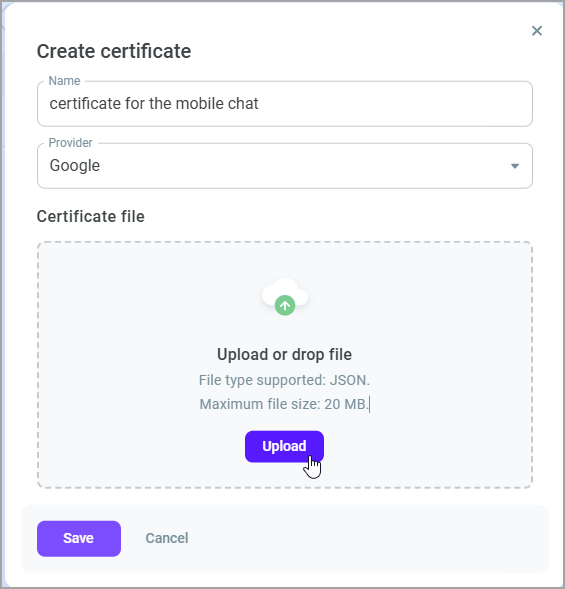
- Click Save.
Once you have uploaded and saved the certificate, you can use it in the mobile chat settings to enable push notifications.
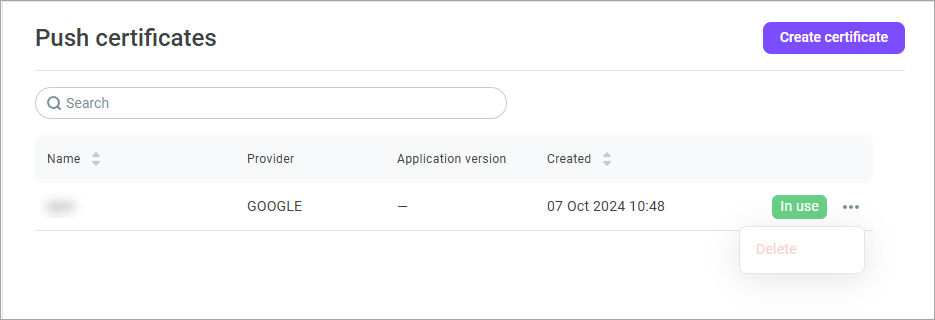
The uploaded certificates arer not available for editing. You can delete a certificate if it is not used in channels.
