Custom channel
Add custom bots to the selected chat. It allows you to receive messages from your customers directly to an agent’s chat from any service, including external resources. You can interact with APIs using webhooks.
- Log in to your Voximplant Kit account.
- Go to Setup > Conversations > Channels.
- Select Custom channel.
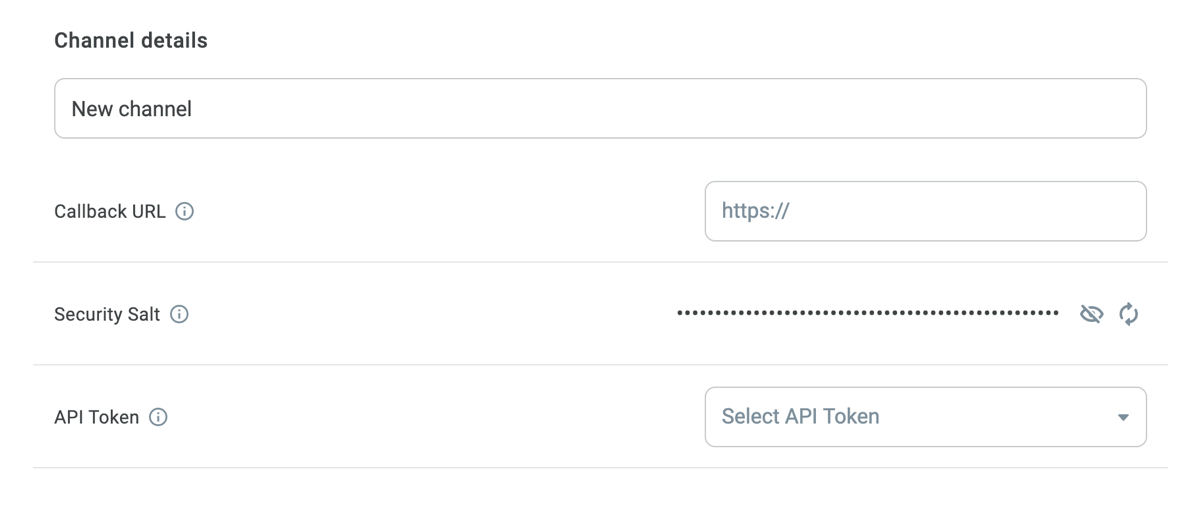
- Enter the channel name.
- Define the Callback URL.
- When you create a channel the system automatically generates Security salt. Security Salt is a piece of random data used to safeguard signatures and prevent data decoding. The signature on the Voximplant Kit side generates according to the algorithm:
The authorization header contains the signature: MD5($ {Salt}: $ {token}: $ {EventId}).
When creating a channel to the Callback URL, a test request contains the signature: MD5($ {Salt}: $ {token}).
- Select an API token from the drop-down list.

To generate an API token, go to the Administration > Security > API tokens section.
- In the Redirect channel messages field, select a queue or function to route customers’ messages.
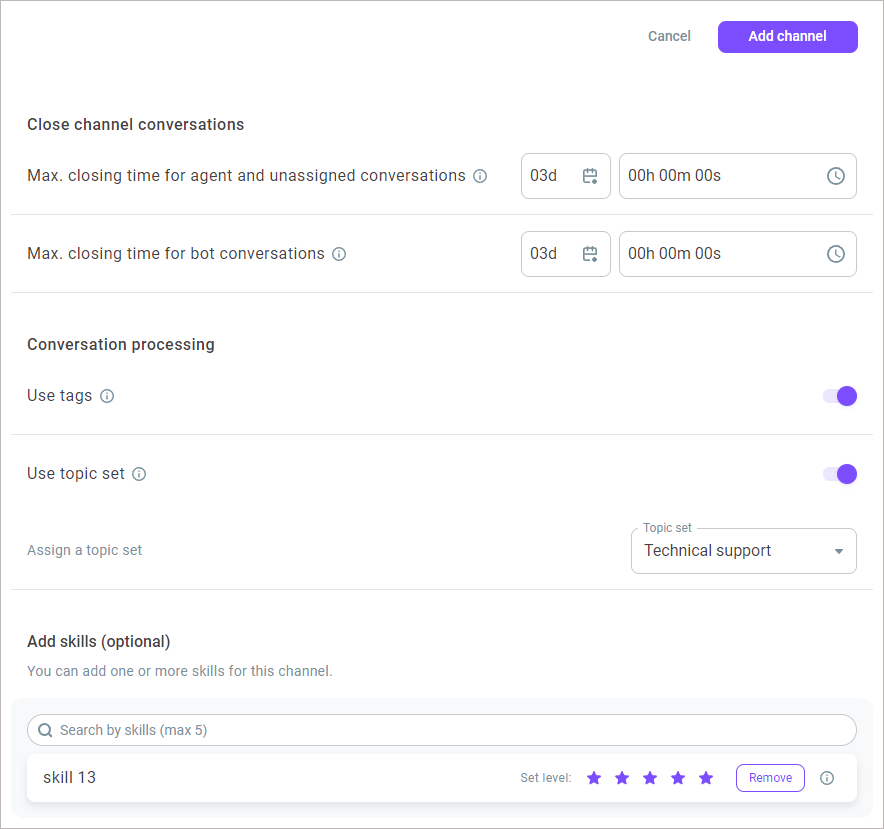
- In the Close channel conversations group box, define the following settings:
Max. closing time for agent and unassigned conversations - Specifies the maximum time a conversation waits before closing. The timer applies to agent and unassigned conversations since the last activity or message. When the timer elapses, the conversation automatically closes. The setting value must be greater than the value defined in the Max. waiting time in the queue settings. The value applies to queues and functions. The maximum value is 14 days and the minimum is 60 sec.
Max. closing time for bot conversations - Specifies the time given to a customer to reply to the latest message of a bot. When the timer elapses, a conversation closes. The value applies to functions and Dialogflow bots. The maximum value is 7 days and the minimum is 60 sec.
- In the Conversation processing group box, define how the channel agents should classify customer conversations.
Enable the Use tags switch to allow the channel agents to use tags for conversations' classification. All tags added in the settings are available for the channel agents in their Workspace.
Enable the Use topic set switch to allow the channel agents to use a topic set for conversations' classification. Select a topic set from the drop-down list.
A channel can only have one topic set assigned. The assigned topic set is then available for the channel agents in their Workspace. When you select another set, it automatically replaces the previous one.
- Add skills if needed.
- Click Add channel.

Sending and receiving messages
To send events to Voximplant Kit, you need to get a token. For that, use the login method: POST https://kit-im-{{ACCOUNT_REGION}}.voximplant.com/api/v3/botService/login?domain={{domain}}&access_token={{access_token}}. Note that the request body must be sent in form-data or x-www-form-urlencoded.
Add the channel_uuid {{channel_uuid}} to the request body. You can get it in the Channel UUID field in your channel settings. The link that will receive customer messages looks like this: https://kit-im-{{ACCOUNT_REGION}}.voximplant.com/{{CHANNEL_UUID}}.
With this request, you receive two new tokens: access_token and refresh_token.
access_token is valid for 15 minutes.
refresh_token is valid for 24 hours.
The following example shows the data structure that Voximplant Kit expects from an external source:
`{
    "client_data": {
        "client_id": "107804195", // REQUIRED! Client ID in the external channel
        "client_phone": "", // Customer phone number
        "client_avatar": "", // Customer avatar link
        "client_display_name": "James Smith" // Сustomer name
        "client_email": "", // Customer Email
        "client_language": "",
        "utm": {
            "source": "",
            "campaign": "",
            "content": "",
            "medium": "",
            "term": ""
        },
        "page": {
            "url": "",
            "title": ""
        },
        "location": {
            "latitude": 33.1212,
            "longitude": 33.1212,
            "country": "",
            "country_code": "",
            "region": "",
            "region_code": "",
            "city": "",
            "ip_address": ""
        },
        "device": {
            "type": "",
            "model": "",
            "user_agent": ""
        }
    },
    “event_id”: “123”,
    “event_type”: “send_message”
    “event_data”: {
        "message": {
            “message_id”: “123”,
            "text": "",
            "payload": [
                {
                    "type": "photo | audio | video | document",
                    "file_name": "",
                    "file_url": ""
                }
            ]
        }
    }
}`
Use the Authorization: Bearer {{access_token}} header in the request to send messages to the channel.
Use refresh_token to get a new access_token without specifying additional data: POST https://kit-im-{{ACCOUNT_REGION}}.voximplant.com/api/v3/botService/refreshToken. In the body, specify only the refresh_token:{{refresh_token}} that you received earlier. The request returns two new tokens: access_token and refresh_token.
Explore our API documentation and see the methods required to create/refresh tokens, example responses, and schemas of Voximplant Kit messages.
