Configuring users
In this article, you will learn how to add/edit users and arrange them into groups.
You have permissions to add/edit users according to your role. For more information on the CC roles, go here.
Contents
Adding users
- On the left sidebar, select Setup > Contact center > Users.
You can add users both on the Active and Invited tabs.
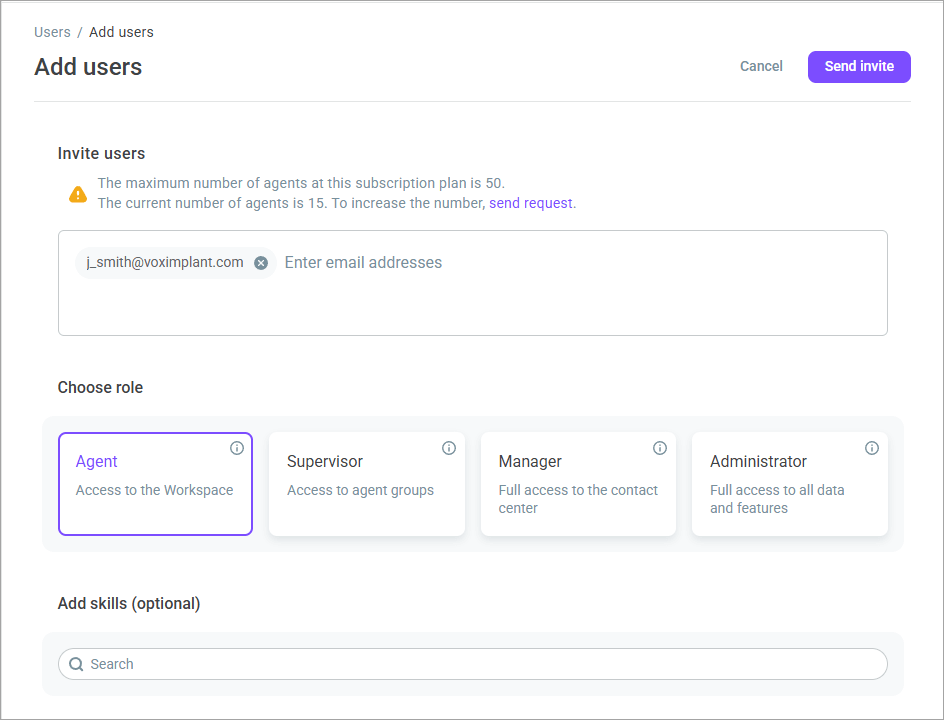
- To add a user, click Add users.
- Select Invite from the drop-down list.

- Enter the user email in the Email addresses field.
- Assign the user a role.
- Add skills if needed.
- Click Send invite.
The sent invitation is valid for 1 day.
You can import a user list from your PC.
- Click Add users and select Import from the drop-down list.

- In the Upload file with contacts window, click Upload.
- Select the required file and click Open. The file must be in .XLS or .XLSX format and consist of one column with a contact email in each row.
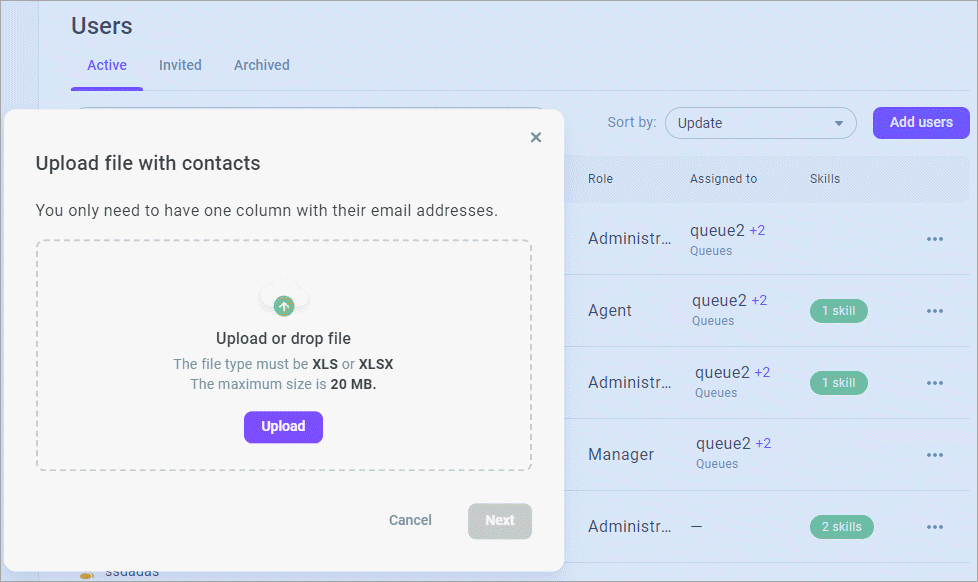
- Click Next. The system validates emails from the file and adds them to the list.
Creating groups
You can arrange users into a group and assign them a supervisor.
Group settings override general contact center settings.
Every user can be a member of only one group. If you want to assign a user to a new group, you first need to unassign them from the current one.
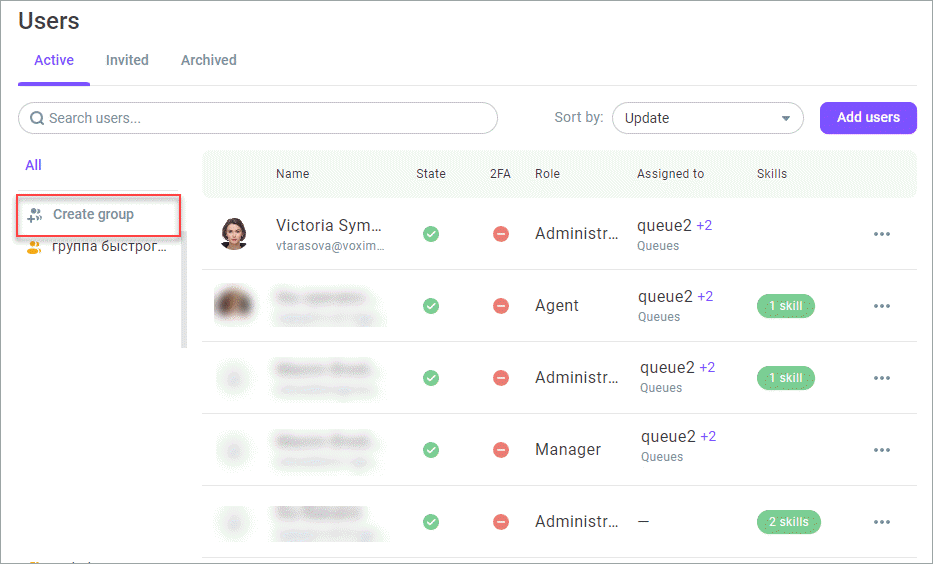
- On the Active tab, click Create group.
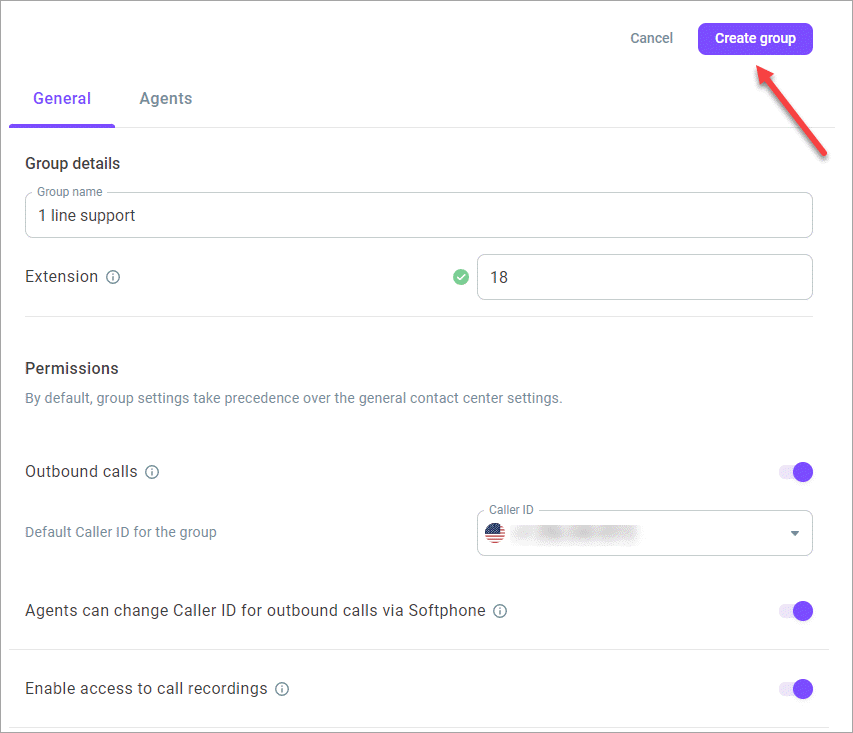
- Enter the Group name and define the Extension number.

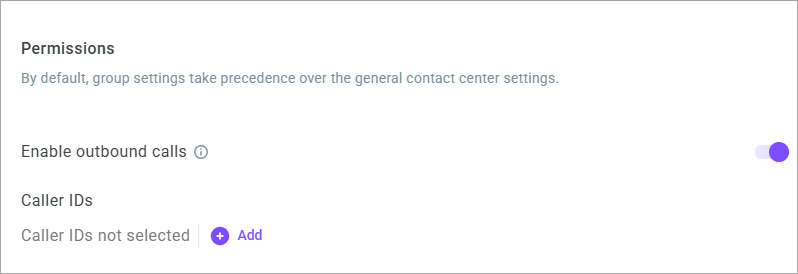
- Use the Enable outbound calls switch to allow group users to make outbound calls.
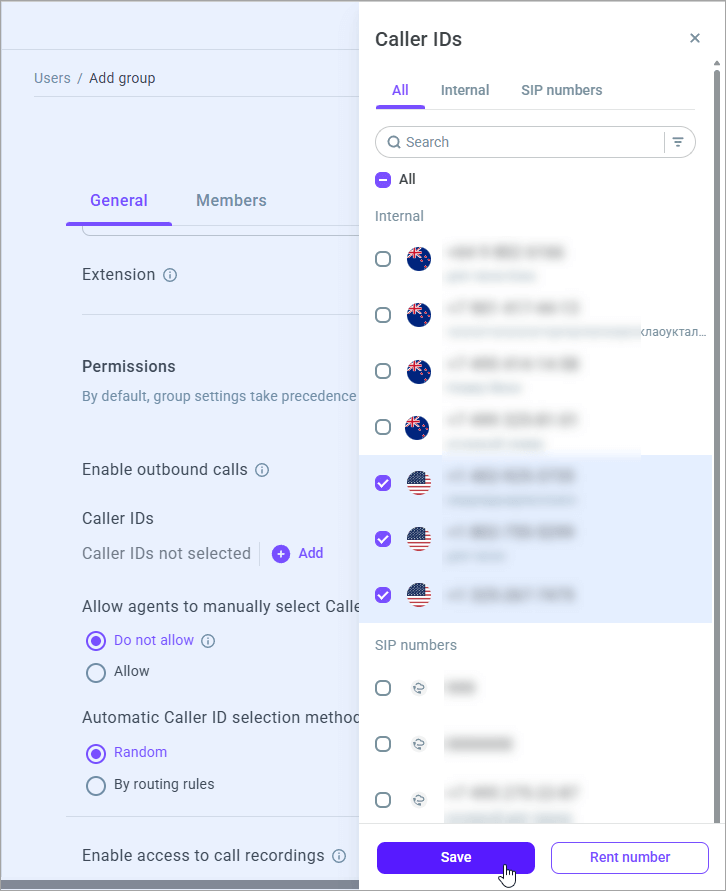
- Click Add in the Caller IDs field to add phone numbers for outbound calls.
- In the panel on the right, select the desired numbers. Please note that you can only choose either Internal numbers or SIP numbers.
- If there are no phone numbers on your account yet or you require an additional phone number, click the Rent number button.
- Click Save.
- Assign one of the selected phone numbers as the Default Caller ID for the group. The system uses this Caller ID if:
Agents cannot edit the Caller ID in the softphone and you disable the Use automatic Caller ID selection switch.
You enable the Use automatic Caller ID selection setting, select the By routing rules option, but the dialed phone number does not match any of the rules in the selected set.

- Enable the Allow agents to manually select Caller IDs switch so that the group agents can manually select a Caller ID in the softphone.
With the setting disabled, the following logic applies:
The system uses the Default Caller ID if you disable the Use automatic Caller ID selection switch.
The system automatically selects a Caller ID (randomly or by routing rules) if you enable automatic Caller ID selection.

- Enable the Use automatic Caller ID selection switch so that the group agents can use automatic Caller ID selection for outbound calls from the softphone. Configure how auto-selection should work.
Random - The system automatically selects a random Caller ID.
By routing rules - The system automatically selects a Caller ID based on matches of the dialed phone number with masks from the routing rules in the selected set. Choose a routing rules set. If the system fails to find a match, it uses the Default Caller ID.

How automatic number selection works
If agents are not allowed to select a Caller ID, the system automatically selects it (randomly or by routing rules) without agent involvement.
If agents are allowed to select a Caller ID, they can configure how it should be selected: manually from a list of available phone numbers or automatically (randomly or by routing rules).
If you enable the switch in the general settings and disable it for the group - the group agents will not have access to their call recordings in the softphone, while all other contact center agents will do. If you disable the switch in the general settings and enable it for the group - the group agents will have access to their call recordings in the softphone, while all the rest of the agents will not.
- Toggle the Enable access to call history switch to give the group agents access to their call history.
- Toggle the Enable access to message history switch to give the group agents access to their message history.
If you enable the switches in the general settings and disable them for the group - the group agents will not have access to their call and message history. If you disable the switches in the general settings and enable them for the group - the group agents will have access to their call and message history.

Now set up dialing settings.
- Enable the Override the audio recording on dialing switch to select an audio recording the system will play to customers while they are dialing the group. Upload a file from your PC or select one from the library. Click Play to listen to the selected recording.
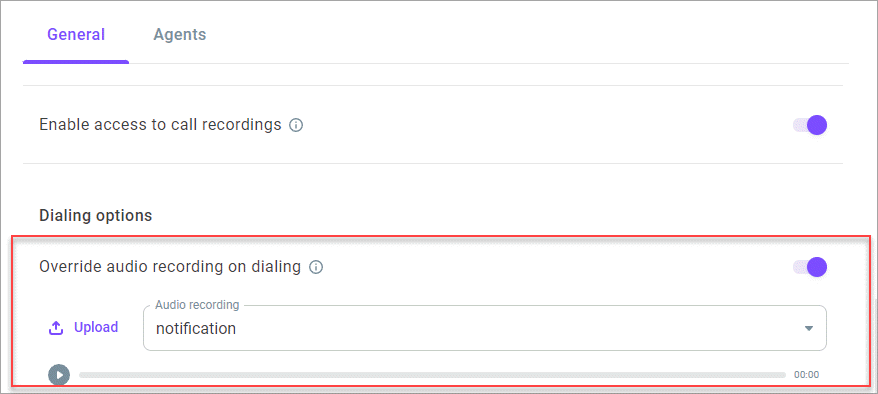
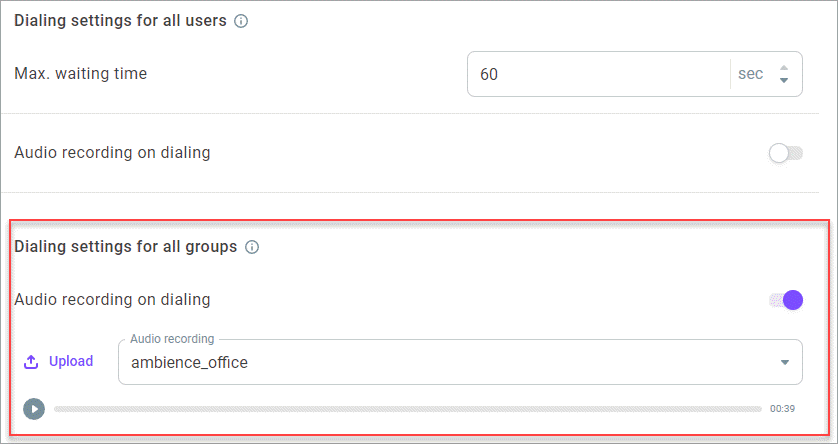
If the switch is disabled in the group settings, the system will play the recording selected in the Dialing settings for all groups field in the Setup > General settings > Dialing settings section. If both switches are enabled simultaneously, the group settings will have higher priority.
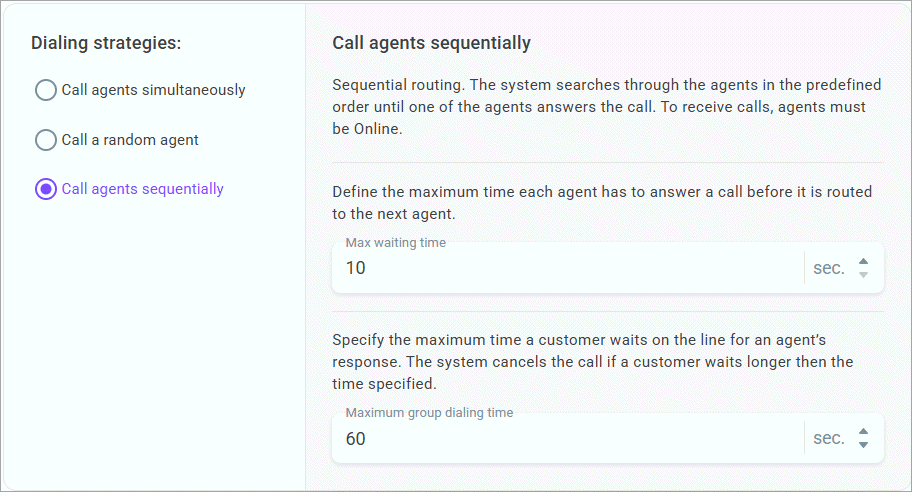
- In the Dialing options field, define how the system should distribute customer calls between the group agents.
The available options are:
Simultaneous routing. The system routes an inbound call to all online agents in the group at once. Dialing attempts continue until the call is answered. After that dialing stops. This strategy assumes that you should specify the Maximum waiting time; if no group agent answers the phone when this time elapses, the system ends the call. This method helps reduce customer's waiting time for an answer since the call is answered by the first agent available.
The maximum number of simultaneous calls that are not answered yet at any given moment is limited to 10.

Random call distribution. The call goes to the agent (only one) who received the least number of calls. To receive calls, agents must be online. This strategy assumes that you should specify the Maximum waiting time. If the selected agent fails to accept the call within the time specified, the system cancels it and stops dialing. This approach helps evenly distribute load among employees, preventing early fatigue and allowing them to prepare for the next call.

Sequential routing. The system routes an inbound call to one phone number from the list, then another, and another, searching for an available online agent. This strategy assumes that you should define the Maximum waiting time each agent has to answer a call before it is routed to the next agent. The system keeps on dialing until one of the agents accepts the call or the Maximum group dialing time elapses. After that dialing stops.
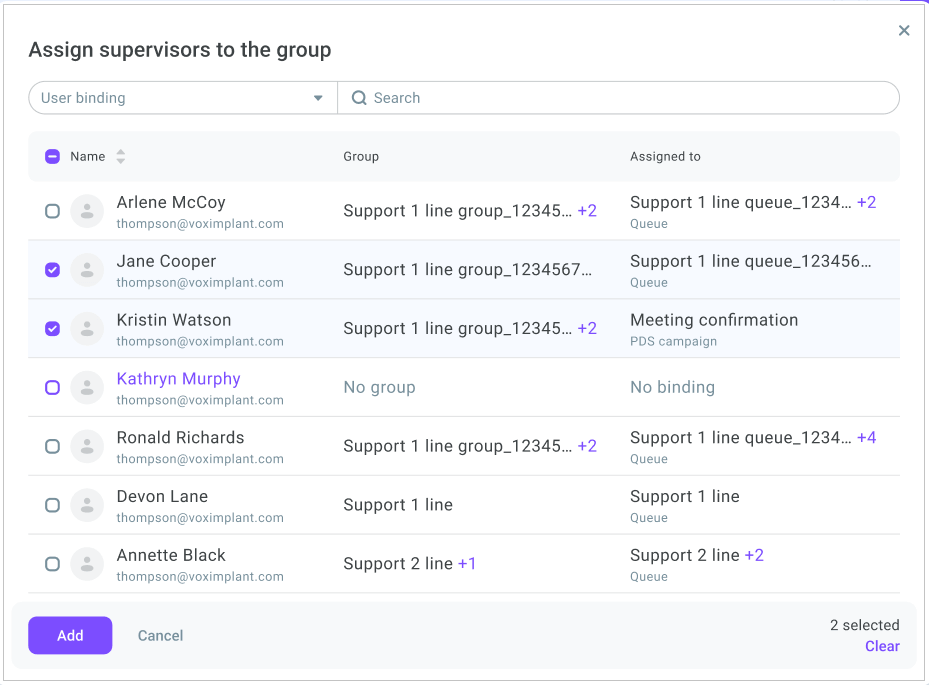
- Assign one or several supervisors to manage the group. Note that a supervisor is not considered a group member and does not handle conversations. Every supervisor can simultaneously manage several groups.
Only users with the Owner, Administrator, and Manager roles have permissions to assign supervisors.
- Click + Assign.

- The dialog window displays the list of users with the Supervisor role.
- Select the user(s) you need and click Add.
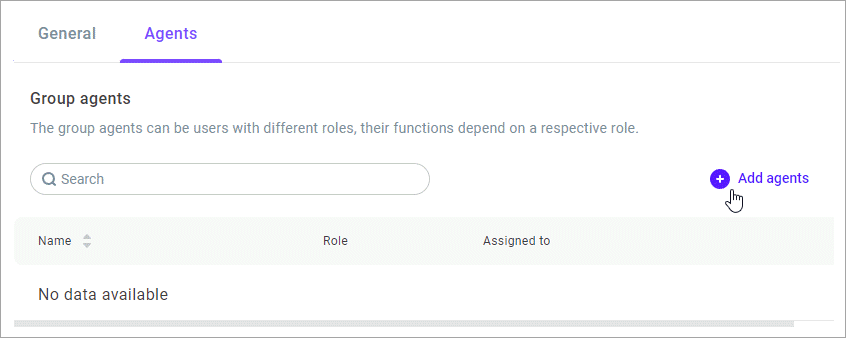
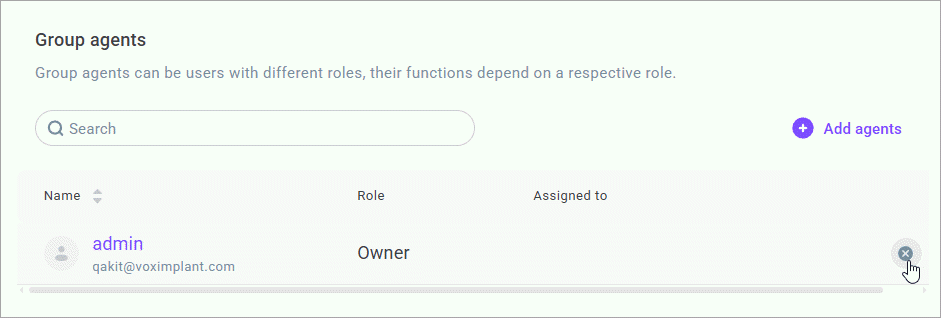
- Next, go to the Members tab and add users to the group. You can add users with any role, their functions in the group will differ depending on the role.
- Click + Add agents.
- Select the users and click Add.
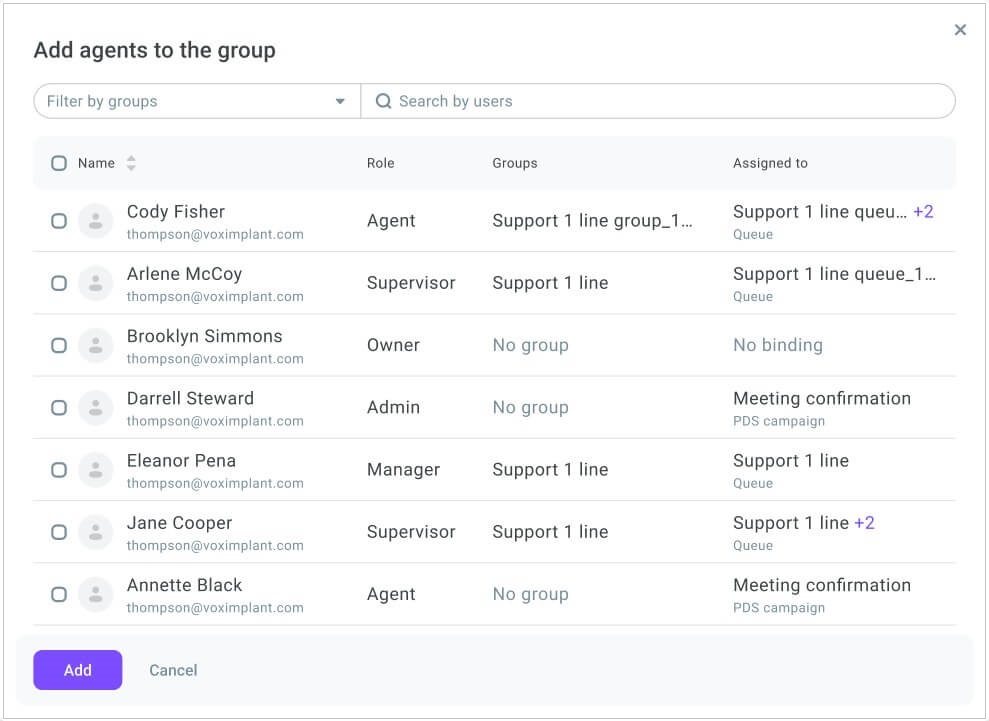
The added users now display as the group members. To remove agents from the group, click the cross icon and confirm the action.
- Click Create group.
Editing users
- Select the user and click the Action menu icon.
- Click Edit user.

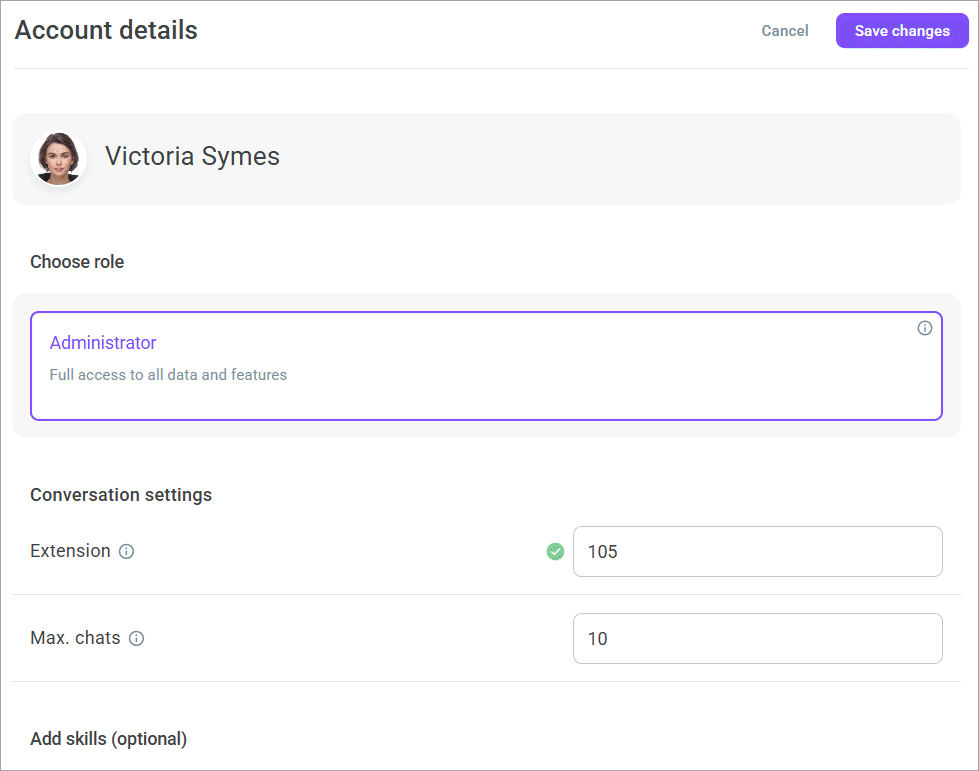
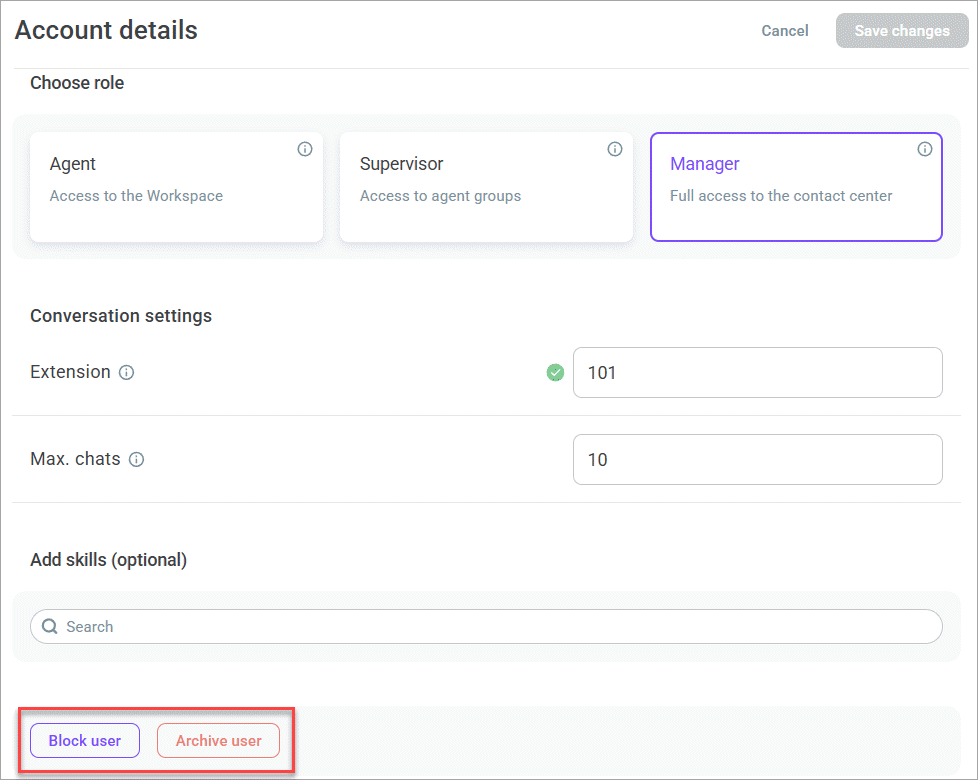
- Change the user role if needed.
- Set up an extension number for the user in the Extension field.
- In the Max. chats field, enter the maximum number of chat conversations that can be simultaneously allocated to an agent. The limit applies to automatically assigned chats only (1-100).
- Add or remove skills in the Add skills (optional) field and set the skill level.
- If you edit a supervisor, the Assign to group field is available. You can review the list of groups assigned to the supervisor or remove them from groups.
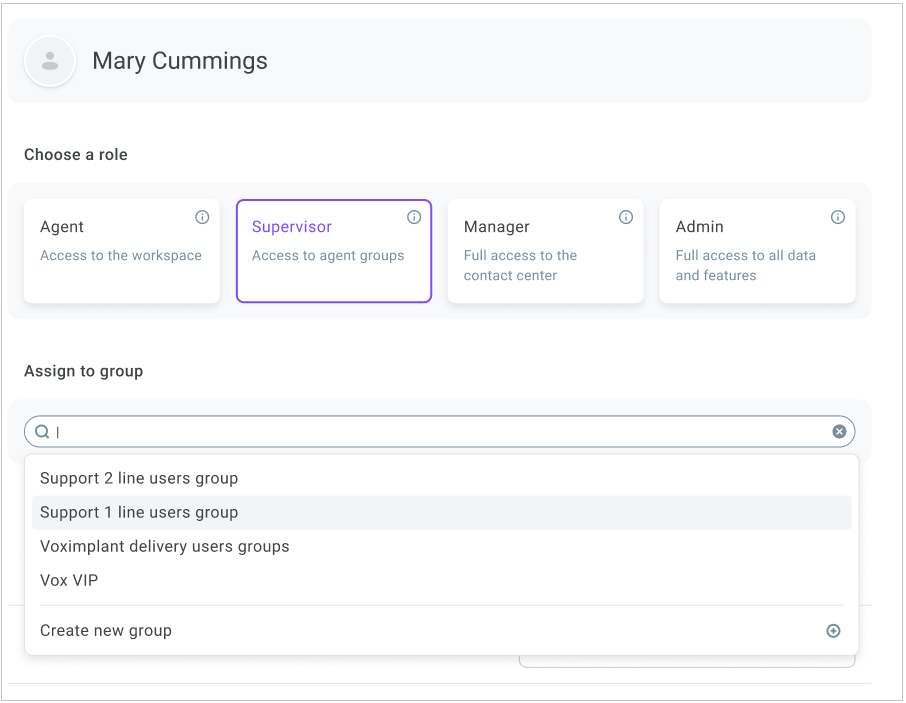
- If you do not have any groups yet, click Create new group.
- You can permanently archive or temporarily block (from 8 hours to 1 month) the user by clicking the respective buttons. To review the list of inactive users, go to the Archived tab.
- Click Save changes.
Bulk editing users
- From the Users list, select the accounts you want to edit.
The number of users selected and action buttons display at the bottom of the screen.

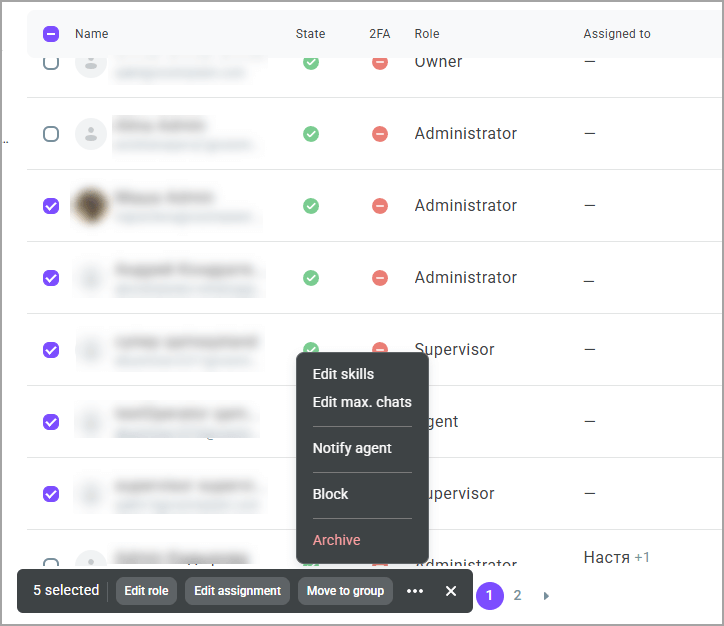
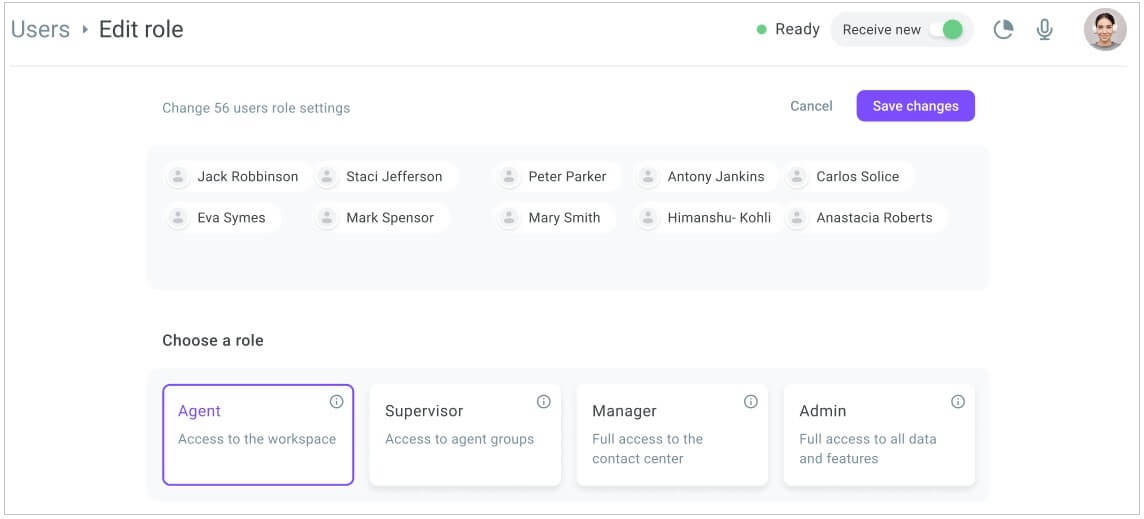
- Select Edit role if you want to change roles of the selected users.
- Select Edit assignment to assign/unassign users to/from queues or campaigns.
You can assign users to multiple queues or a single agent campaign. You cannot assign a user to a campaign and queue at the same time. To assign users to a queue, you must select the assignment method: add a new queue to the list of already assigned queues or override the existing setting. By default, a user can be a member of maximum five queues. To transfer users from an active agent campaign to a queue, you must first unassign them from that campaign.

- If you want to change the maximum number of conversations the users can simultaneously process, select Edit max. chats and set the value (1-100).
- Select Move to if you want to move the selected users to a group.
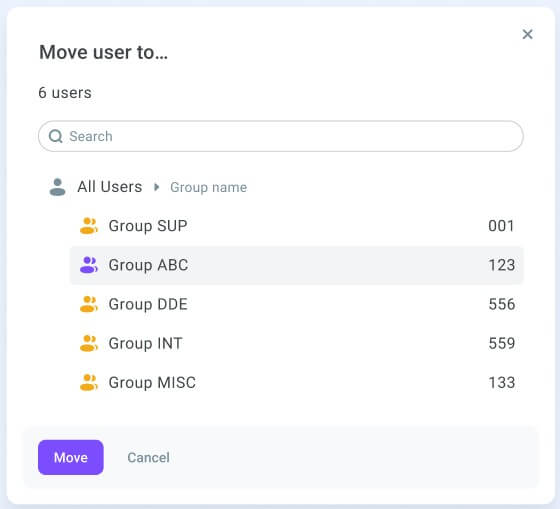
If you do not have any groups, click Create new group and define the group settings.
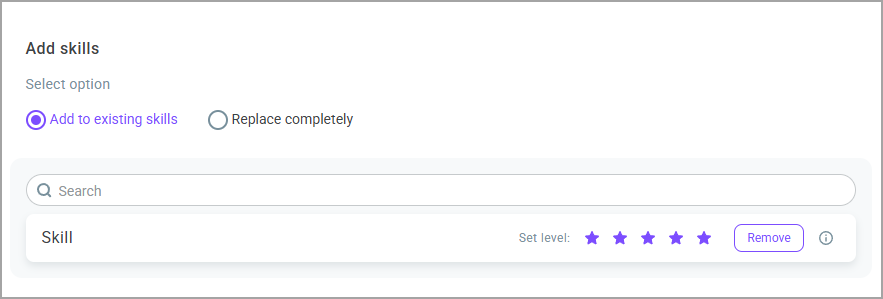
- Select Edit skills if you want to add or replace user skills.
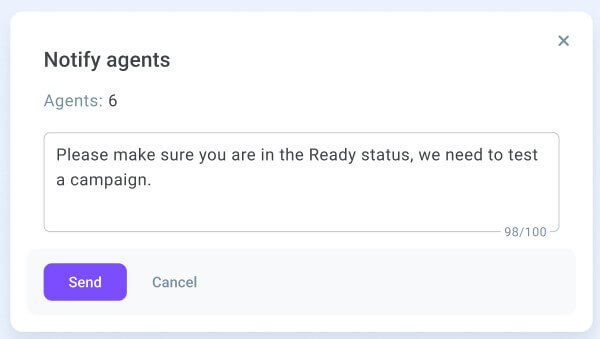
- Select Notify agent to send a message to the selected users. Enter the text and click Send.
- Click Block if you want to block the accounts of the selected users. Choose an interval for the block. If you do not select an interval, the system blocks users indefinitely.
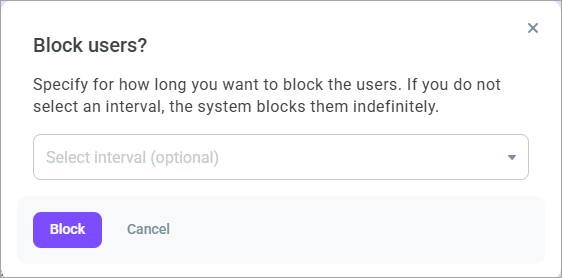
If there are both unblocked and blocked employees among the selected users, in addition to the Block button, the Unblock button is available that allows you to restore user accounts.
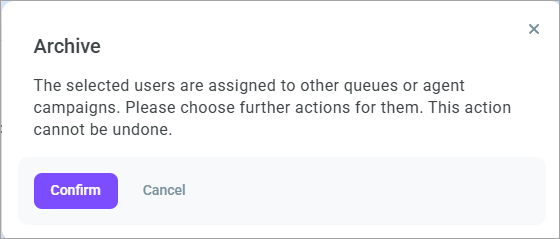
- Click Archive to move the user accounts to the archive. If the selected employees are assigned to queues or campaigns, choose further actions for them.
Reviewing and editing user profiles
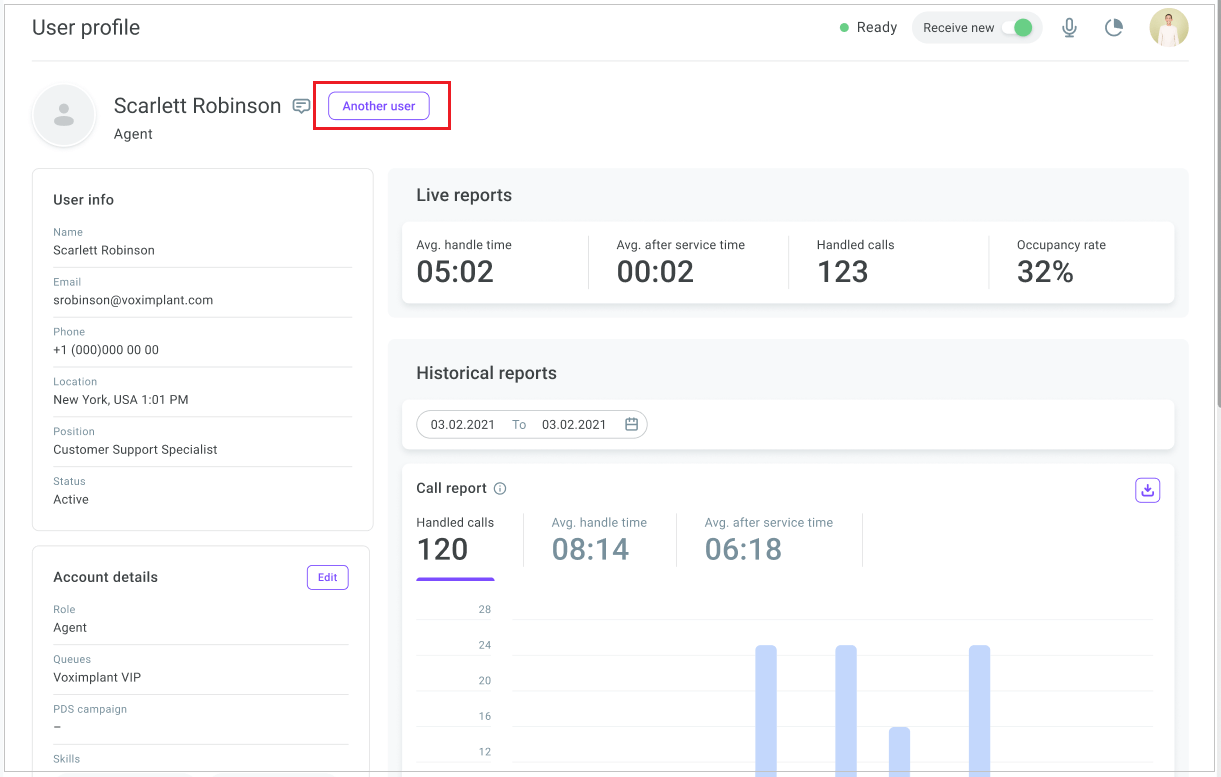
- On the Active or Invited tabs, click on the user name you want to view or edit.
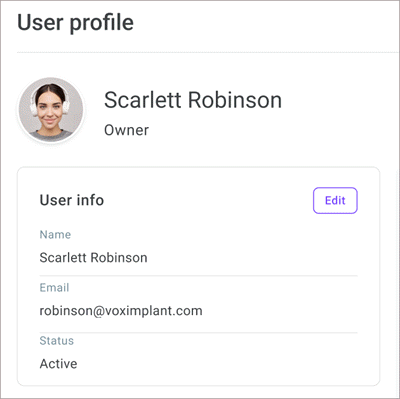
- The User profile displays.
- Review the user details in the User info group box.
- In the Account details group box, review the user account information: role, skills, assigned queue(s), or PDS campaign.
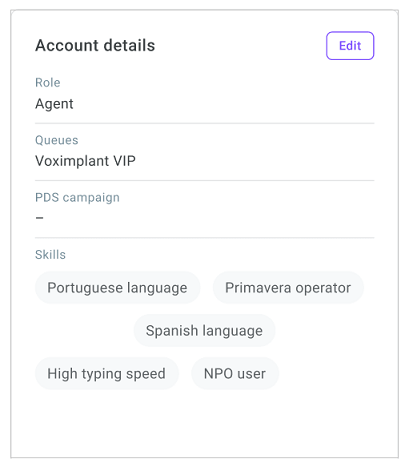
- Click the Edit button if you have permissions to edit user account details according to your role.
- If required, change the user role, add/remove skills, edit the extension and the max. chats settings.
- Click Save changes.
- Review the user's live and historical statistics on various reports.
Live reports contain the following live metrics for the last 24 hours:
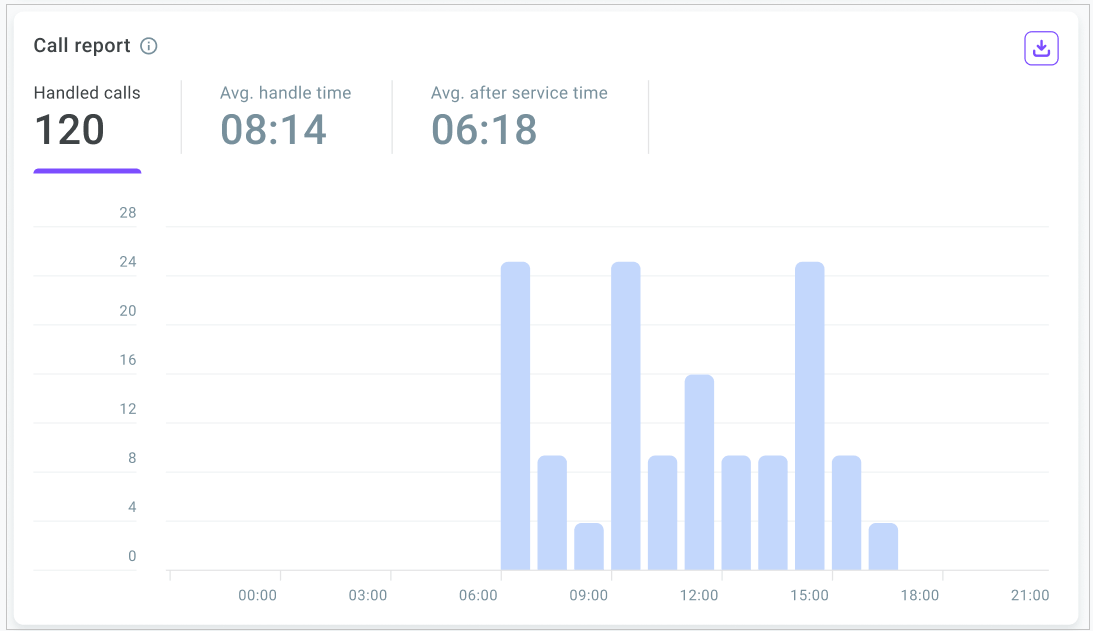
Avg. handle time - Average time the agent spends In service and After service.
Handled calls - The total number of calls handled by the agent.
Avg. after service time - Average time the agent spends on post-call activities (After service).
Occupancy rate - The system calculates this value based on the agent's net service time to the total hours the agent spends in a shift (in service + after service / total shift time).

Historical reports are diagrams that display metrics of the user for the selected period.
A call report displays the user calling statistics. The report updates several times an hour (at 5 min, 20 min, 35 min, and 50 min). You can switch between the tabs to review the number of calls handled by the agent and the agent’s avg. handle and after service time.
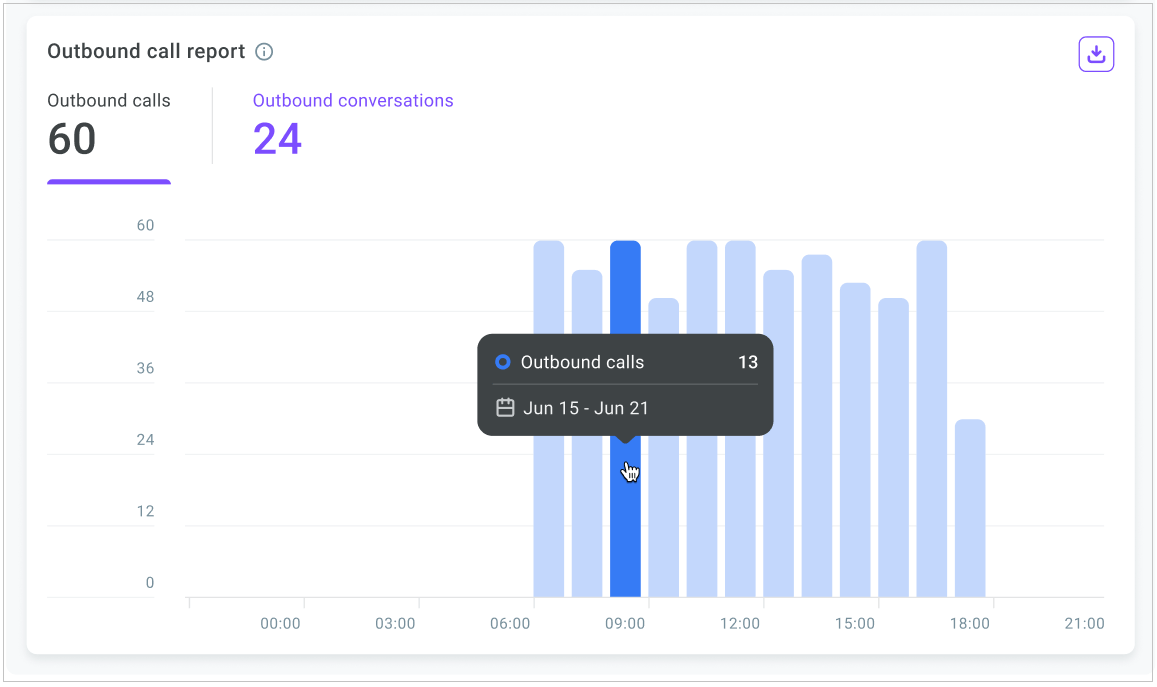
An outbound call report displays the number of outbound calls performed by the agent via the softphone and the number of actual outbound conversations that lasted more than 5 sec. The report updates several times an hour (at 5 min, 20 min, 35 min, and 50 min).
- To review/edit another user, click Another user and select the one you need.
