Reviewing call history
Voximplant Kit captures the full history of calls.
The Calls history section is available to users with the Manager, Administrator, and Owner roles. Users with the Supervisor role can view call history of their group agents. If the Enable access to call history switch is enabled in the general CC or group settings, supervisors and agents can see the history of their own calls.
To view the call history:
- Log in to your Voximplant Kit account.
- On the left sidebar, click History.
- Select the Calls tab.
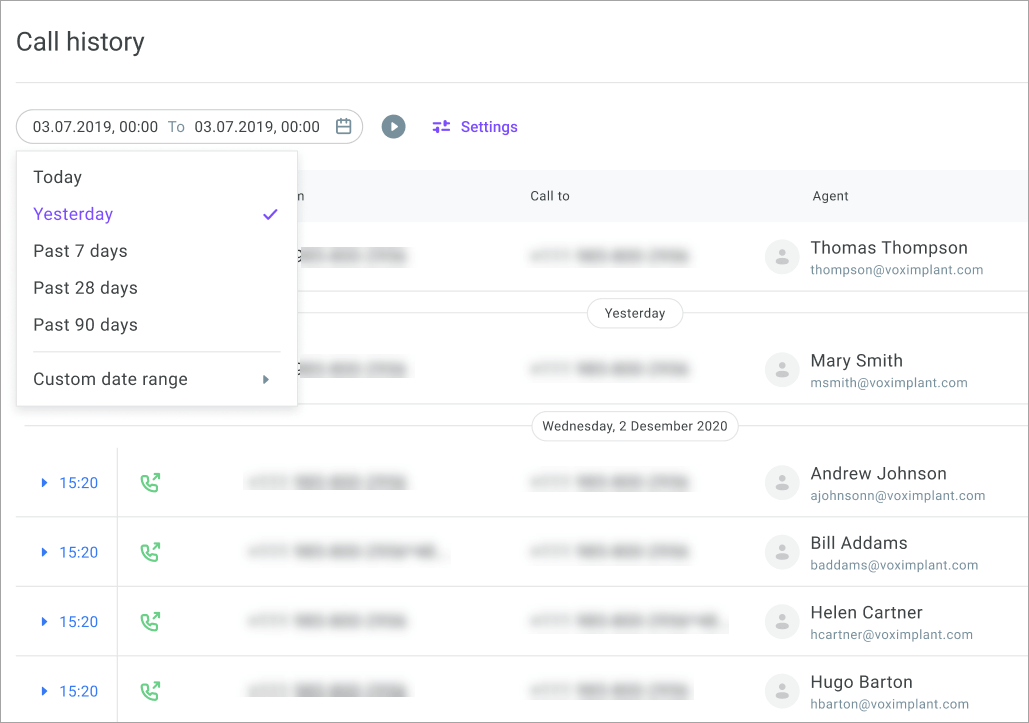
- In the Calendar field, select the call history report date range. You can select one of the predefined values or specify a custom date range.

- The call history table contains the following columns:
Time – Indicates the call connection time.
Type – Indicates whether the call is outbound or inbound.
Call from – Indicates the phone number of the caller.
Call to – Specifies the phone number of the callee.
Agent – Specifies the name of the agent who handled the call. This field also includes the information on whether the call is an outbound call from the softphone.
Queue – Specifies the queue to which the system distributed the call.
Dialing time – Time from the start of dialing to the moment the subscriber (voicemail) answers the call or the subscriber receives the unavailable status. For more details on each call type, see the table below.
Talking time – Time from the moment the subscriber (voice assistant) picks up the phone to the moment the call ends. For more details on each call type, see the table below.
Call type | Dialing time | Talking time |
Automated campaigns | Time FROM the start of dialing TO the moment the subscriber receieves the unavailable status from the telecom operator OR until the subscriber picks up the phone / voicemail (voice assistant) is connected. | Time FROM the moment the subscriber (voice assistant) picks up the phone TO the moment the call ends (the subscriber hangs up / end of scenario / voicemail (AMD) is detected ). |
Outbound call from the softphone | Time FROM the start of dialing by a Voximplant Kit user TO the moment the subscriber receieves the unavailable status from the telecom operator OR until the customer picks up the phone / voicemail (voice assistant) is connected. | Time FROM the moment the subscriber (voice assistant) picks up the phone TO the moment the call ends (the customer/agent hangs up). |
Agent campaigns | Time FROM the start of dialing TO the moment the subscriber receieves the unavailable status from the telecom operator OR until the customer picks up the phone / voicemail (voice assistant) is connected. | Time FROM the moment the subscriber (voice assistant) picks up the phone TO the moment the call ends (the agent/customer hangs up or voicemail (AMD) is detected ). |
Inbound call | Not applicable | Time FROM the moment the scenario starts TO the moment the call ends (the agent/customer hangs up / end of scenario). |
Record – Click Play to listen to the call audio recording, if any, or copy the link to the clipboard.
Price – Displays the price of the call.
This field is not available to users with the Supervisor role.
Scenario – Displays the link to the related scenario, if any.
This field is display-only for users with the Supervisor role.
Campaign – Displays the campaign name if the call was procecced within a campaign.
Attempt result – Displays the system call result (for the list of available call result codes, see the table below).
A system call result code indicates whether a call was successful and is colored accordingly. A successful call result is colored green. An unsuccessful result is colored red.
Available system call result codes
Attempt result | Description |
Dialing error | A dialing error that does not fall under other established cases. |
Number unavailable | The destination number is unavailable (turned off or out of network coverage). |
Request terminated | The request was terminated (for SIP) or the callee failed to answer the call. |
AMD | The call was received by an answer machine. |
Invalid number | Incorrect destination phone number. |
Number busy | The callee was talking on the phone or dropped the call. |
No answer | No response within the Dialing time defined in the Outbound call block, campaign, or group settings. |
Call answered | The callee answered the call. |
Insufficient funds | Insufficient funds for a phone call. |
Lost by agent | The call was queued to an agent, but they did not pick up the phone; including calls to extensions (user, group, queue). |
Call rejected | The callee rejected the call or the number was busy. |
Restricted by DNC | The destination phone number is in the DNC list; dialing not allowed. |
Abandoned | The customer picked up the phone, but there was no agent available. |
Call ended in scenario | The inbound call ended in the scenario without reaching the Successful call block or transferring to an agent. |
Wrap-up code – Displays the name of the wrap-up code, assigned to the call by an agent within an agent campaign (for the information on wrap-up codes, go to this article).
If an agent enters the Call back wrap-up code, the tooltip displays the date and time scheduled for the callback.
Attempts – Displays the actual number of dialing attempts (applicable only for PDS campaigns).
Tags – Displays tags added to the conversation.
Topics – Displays topics assigned to the call, if any.
Notes – Displays call notes. Click the cell to see the full list of notes added by agents.
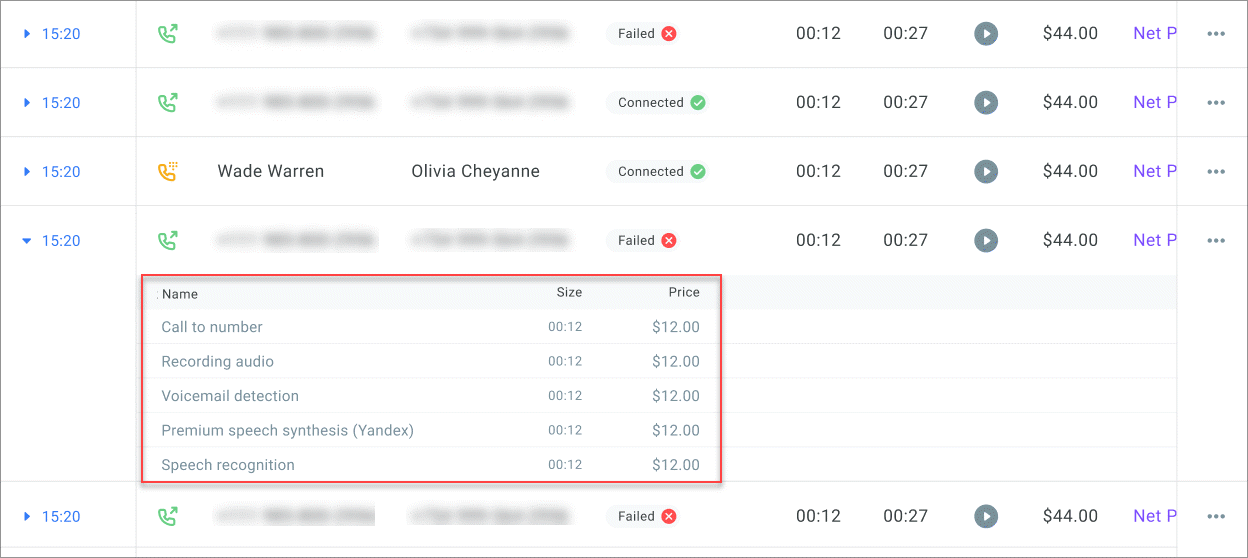
- Click on the required call to expand it and review the additional call information.
The additional call information is not available to users with the Supervisor role.

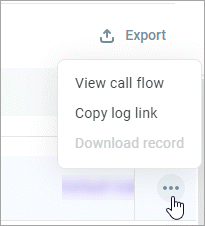
- Click the Action menu icon and select the View call flow option if you want to review how the call went through the scenario. If you need to share the call log with the support team, select Copy log link - the system copies the log link to the clipboard. Click Download record to download the conversation recording to your PC.

- Click Settings if you need to apply additional filters or customize your call history view.
On the Filters tab, the following filtering options are available:
Type (inbound or outbound)
Phone (minimum 3 characters)
Talking time (from 0 to 24 hours)
Groups
Agents
Queues
Attempt results
Wrap-up codes
Tags
Scenarios
Campaigns (automated, PDS)
Outbound campaigns (new)
Topics
On the View tab, customize your view by selecting the required columns.
- Click Pause to disable real-time updating of the call history if needed.

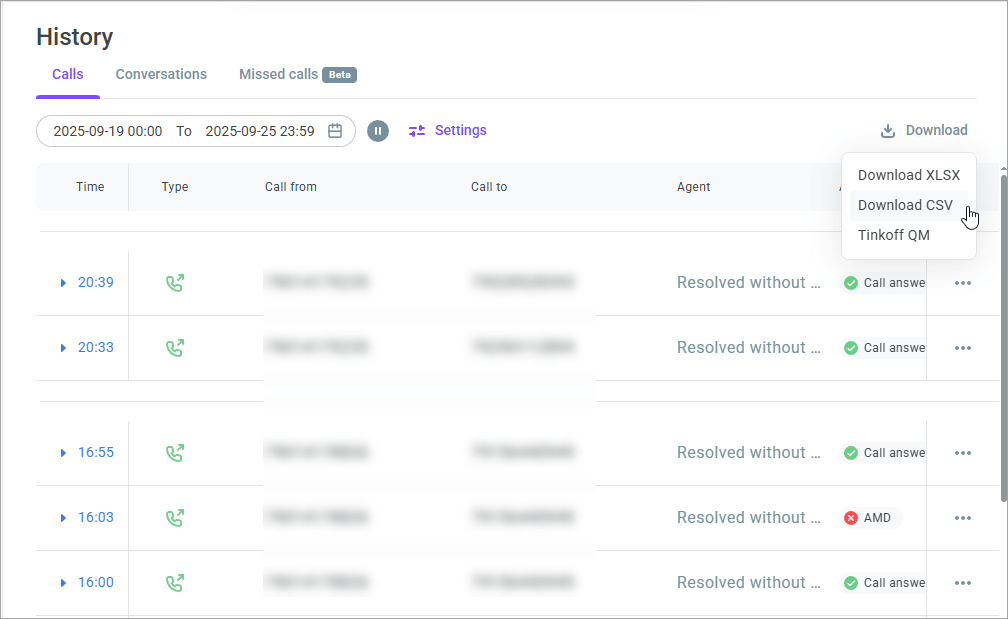
- Click the Download button and select how you want to export the call history report:
Download the report as an XLS file
Download the report as a CSV file
Export the report to TBank QM for analysis
The TBank QM option is only available after you have connected and activated an integration with Tinkoff QM. Note that only users with the Owner, Administrator, and Manager roles can export call records to TQM.

