Working with extensions
With extensions, you can forward calls from a specific scenario or your Workspace directly to an agent, group, queue, or remote extension.
Contents
Generating extensions
- Log in to your Voximplant Kit account.
- Select Setup > Contact center > Extensions.
- Click Generate.
- Select how the system should assign extensions. The available options are:
For all empty
For empty queues
For empty groups
For empty users
For empty remote extensions
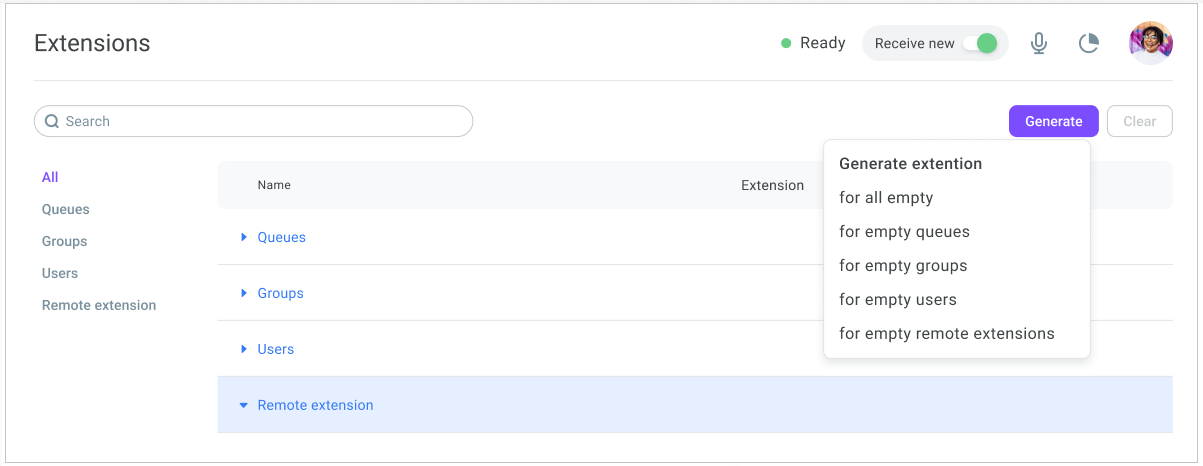
- In the Generate extensions window, select the Number of digits to use for the extension.
The number of digits should be equal to the number of extension code instances.
- In the Interval to generation code field, set the minimum and maximum limits for the extension generation.
The code generation interval should be equal to or greater than the number of instances.
- Click Generate.
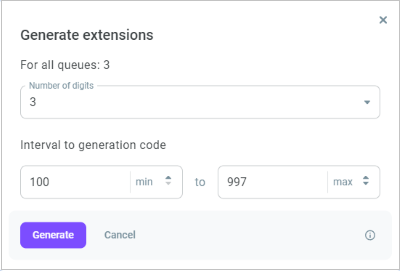
When you select to generate extensions for all empty entities, the system assigns extension numbers in ascending order - first to users, then to groups and queues, and finally to remote extensions.
- Extensions you generate are active by default, but you can deactivate them. Select the required extension and click Edit extension.
- Disable the Active extension switch.
Inactive extensions remain assigned to the given queue, group, user, or remote extension, and you cannot re-assign them. The system does not display them on the interface except for the extension table.
- You can also edit the extension number if required.
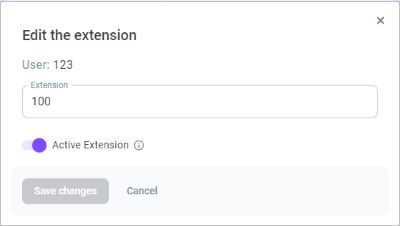
- Once you finish, save your changes.
Assigning extensions to specific users, queues, and remote extensions
- On the left sidebar, select Setup > Contact center > Users.
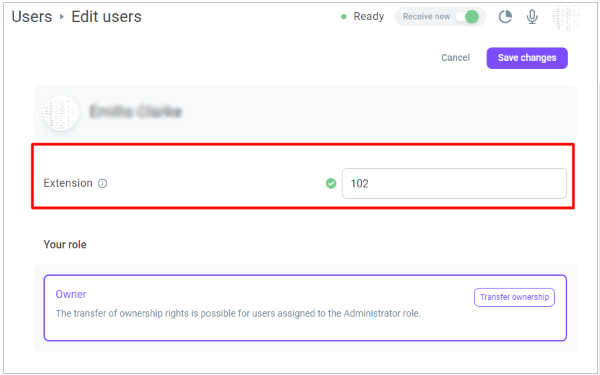
- Select the user you want to assign an extension.
- Click the Action menu icon and select Edit user.
- Select the extension and click Save changes.
- To assign an extension to a user group, select the group you need and click the Edit icon.
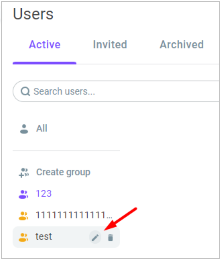
- Select the extension and click Save changes.
To assign an extension to a queue:
- On the left sidebar, select SSetup > Contact center > Queues.
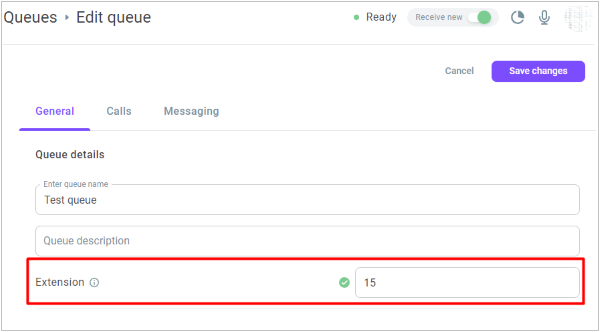
- Select the required queue, click the Action menu icon, and select Edit.
- Select the extension and click Save changes.
To assign an extension to a remote extension:
- On the left sidebar, select Setup > Contact center > SIP trunks.
- Find the SIP trunk to which the required remote extension belongs.
- Click the Action menu icon and select Manage remote extensions.
- Select the remote extension you need and click the Action menu icon again.
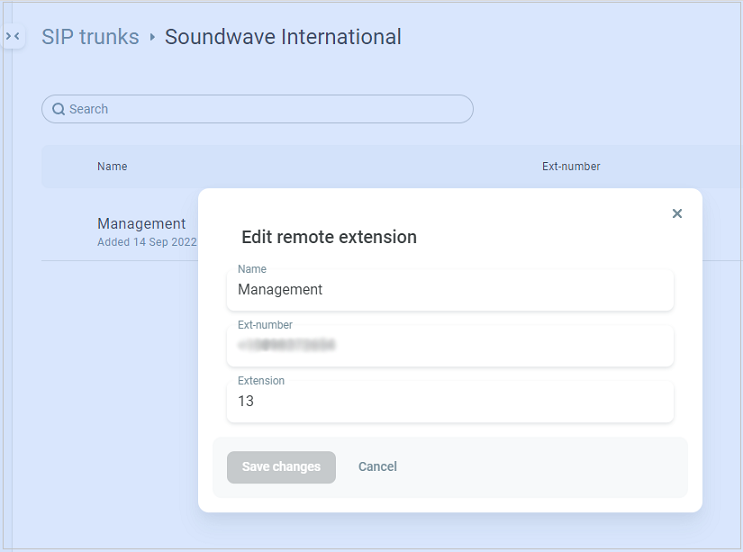
- Select Edit.
- Select the extension in the Extension field and click Save changes.
Forwarding calls to extension numbers
You can forward a call to an extension number as follows:
Use the Extension block in your scenario
Transfer a call in your Workspace
Transfer a call in the softphone
To transfer a call in your Workspace, do the following:
- Сlick the Transfer icon on the call control panel.

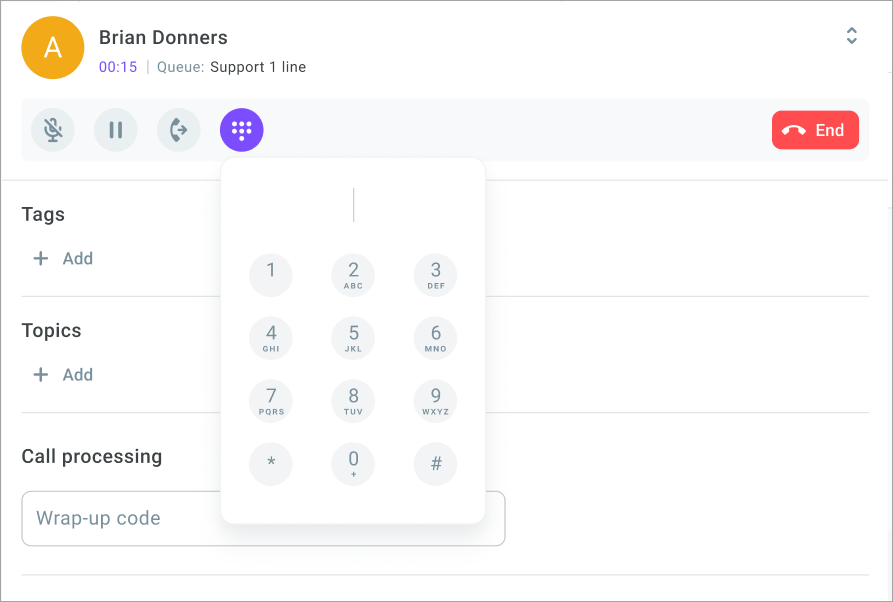
If required, use the DTMF keypad to manually dial the extension number to transfer the call to.
- In the Transfer call window, search for the required extension number of a user, group, queue, or remote extension.

- Select, whether you want to notify the destination party before transferring the call (warm transfer) or perform an unattended transfer (blind transfer). Select the Ask first or Transfer now radio button accordingly.
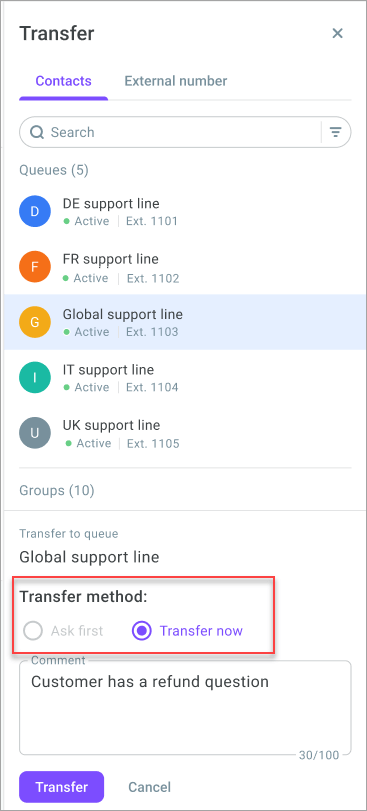
- Click Transfer and then Complete transfer.
To transfer a call in the softphone, do the following:
- Click Transfer on the control panel.
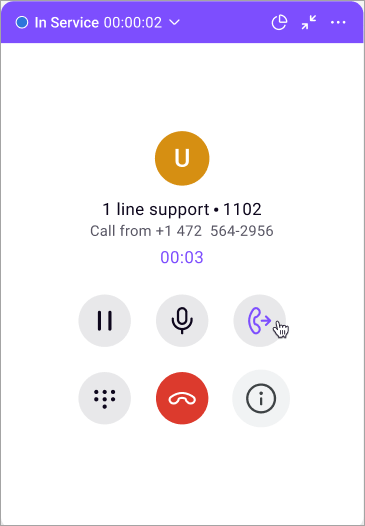
A call transfer window opens. The Contacts tab displays the list of users, queues, groups, and remote extensions with extension numbers.
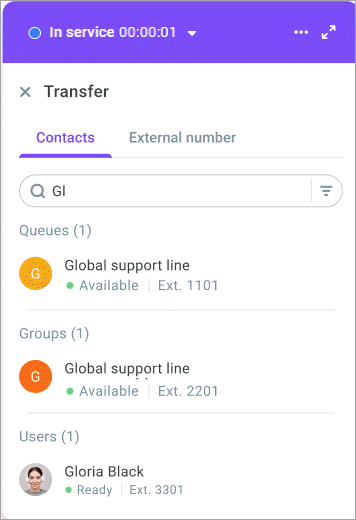
- Search for the required extension number of a user, group, queue, or remote extension.
- Select, whether you want to notify the destination party before transferring the call (warm transfer) or perform an unattended transfer (blind transfer). Select the Ask first or Transfer now radio button accordingly.
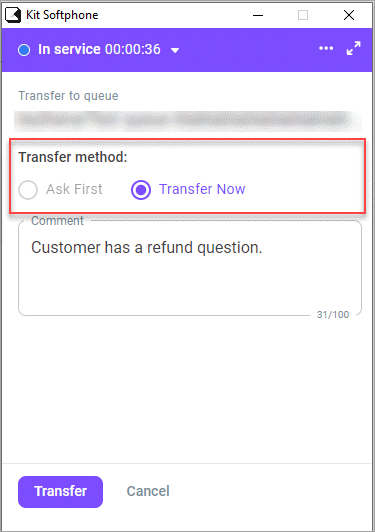
- Click Transfer. If the transfer is successful, you will hear a beep.
- Click Complete transfer.
