Exploring your workspace
Workspace is the main working area for agents. In the Workspace, agents answer calls from queues and work with inbound conversations. In addition, agents can call customers directly from their Workspace using the softphone functionality.
This section is available to all contact center users. A user with any role (Agent, Supervisor, Manager, Administrator, Owner) can work as an agent and process calls in the Workspace.
Contents
Getting started with your Workspace
Log in to your Voximplant Kit account and go to the Workspace section. If your role is an Agent, the Workspace opens by default.
By default, you are assigned the Online status once you log in to your account. In this status, you can receive internal calls from your colleagues, transferred calls, and customer calls made to your or your group's extension number. Online agents do not receive calls and chats from queues. To start processing requests from queues, change your status to Ready in the upper right-hand corner of the screen. If you are busy, set the status to DND or one of the appropriate custom statuses.
The Workspace consists of two tabs: My tasks and Unassigned. The My tasks tab displays the list of tasks you are currently processing. It can be an inbound customer call or chats distributed to you. The Unassigned tab displays chats waiting for an available agent. You can select any conversation and assign it to yourself or another employee.
Agents and supervisors can see unassigned requests from their queues only. Users with the Manager, Administrator, and Owner roles can see the full scope of unassigned requests.
Processing inbound calls
To receive a call from queue, an agent must be in the Ready status, and the inbound scenario that initially receives the call must contain the Call to queue block.
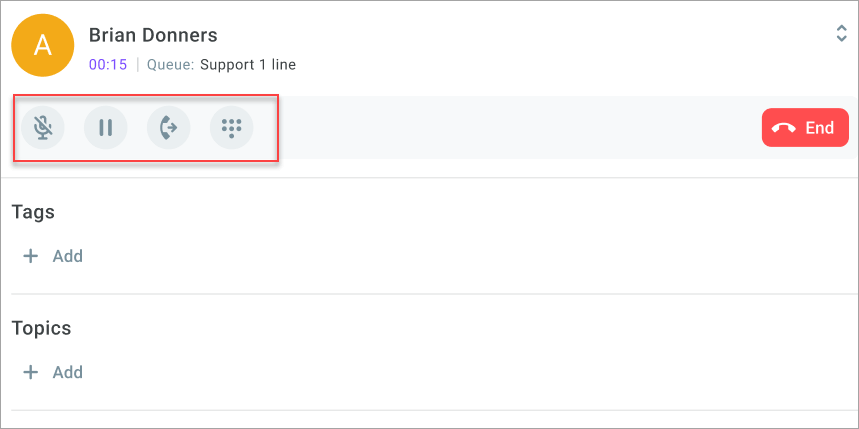
- Once a call from queue is distributed to you, it displyas in the top of the screen. Click it - a call panel with control buttons displays.
- Click Answer to answer the phone.
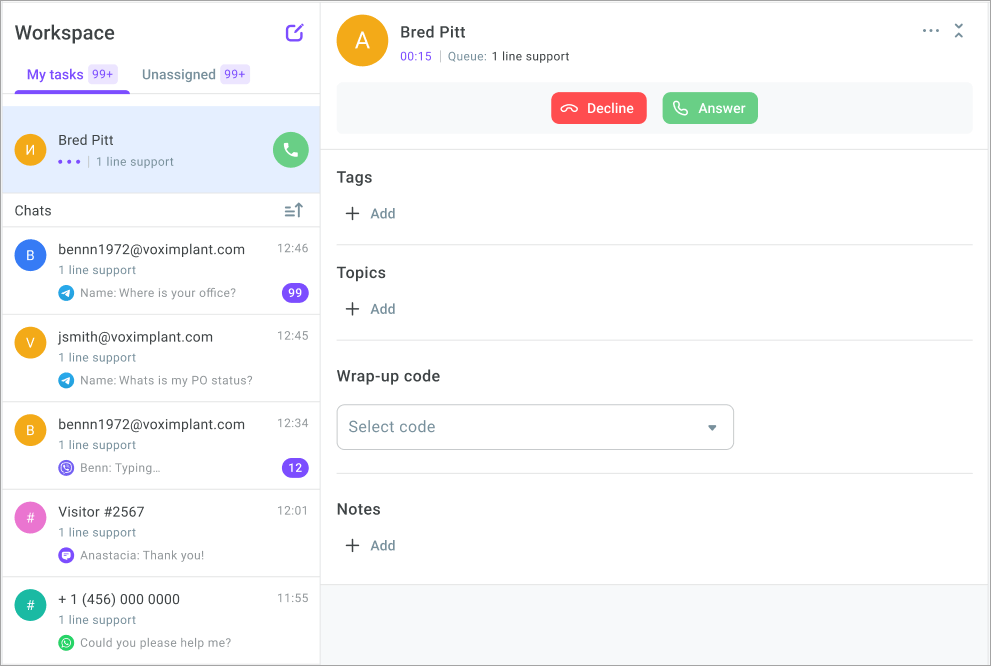
While handling a call, your status is In service. If you fail to answer the phone, your status changes to Banned.
After answering the call you will be able to:
mute yourself
put the call on hold
transfer the call to another agent (group/queue)
use DTMF to dial an extension or select an IVR item
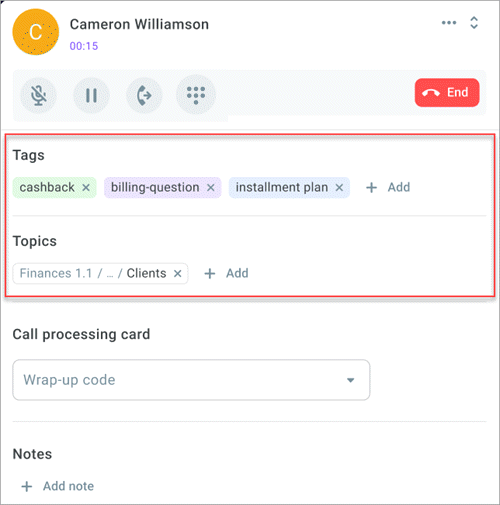
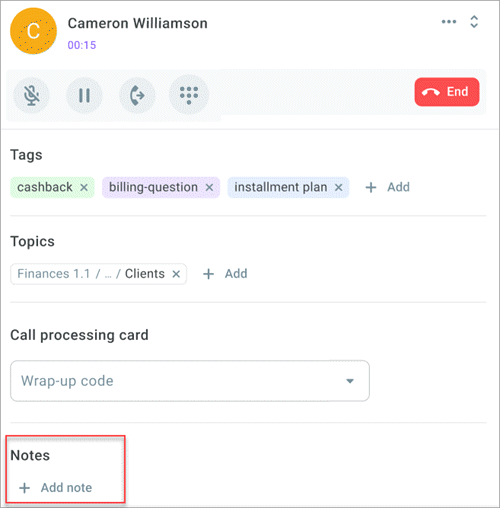
- During a conversation you can add tags and topics to the call. To do this, click Add in the appropriate field below the call panel. The functionality of tags and topics allows you to classify customer requests depending on specific properties, for example, call duration, conversation subject, or whether the caller is a prospect.
- Select a wrap-up code to label the conversation outcome, if the call was received in a campaign.
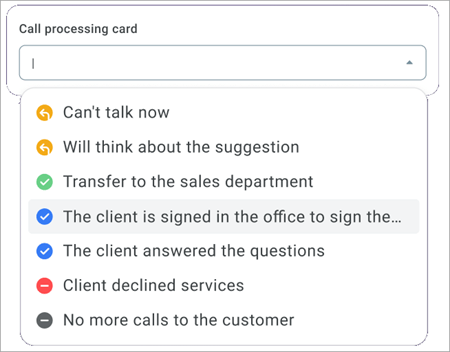
- If required, add additional information to the conversation in the Notes field. This is helpful if you do not see an appropriate topic to classify your conversation. You can enter a PO number, a missing article to be ordered from a warehouse, etc.
Every agent can add one note to a conversation they are assigned to. If you transfer a conversation to another agent, the agent will see the comment added by you in a display-only mode. The maximum number of notes agents can add to a conversation is limited to 10. The maximum number of characters in a note is limited to 1000. Note that you cannot add notes to unassigned conversations.
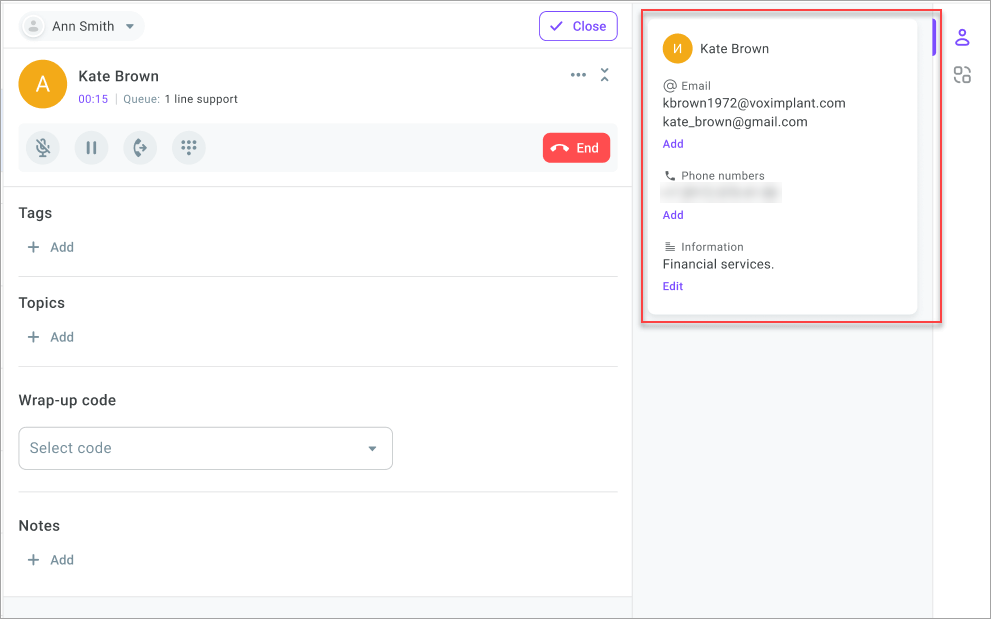
- During an active call, a customer card appears on the right side, displaying their email, phone numbers, and additional information. To supplement the data, click Add.
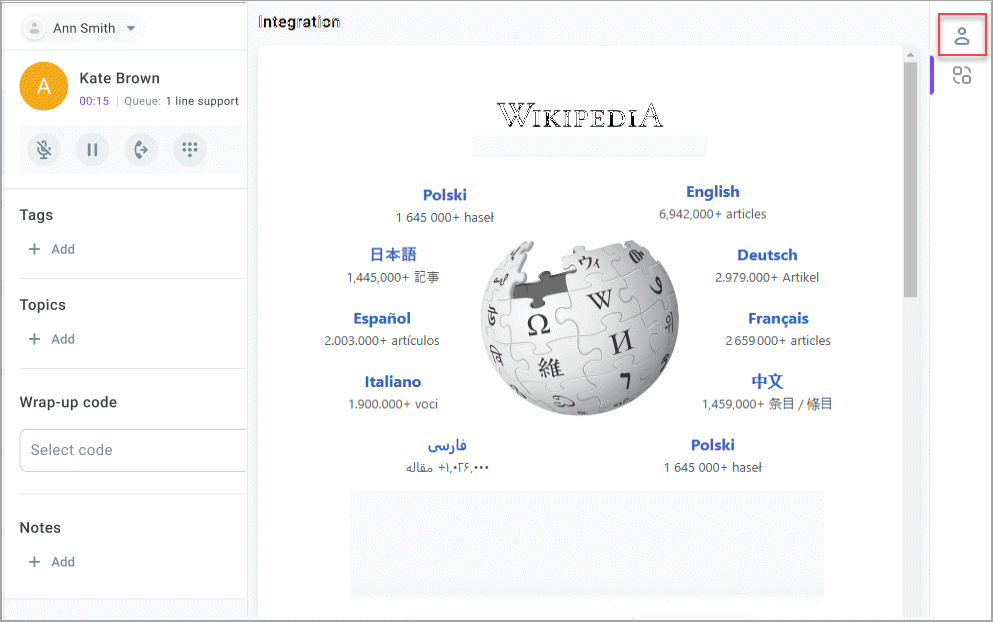
If the Integration option was selected in the right sidebar menu upon logging out (see more details below), an iframe displays instead of the contact card. To switch back to the contact card, click the Contact icon.
- When the conversation is over, click End.
After you end the call, your status changes to After service. In this status, you can also enter required call details, assign wrap-up codes, etc. If the After service time limit switch is enabled in the queue settings, the system forces you out of the after service once the specified time is over.
Transferring a call
- On the call panel, click the Transfer button to route the call to another agent.

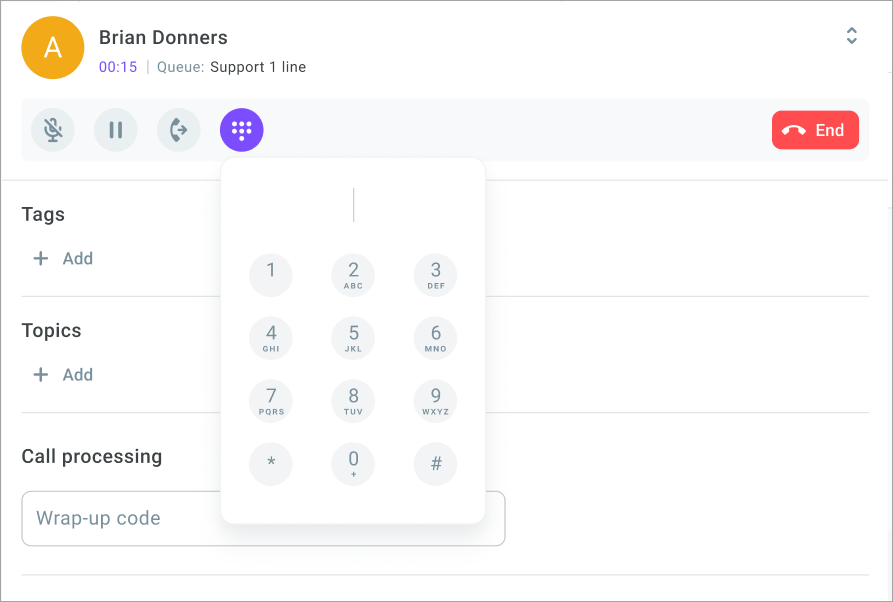
If required, use the DTMF keypad to manually dial the extension number to transfer the call to.
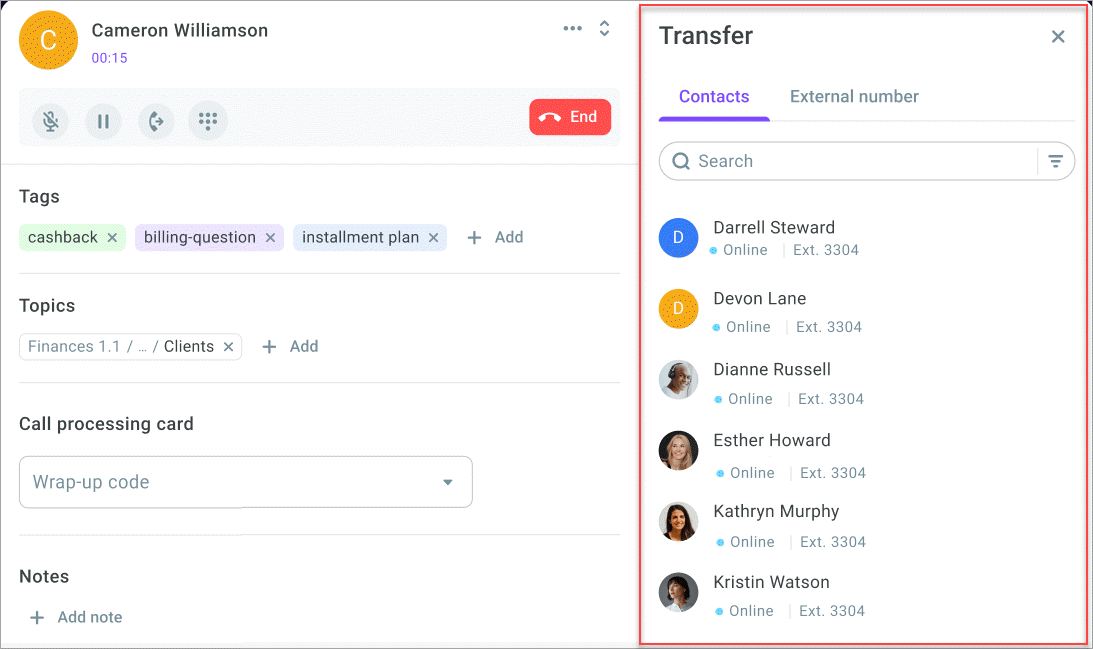
A call transfer window opens in the right area of the Workspace. The Contacts tab displays the list of users, queues, groups, and remote extensions.
The contact list includes only users, queues, and groups with an extension number. By default, the tab contains only available contacts: groups in the Available status (provided there are Online or Ready employees), queues in the Available status (provided there are Online, Ready, Dialing, or In service employees), and agents in the Online and Ready statuses. Unavailable contacts are hidden, you can only see them by disabling the Only available switch in the Search field. When disabled, unavailable users, groups, and queues display in the list, BUT remain inactive. Unavailable contacts are blocked, since the system immediately cancels any call to them.
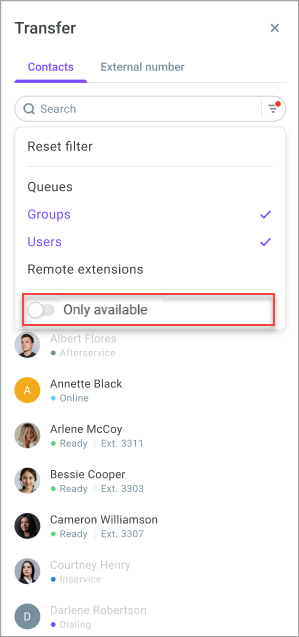
- Search for and select the required number either by username or by extension of a specific user, group, queue, or remote extension. Make sure to enable the Only available switch.
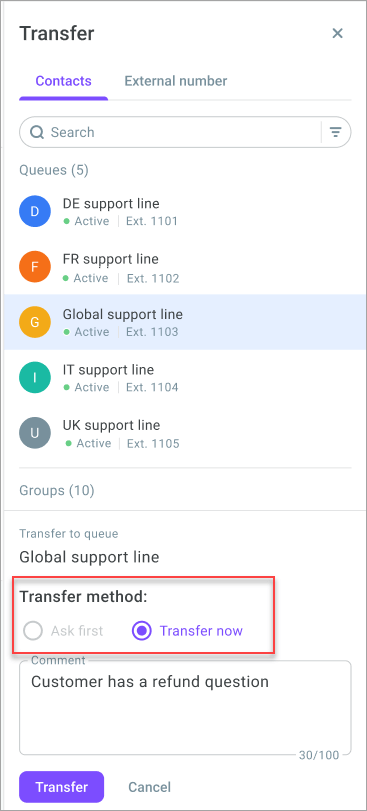
- Select, whether you want to notify the destination party before transferring the call (warm transfer) or perform an unattended transfer (blind transfer). Select the Ask first or Transfer now radio button accordingly.
If you are transferring a call to a queue only blind transfer is possible.
If you are transferring a call to an agent group, the system allocates the call according to the dialing strategy defined in the group settings. The options are:
Call agents simultaneously - The system routes an inbound call to all group agents at once. Dialing attempts continue until the call is answered. After that, dialing stops. This method helps reduce customer's waiting time for an answer since the call is answered by the first agent available. The maximum number of simultaneous calls that are not answered yet at any given moment is limited to 10.
Call a random agent - The call goes to the agent (only one) who received the least number of calls. If the agent fails to accept the call, the system cancels it and stops dialing. This approach helps evenly distribute load among employees, preventing early fatigue and allowing them to prepare for the next call.
Call agents sequentially - The system routes an inbound call to one phone number from the list, then another, and another, searching for an available agent. The system keeps on dialing until one of the agents accepts the call. After that, dialing stops.
- If you want to transfer a call to an external phone number, select the External number tab in the Transfer window. Select a Caller ID in the Call from field and enter the destination phone number in the Call to field.
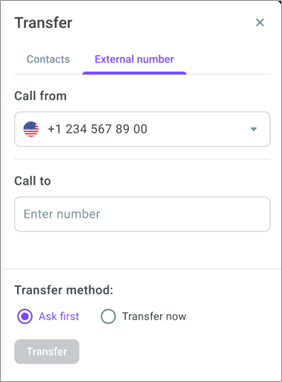
- Click Transfer. If the transfer is successful, you will hear a beep.
- Click Complete transfer. Note that the call details are transferred to the destination agent together with the call (both in an attended and blind transfer).
If an attended transfer fails, you can try to transfer the call again or end it. In case of a blind transfer, the call does not return to you.
Processing inbound conversations
Inbound messages can be automatically distributed to you from queues or assigned to you manually. Automatic distribution of chats is only available when an agent is in the Ready status.
- To manually assign a conversation to yourself, select it from the Unassigned list. Use the filter to sort conversations by the time they were received. If necessary, enter the desired phone number in the Search field - the system will display the results received, including partial matches.
Next to each chat, you can see the respective channel's icon.
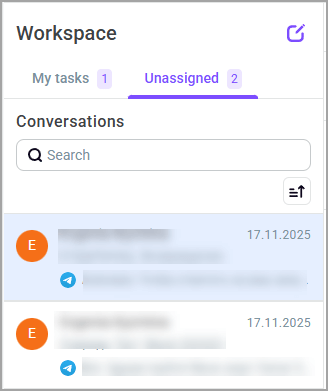
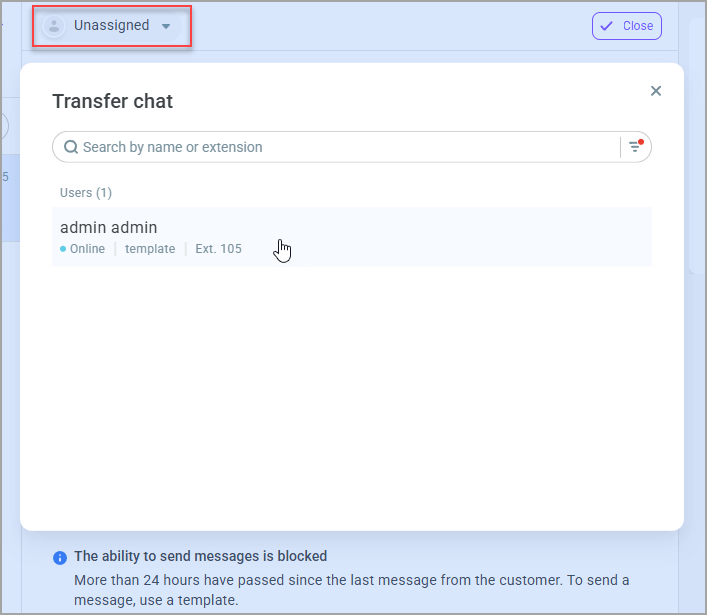
- Assign the conversation to yourself. For that, click the Unassigned drop-down list and select your name in the Transfer chat window. The selected conversation now displays on the My conversations tab.
All conversations are currently processing display in the list with a timer which starts from the moment a conversation is assigned to you (automatically or manually).
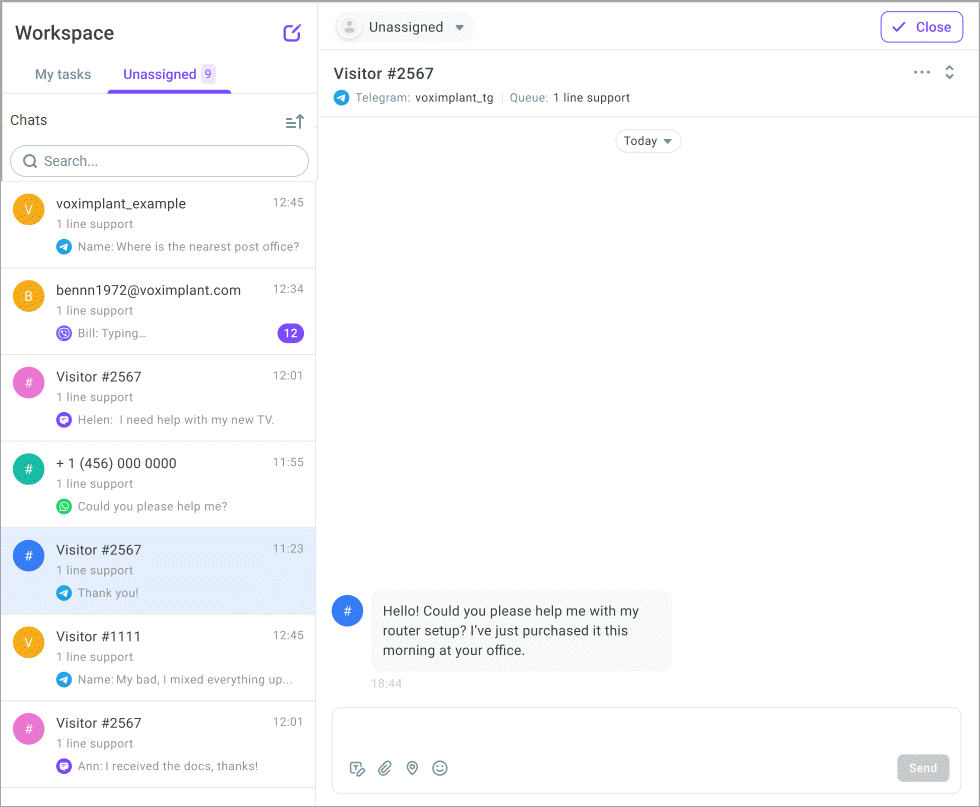
- Use the filter to display answered conversations or conversations you have not answered yet.
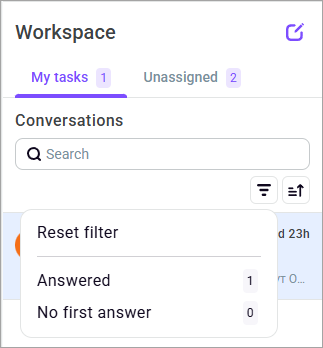
- In the middle column, enter your message in the text field and click Send.
Depending on the queue settings, the system can send automatic replies to a customer or manage chat activity. For details, go here.
Every agent can add one note to a conversation they are assigned to. If you transfer a conversation to another agent, the agent will see the comment added by you in a display-only mode. The maximum number of notes agents can add to a conversation is limited to 10. The maximum number of characters in a note is limited to 1000. Note that you cannot add notes to unassigned conversations.
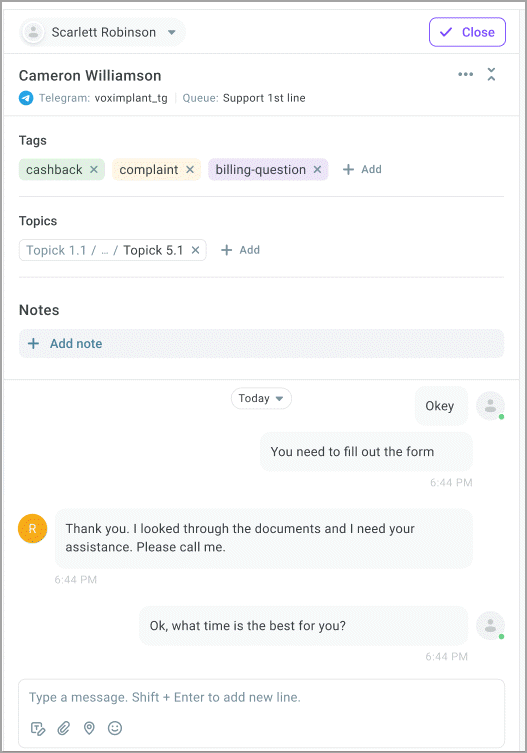
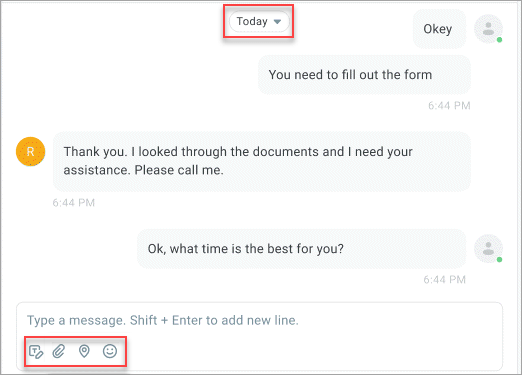
- If you need to review the conversation history, click on the date above the text field and select the required one from the drop-down list.
- If you need to attach a document, share your location, or use Emoji, click on the appropriate icon in the text field. You can also use a predefined message template.
While processing conversations, agents see active templates from the collections assigned to their groups only. For details, go here.
- While processing an active conversation, a customer card appears on the right side, displaying their email, phone numbers, and additional information. To supplement the data, click Add.
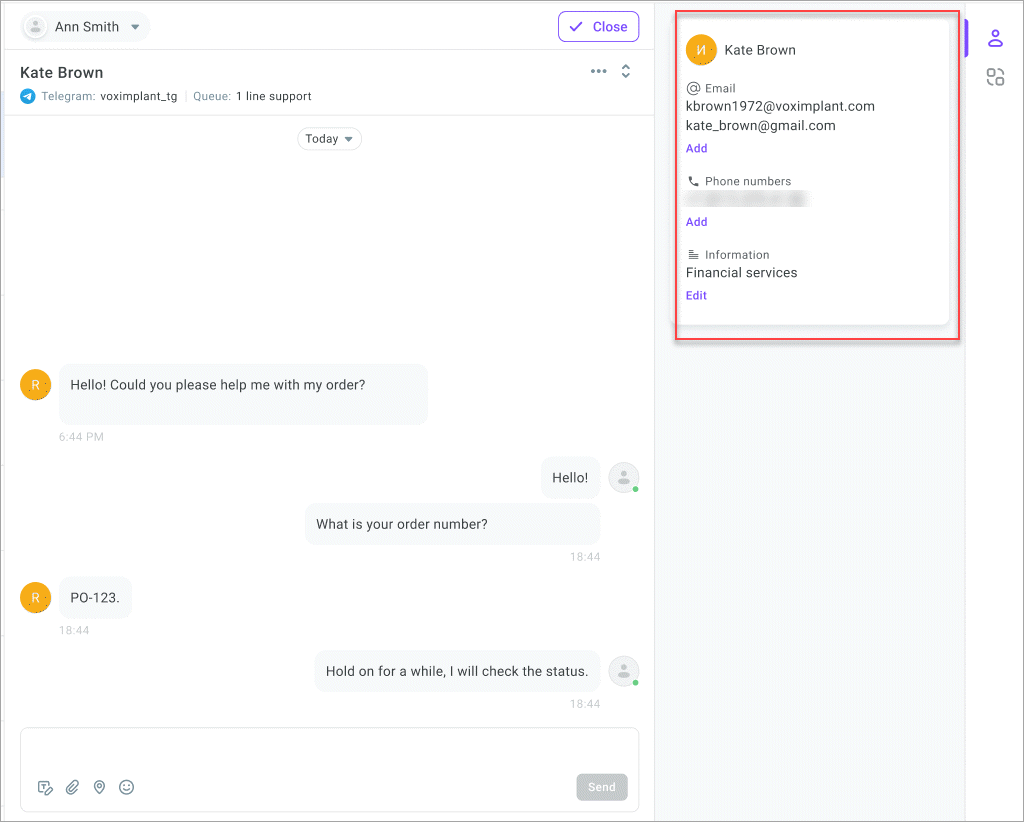
You can also open an intergation tab and enter customer data into a third-party service, such as a CRM system, if the necessary settings have been made (see details below). To switch back to the contact card, click the Contact icon.
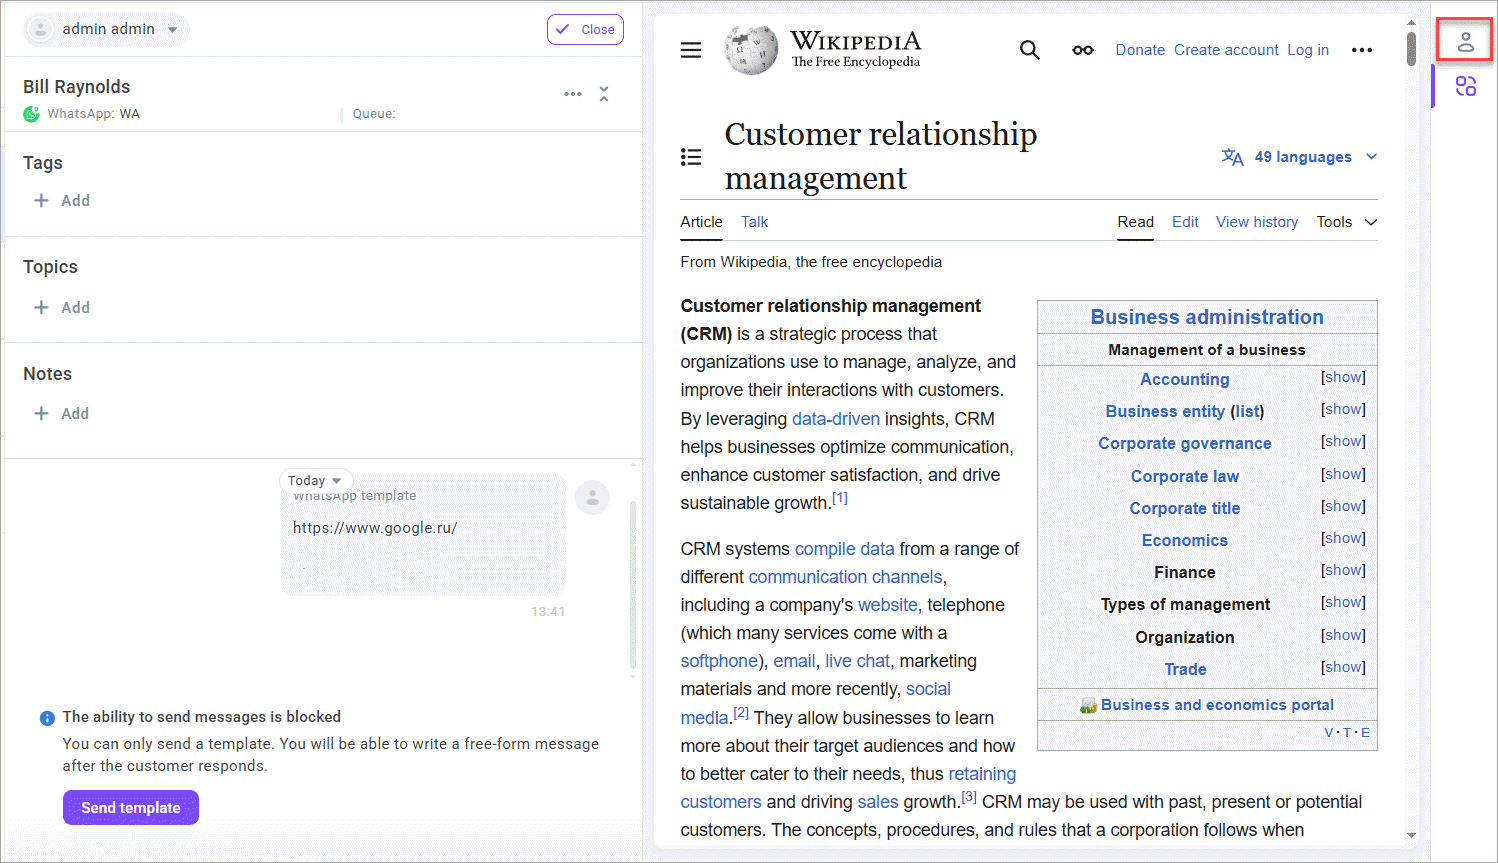
- To close the conversation, click Close on the conversation card in the left or middle columns.
Agents cannot initiate conversations with customers. When you close a chat, you cannot reach the customer yourself until they start a conversation again. The system can automatically close chats, both assigned and unassigned, when the time specified in the channel settings is over.
The maximum lifespan of a conversation is 90 days. After this period, ALL conversations are automatically closed, regardless of their status.
Transferring a conversation
You can transfer your conversation to another agent or queue.
- At the top of the screen, click the drop-down list to transfer the chat.
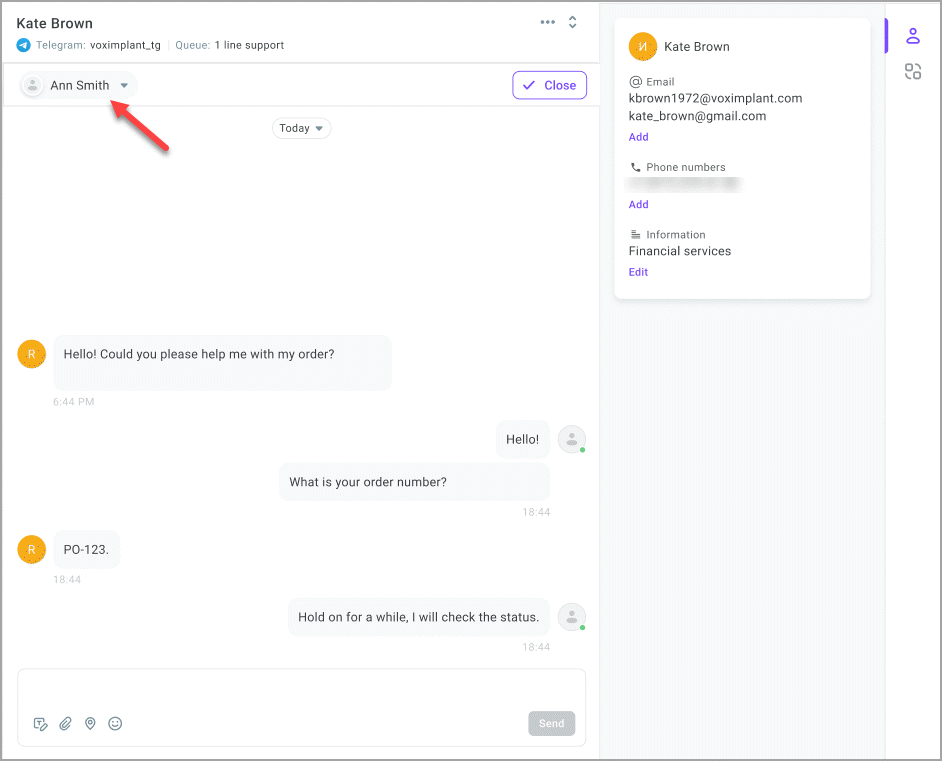
- Select an agent or queue for the transfer.
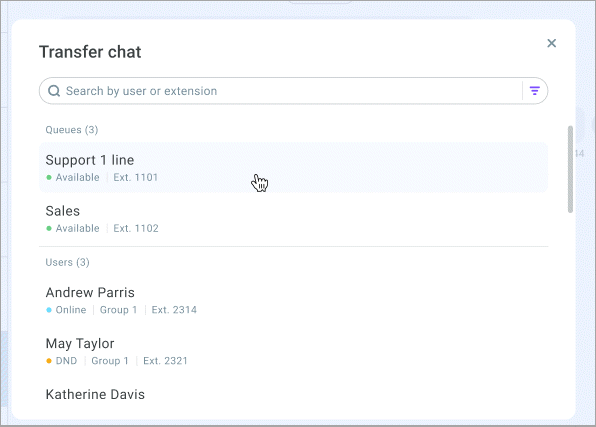
By default, the tab contains only available contacts: groups in the Available status (provided there are Online or Ready employees), queues in the Available status (provided there are Online, Ready, Dialing, or In service employees), and agents in the Online and Ready statuses. Unavailable contacts are hidden, you can only see them by disabling the Only available switch in the Search field. When disabled, unavailable users, groups, and queues display in the list, BUT remain inactive.
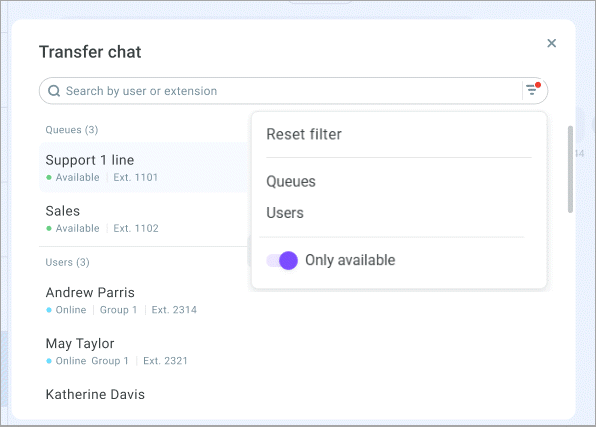
When transferring a conversation to a queue, it goes to the end of the queue without priority for both assigned and unassigned dialogues. You cannot transfer a conversation to a queue if its message limit is reached.
Sending outbound messages
You can initiate a conversation with a customer through a WhatsApp channel by clicking the Create chat icon. Please note, that WhatsApp strictly restricts the ability to initiate contact with customers and you can only write to a customer first using an HSM template.
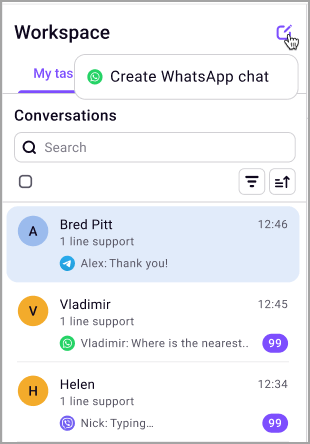
An HSM template (Highly Structured Message) is a pre-defined standard message for sending to customers via WhatsApp. A template can consist of text, media files, buttons, and variables. WhatsApp templates have strictly limited categories and require WhatsApp approval.
As soon as the customer responds to the template message, you will be able to send free-form messages for 24 hours. Each new response from the customer extends the window by another 24 hours. When more than 24 hours have passed since the last response from the customer, your ability to send messages is blocked. To unlock it, you must send a template again.
If the customer resumes the conversation after 24 hours, you can continue free-form communication regardless of whether a repeated template message was sent.
In Voximplant Kit, the following types of WhatsApp messages from customers are supported: text message, photo, audio, video, location, document and contact.
For detailed instructions on how to create, register, and send an HSM template, go here.
Statuses
Agents can have different statuses while working. Statuses help you track what your agents are busy with and distribute load in the contact center accordingly.
A status displays in the top right-hand corner of the screen with a timer that shows how long an agent stays in this status.
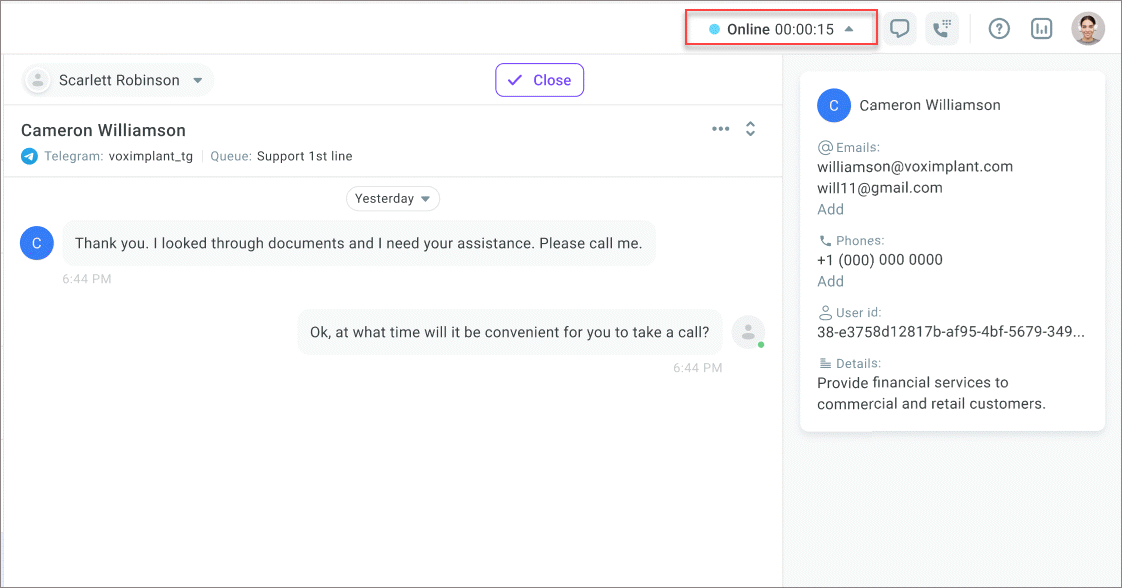
When agents log in to their Workspace, they get the Online status. You can transfer calls to online agents and call them via the softphone. However, they do not receive calls from queues. Agents can change this status by clicking on it and selecting Ready from the drop-down list.
Agents in the Ready status can receive calls from queues and process chats from channels connected to queues. An agent can change this status by clicking on it and selecting one of the unavailability statuses (Online, DND, or custom) from the drop-down list.
Once a call is assigned to an agent, their status changes to Dialing. An agent remains in this status until they answer the call, the call is ended by the customer, or assigned to another agent.
When an agent answers the phone, the status changes to In service. This status is only active while an agent is attending a customer call.
After an agent ends a call from queue, their status changes to After service. Agents can change this status to Ready by clicking the Complete button. If the after service time limit is specified in the queue settings, the system will automatically force agents out of the after service when this limit is reached.
Agents in one of the call processing statuses (Dialing, In service, or After service) can schedule which status should go next be clicking the current status and selecting one of the unavailability statuses (Online, DND, or custom). The transition to the scheduled status will occur after the call is processed.
If an agent fails to answer the call on time, they get Banned. Agents need to manually change this status by clicking the Unban button next to the status. Agents can schedule which status should go next by clicking the current status and selecting the status they need from the drop-down list.
If an agent is unavailable to process customer requests, they set the DND or one of the custom statuses. Agents in this status can neither receive calls from queues nor can you transfer them calls/chats. Agents can change this status by clicking on it and selecting Ready from the drop-down list.
Agents who are not online have the Offline status.
For more information on agent statuses, go here.
Integration of third-party web pages into the Workspace
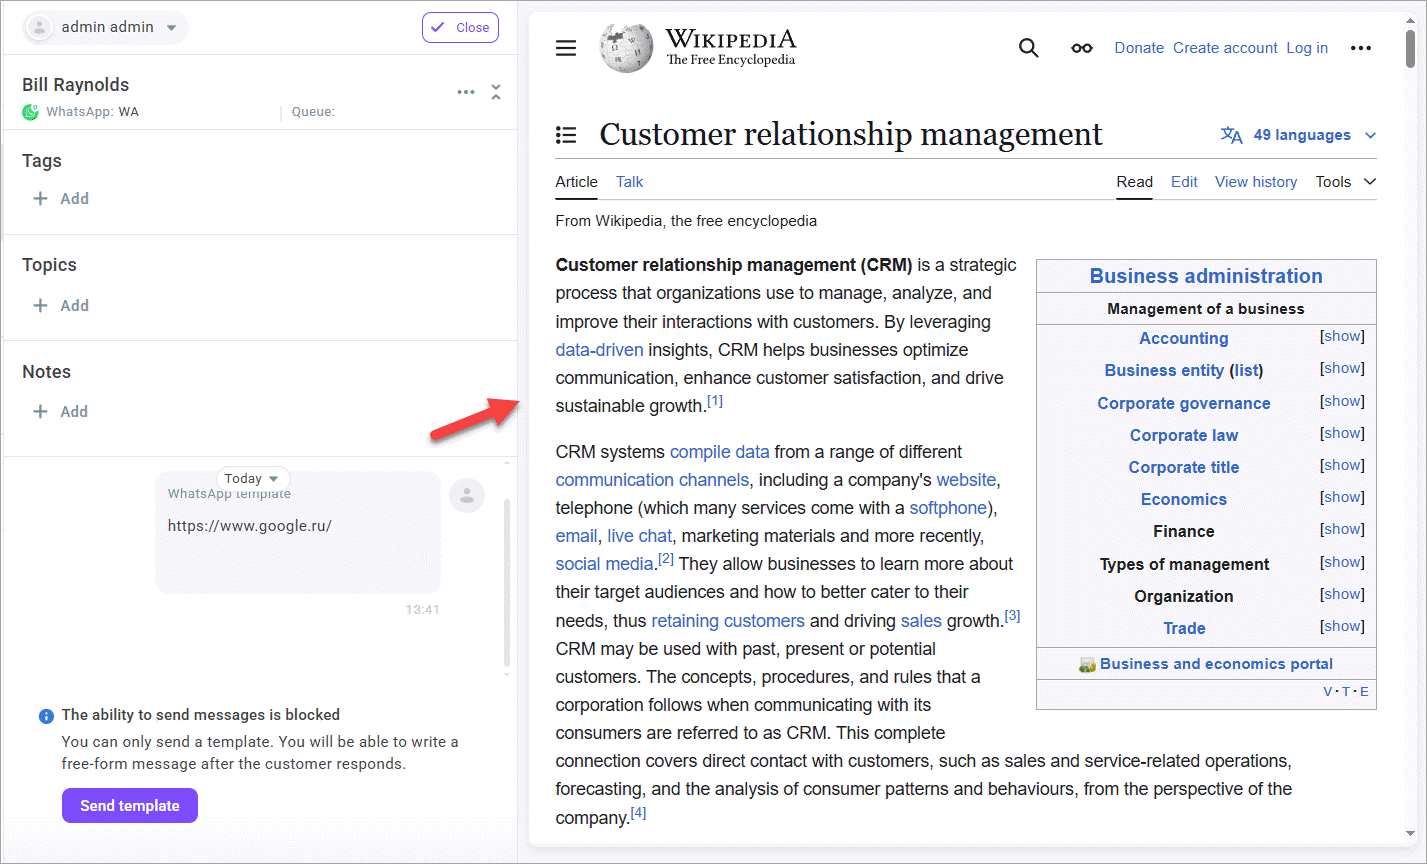
You can embed an iframe of a third-party application web page (e.g., an analytics service, CRM system, etc.) into your Workspace and work within two systems without switching between tabs.
The URL of the displayed page is set in the Get contact information field in the General settings > Other settings section.
Your application can only render a third party web page in an iframe if the page configuration does not prohibit it. The prohibition to use cross-domain frames referring to resource pages is introduced by setting the X-Frame-Options header. The added security is provided only if the user accessing the web page is using a browser that supports X-Frame-Options.
After saving the settings, you can use the third-party service during an active conversation without leaving your Voximplant Kit workspace. To open the integration tab, click the Integration icon in the right sidebar menu.

An iframe of the third-party web page displays within your Workspace page. You can resize the tab for convenience.
