Working with the embaddable softphone
Contents
Handling inbound calls
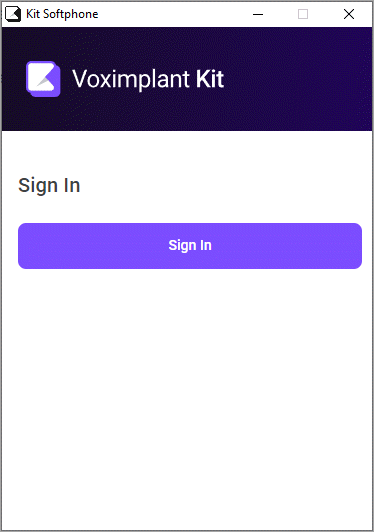
- Sign in to the embeddable softphone.
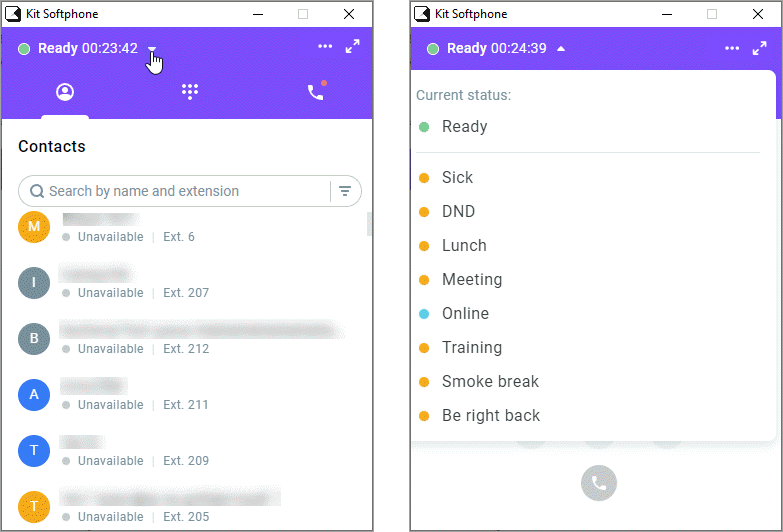
- In the upper right-hand corner of the embeddable softphone, select Ready from the drop-down list.
In the Ready status, the system assigns you inbound calls from queues. You can change this status by clicking on it and selecting one of the unavailability statuses (Online, DND, or custom) from the drop-down list.
When a call is assigned to you, the Ready status changes to Dialing.
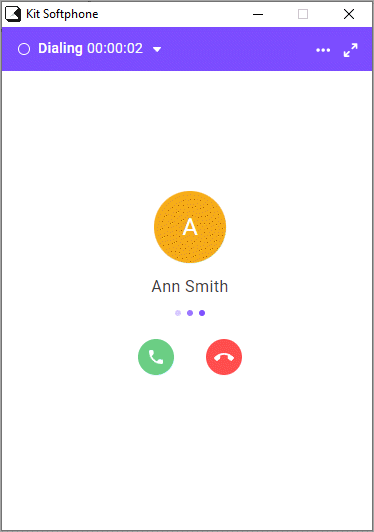
- To accept an inbound call, click the green button.
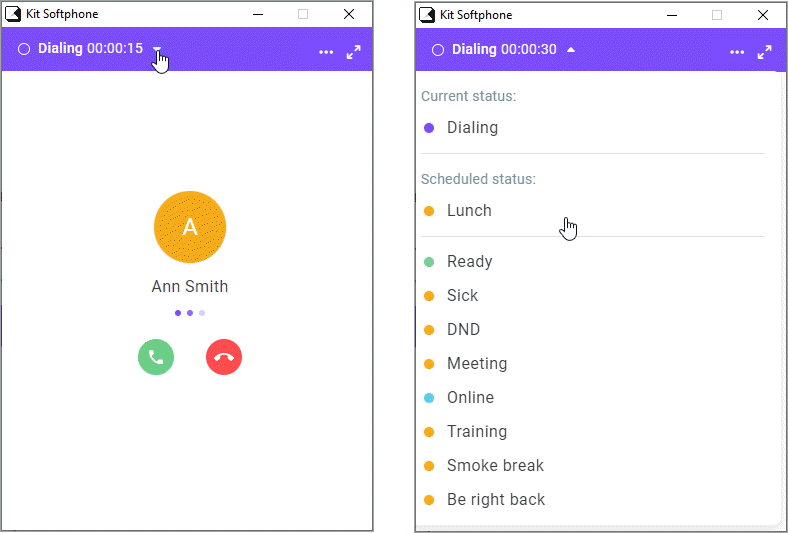
When you answer the phone, your status changes to In service. If you fail to answer the phone on time, you get Banned. You need to manually change this status by clicking the red Unban button. You can schedule which status should go next by clicking the current status and selecting the status you need from the drop-down list.
In the Kit softphone app, the Banned status automatically changes to the previously scheduled status upon detection of any activity, for example, if an agent moves a mouse.
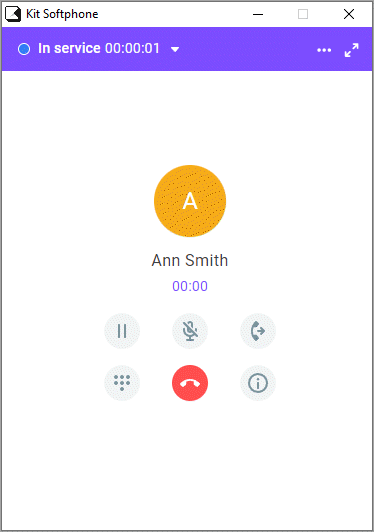
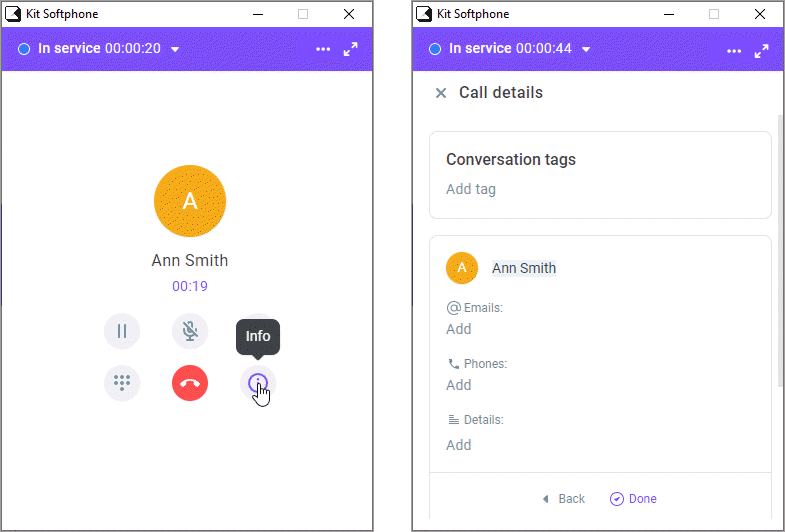
- Click the Information icon to go to the call details.
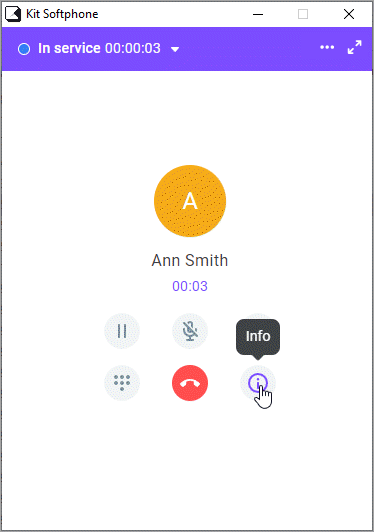
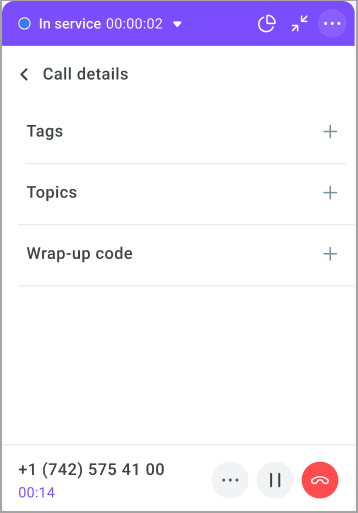
- Add tags and topics to the conversation. The feature helps you thoroughly classify your calls based on certain properties.
- Select a wrap-up code to label the call outcome, if the call was received in a campaign.
- When the conversation is over, click the red button to end the call.
After you end the call, your status changes to After service. In this status, you can also enter call details, assign wrap-up codes, tags, and topics.
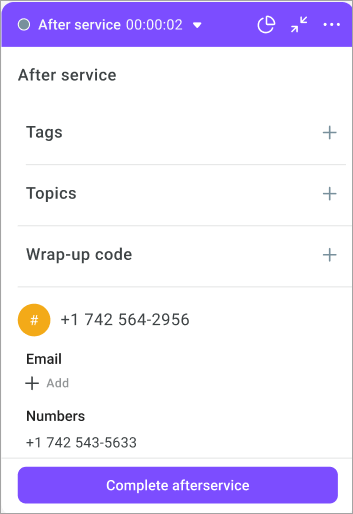
- Click Complete afterservice. If the After service time limit switch is enabled in your queue settings, the system automatically forces you out of the after-call work once the time limit is reached.
While in one of the call processing statuses (Dialing, In service, or After service), you can schedule which status should go next be clicking the current status and selecting one of the unavailability statuses (Online, DND, or custom). The transition to the scheduled status will occur after you process the call.
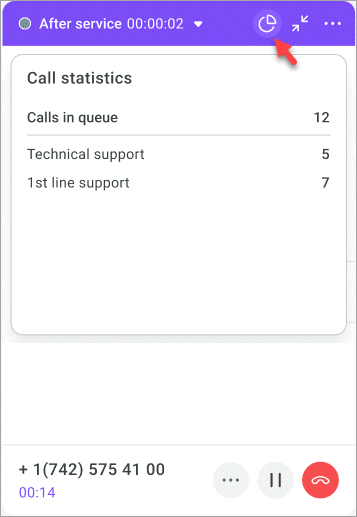
- Click the Statistics icon in the upper right corner to review the number of calls in queue.
Making outbound calls to contacts
- Click the Contacts tab. The tab contains your CC contacts. You can initiate a call to a specific user, queue, group, or remote extension by clicking the call button in front of the contact.
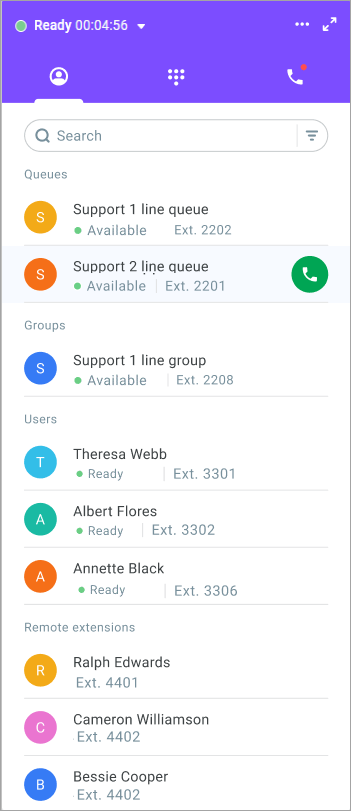
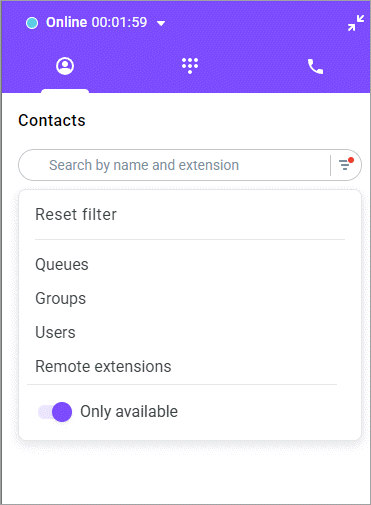
The contact list displays only users, queues, and groups with an extension number. By default, the tab contains only available contacts: groups/queues in the Available status (provided there are Online, Ready, Dialing, or In service employees) and agents in the Online and Ready statuses. Unavailable contacts are hidden, you can only see them by disabling the Only available switch in the Search field. When disabled, unavailable users, groups, and queues display in the list, BUT remain inactive.
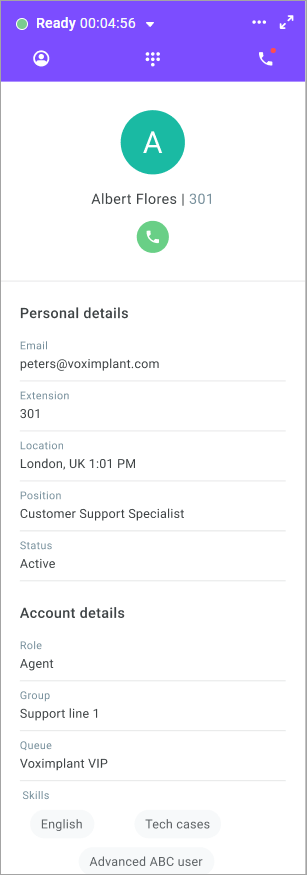
- If you want to call a user, select the user from the contact list. Clicking the user opens the user's card with detailed information.
- Click the green button to start the call.
- To call a queue, select it from the contact list. Clicking the queue opens its card with the queue details and members.
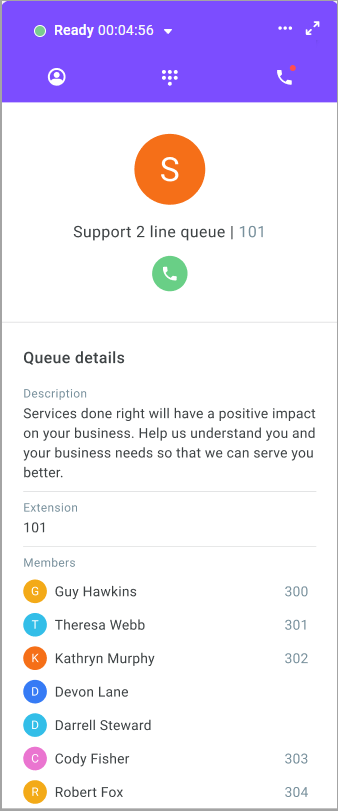
- Click the green button to initiate the call. Once connected to an agent from the queue, you see the agent's card.
- To call a user group, select it from the contact list. Clicking the group opens the group's card with its details and members.
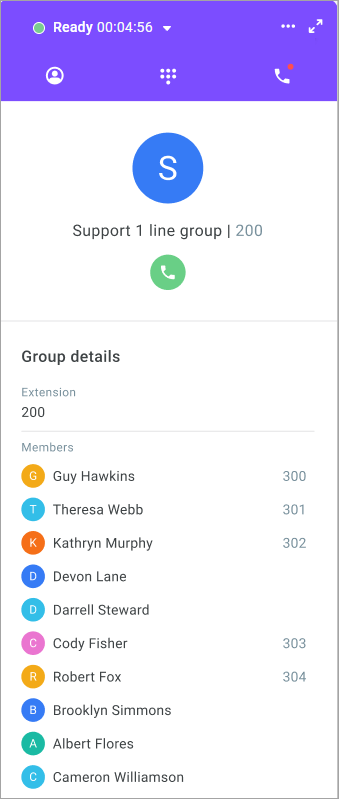
- Click the green button to initiate the call. Once connected to an agent, you see the agent's card.
- To call a remote extension, select it from the contact list. Clicking the remote extension opens the external user's card.
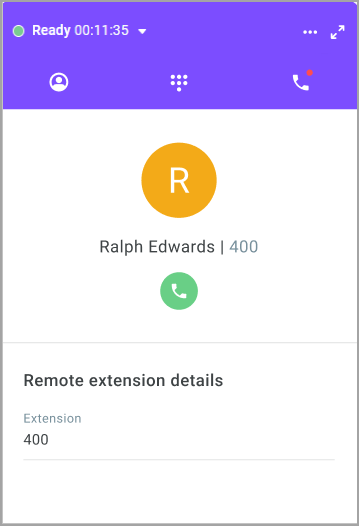
Dialing a phone number and selecting a Caller ID
- Go to the Keypad tab to manually dial a phone number. You most frequently use this tab when you need to call a customer back after your conversation in the queue has ended.
Depending on the General or group settings, the following Caller ID selection logic is implemented on the Keypad tab.
Cases | State of the Allow agents to manually select Caller IDs setting | State of the Use automatic Caller ID selection setting | Caller ID selection |
Case 1 | Disabled | Disabled | The agent cannot select a Caller ID. The system makes a call from the Default Caller ID. |
Case 2 | Enabled | Disabled | The system makes a call from the Default Caller ID or from the Caller ID the agent manually selects from the list of available phone numbers. |
Case 3 | Disabled | Enabled (Randomly) | The agent cannot select a Caller ID. The system automatically selects a random Caller ID from the list of available phone numbers. |
Case 4 | Enabled | Enabled (Randomly) | The system automatically selects a random Caller ID from the list of available phone numbers, or the agent manually selects a Caller ID. |
Case 5 | Disabled | Enabled (By routing rules) | The agent cannot select a Caller ID. The system selects a Caller ID by routing rules or uses the Default Caller ID if no matches are found. |
Case 6 | Enabled | Enabled (By routing rules) | The system selects a Caller ID by routing rules or uses the Default Caller ID if no matches are found. The agent can manually select a Caller ID. |
An outbound call from the softphone when the agent cannot manually select a Caller ID (cases 1, 3, 5)
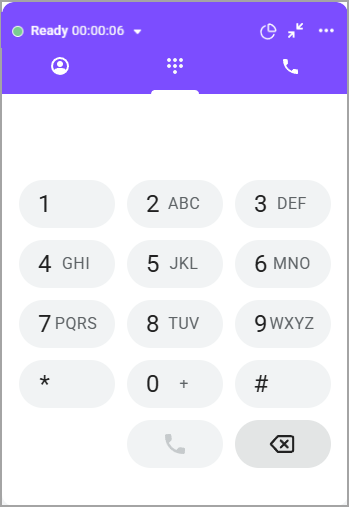
The system uses the Default Caller ID, selects a Caller ID by routing rules or uses a random phone number for an outbound call (depending on the settings).
An outbound call from the softphone when the agent can manually select a Caller ID and auto-selection is disabled (case 2)
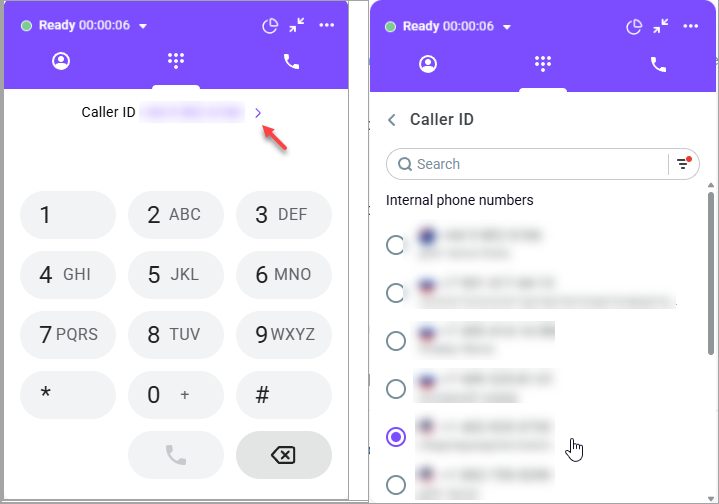
The Call from field displays the Default Caller ID. To manually select a Caller ID, click the arrow icon and choose a phone number from the list of available options.
An outbound call from the softphone when the agent can manually select a Caller ID and random auto-selection is enabled (case 4)
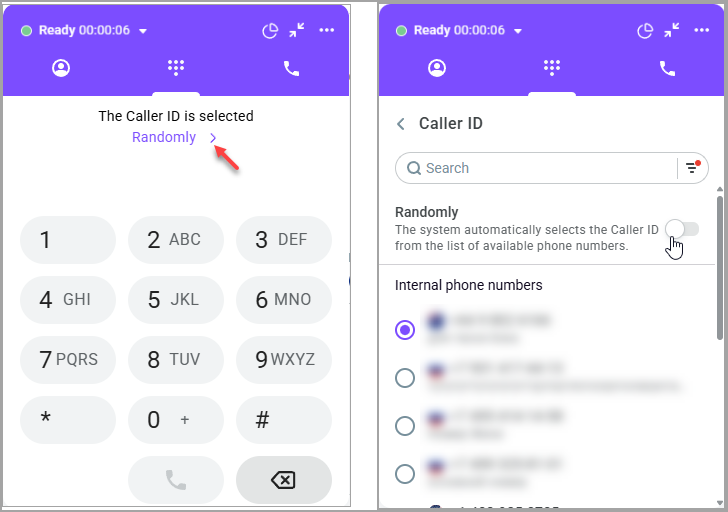
The softphone informs you that a random Caller ID is selected for the call. To manually select a Caller ID, click the arrow icon, disable the Randomly switch, and and choose a phone number from the list of available options.
An outbound call from the softphone when the agent can manually select a Caller ID and auto-selection by routing rules is enabled (case 6)
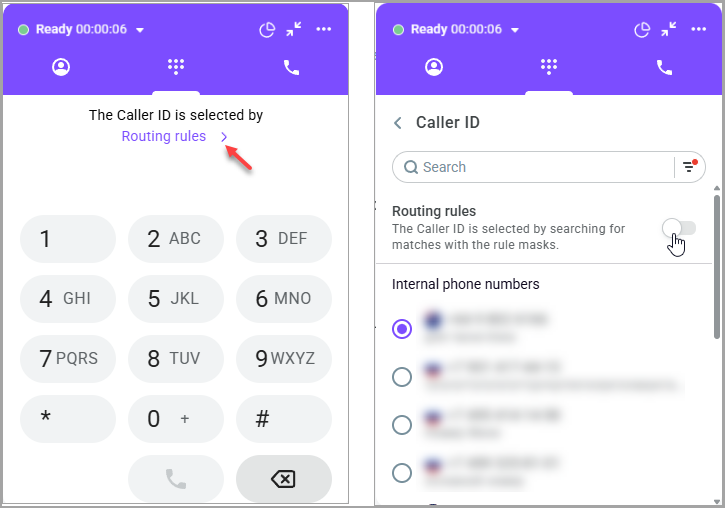
The softphone informs you that a Caller ID is selected by routing rules. To manually select a Caller ID, click the arrow icon, disable the Routing rules switch, and and choose a phone number from the list of available options.
- For manual selection, use the filter to search for the desired number.
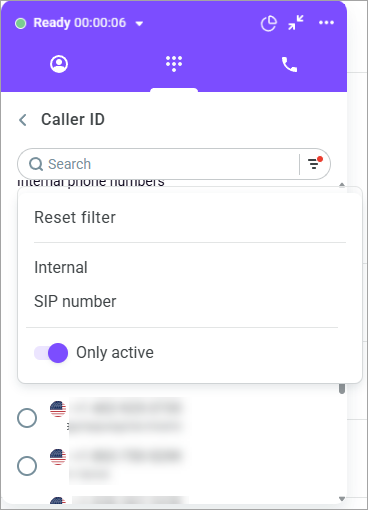
Group settings take precedence over the contact center General settings. If manual Caller ID selection is allowed for all users but prohibited for your group, only automatic number selection is available to you. Conversely, if manual selection is prohibited for all contact center users but allowed in your group, you can use both automatic and manual Caller ID selection.
- On the call control panel, you can mute, put on hold, transfer, or end the call.
- Click the Information button on the call control panel to view the contact card and associated tags. Note that you can edit and update contact cards of the existing contacts and create new contacts. You can add tags to a contact card if needed.
Transferring a call
- To transfer a call, click Transfer on the control panel.
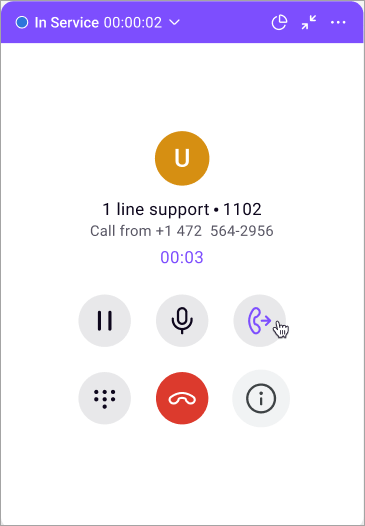
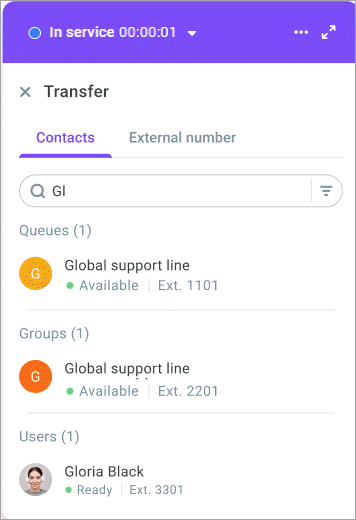
A call transfer window opens. The Contacts tab displays the list of users, queues, groups, and remote extensions.
The contact list includes only users, queues, and groups with an extension number. By default, the tab displays only contacts available for transfer: groups/queues in the Available status (provided there are Online, Ready, Dialing, or In service employees) and agents in the Online and Ready statuses. Unavailable contacts are hidden, you can only see them by disabling the Only available switch in the Search field. When disabled, unavailable users, groups, and queues display in the list, BUT remain inactive. Unavailable contacts are blocked, since the system immediately cancels any call to them.
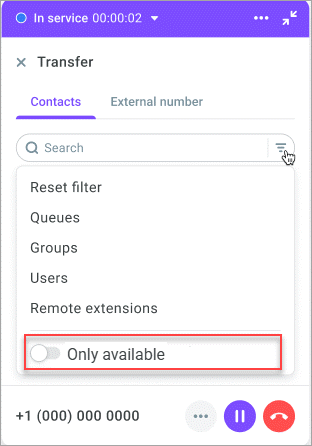
- Search for and select the required number either by username or by extension of a specific user, group, queue, or remote extension. Make sure to enable the Show available only switch.
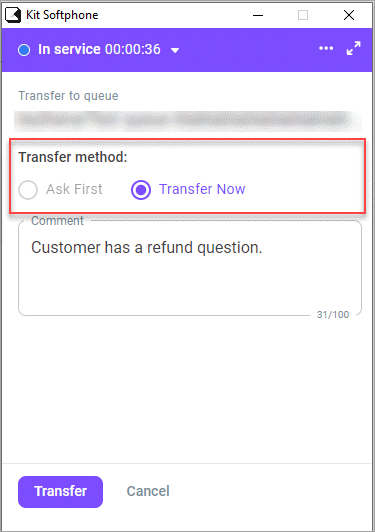
- Select, whether you want to notify the destination party before transferring the call (warm transfer) or perform an unattended transfer (blind transfer). Select the Ask first or Transfer now radio button accordingly.
If you are transferring a call to a queue only blind transfer is possible.
If you are transferring a call to an agent group, the system allocates the call according to the dialing strategy defined in the group settings. The options are:
Call agents simultaneously - The system routes an inbound call to all group agents at once. Dialing attempts continue until the call is answered. After that, dialing stops. This method helps reduce customer's waiting time for an answer since the call is answered by the first agent available. The maximum number of simultaneous calls that are not answered yet at any given moment is limited to 10.
Call a random agent - The call goes to the agent (only one) who received the least number of calls. If the agent fails to accept the call, the system cancels it and stops dialing. This approach helps evenly distribute load among employees, preventing early fatigue and allowing them to prepare for the next call.
Call agents sequentially - The system routes an inbound call to one phone number from the list, then another, and another, searching for an available agent. The system keeps on dialing until one of the agents accepts the call. After that, dialing stops.
- If you want to transfer a call to an external phone number, select the External number tab in the Transfer window. Select a Caller ID in the Call from field and enter the destination phone number in the Call to field.
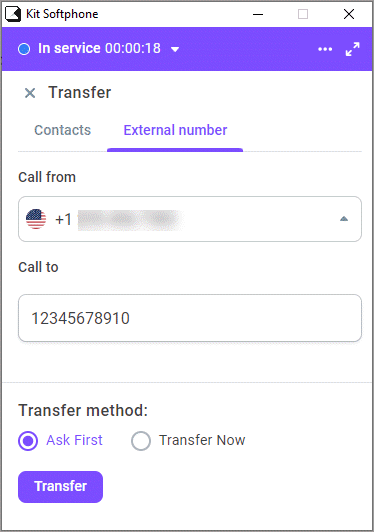
- Click Transfer. If the transfer is successful, you will hear a beep.
- Click Complete transfer. Note that the call details are transferred to the destination agent together with the call (both in an attended and blind transfer).
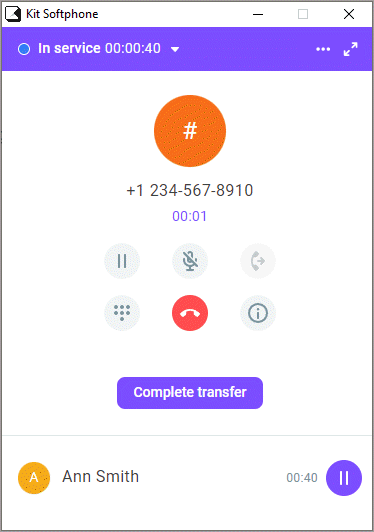
If an attended transfer fails, you can try to transfer the call again or end it. In case of a blind transfer, the call does not return to you.
Viewing call history
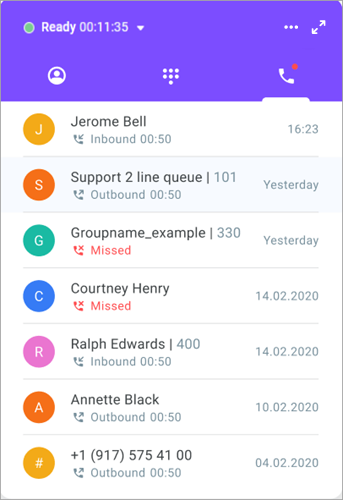
- Click the Recent calls tab to review the call history if needed. The system displays missed, inbound, and outbound calls. You can see the call date, time, duration, and status. You can initiate an outbound call by clicking any recent contact.
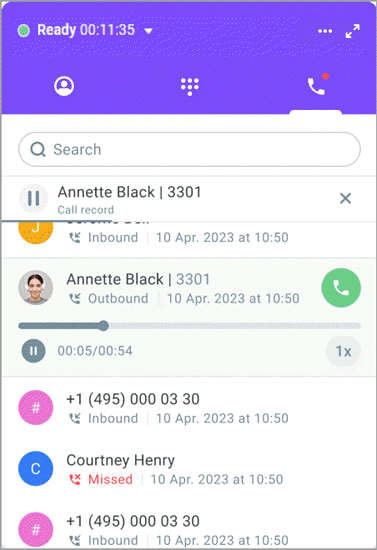
- If the Enable access to call recordings switch is activated for all or your group agents, you can listen to your call recordings. To play a recording, click on the required call and click Play.
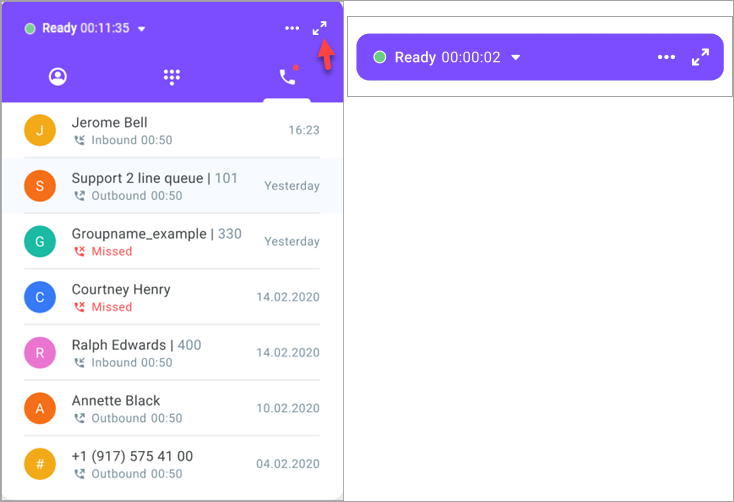
- If required, minimize the softphone window by clicking the Collapse icon.
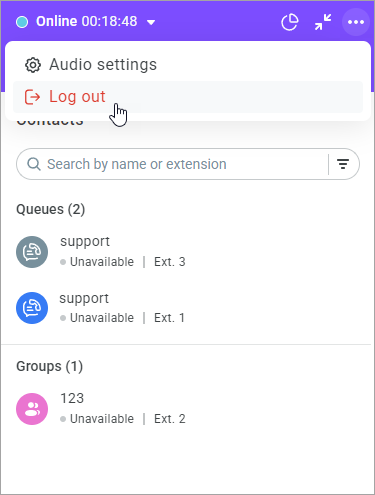
- In the right menu, click Audio settings to configure your audio devices and test the sound.
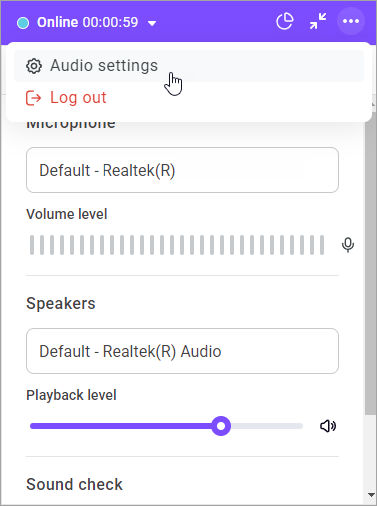
- To log out of the system, select Log out in the right menu.
