Creating message templates
In this section, you can create and manage message templates. Predefined messages contained in message templates can be used in a number of different situations to quickly construct a message in text channels rather than having to construct the message completely from scratch. It allows you to significantly reduce the time required to respond to a customer.
This section is only available if the contact center functionality is enabled in your account.
Creating and managing message templates is available only to users with the Owner, Administrator, Manager, and Supervisor roles (can manage templates from collections assigned to their groups). Users with the Agent role can use templates in their Workspace.
Contents
Creating a template collection
Before creating templates, you need to add a collection in which they will be stored.
- Log in to your Voximplant Kit account.
- Select Setup > Conversations > Message templates.
- Click Create collection.
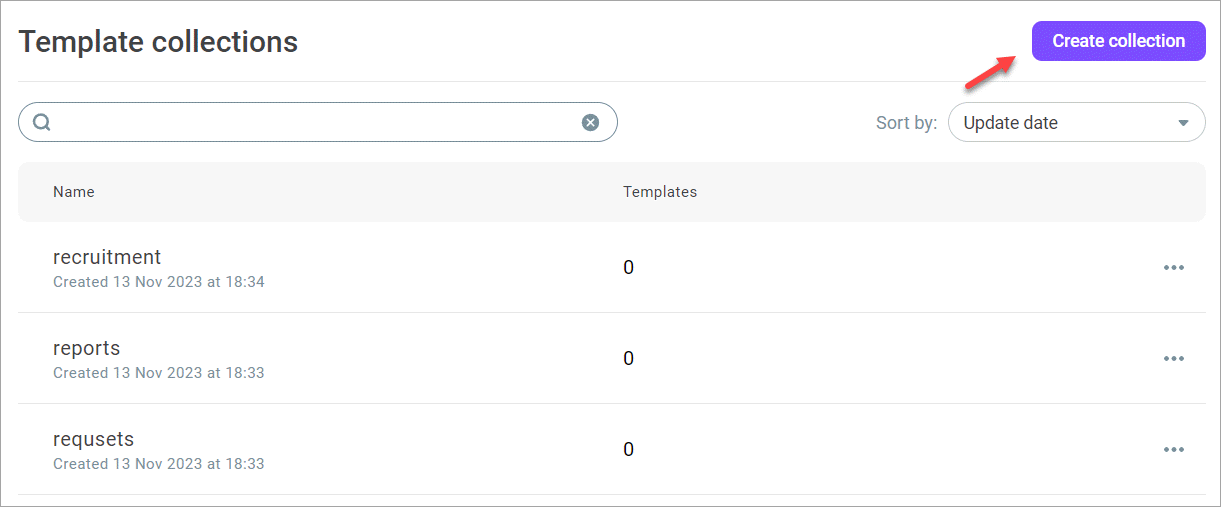
The maximum number of collections is 100.
Users with the Supervisor role cannot add and delete template collections.
- Enter the collection name and add a description.
- In the Assign to groups field, select the groups you want to assign to the collection.
You can assign up to 25 collections to each group. One collection can be assigned to an unlimited number of groups. If you do not assign a collection to any group, it is not visible to agents in the Workspace.
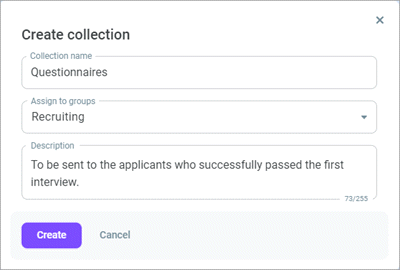
- Click Create. The system adds the collection to the list.
- If required, you can edit or delete the collection using the Action menu.

Adding templates to a collection
- In the Template collections list, click the collection in which you want to create a template.
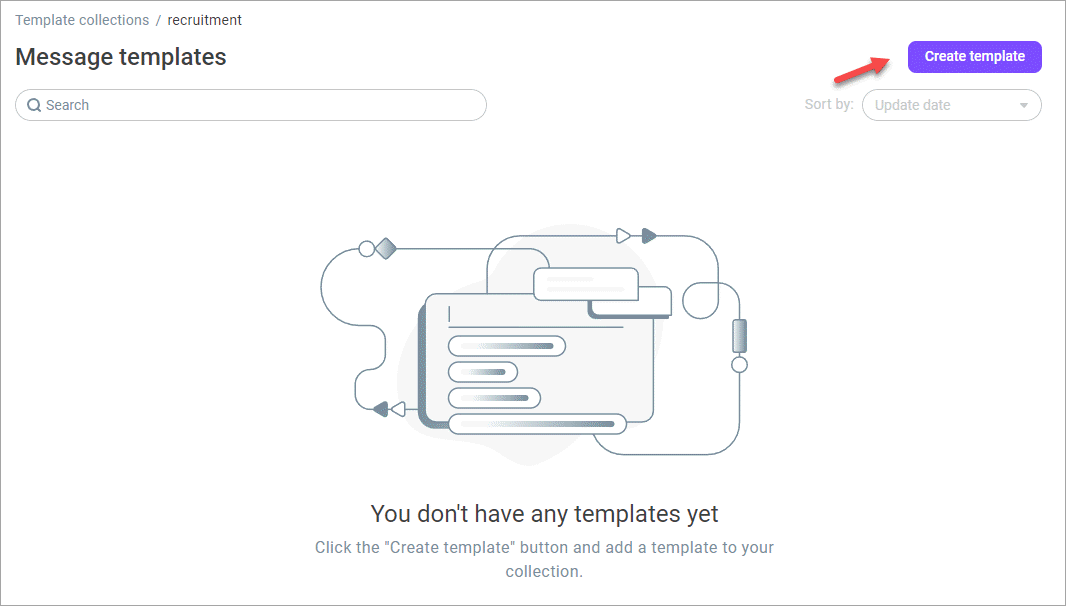
- Click Create template.
You can add up to 1000 templates to a collection.
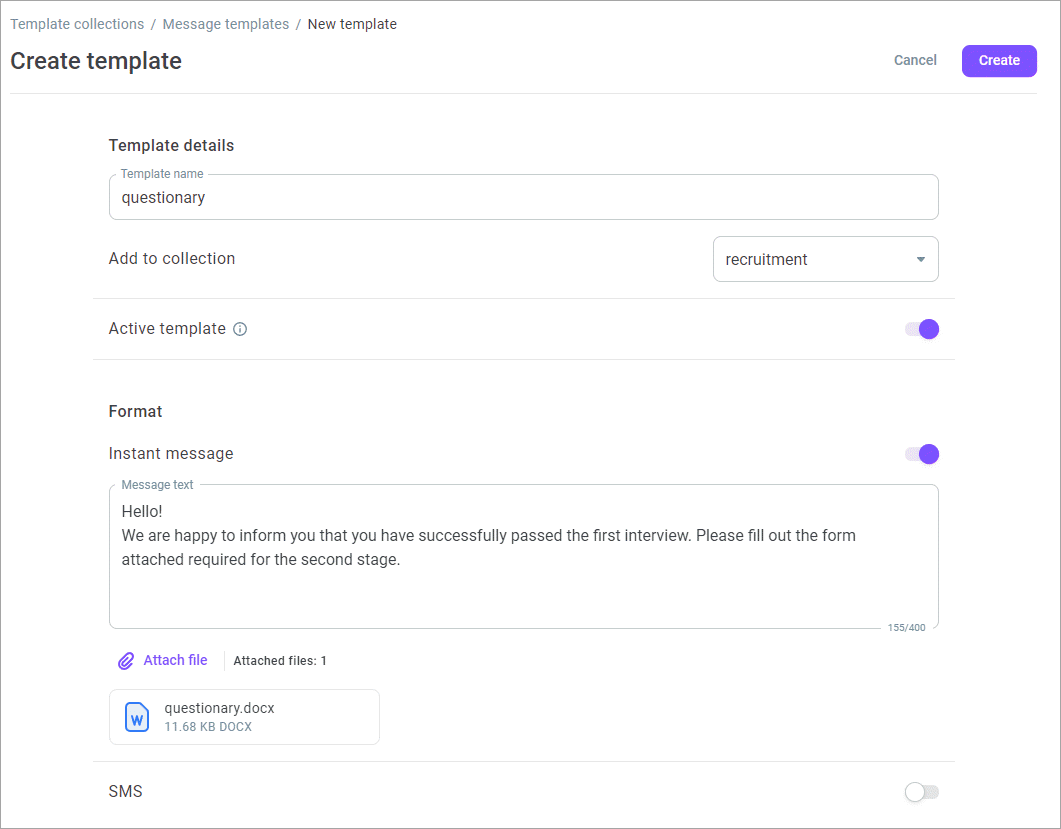
Enter the collection name.
Select the collection (only one) in which you want to create a template. The current collection is selected by default.
Enable the Active template switch to make the template available for agents in the Workspace. Inactive templates display only in the Message templates section, and and you cannot send them to customers.
In the Format group box, enable the Instant message and/or SMS switch to activate the template for a specific message type. If both switches are disabled, the Active template switch gets locked, and the template is unavailable for agents.
Enter the message text.
The maximum message size is 1000 characters.
- For instant messages, you can add attachments from the file storage (max 10).
- Click Create.
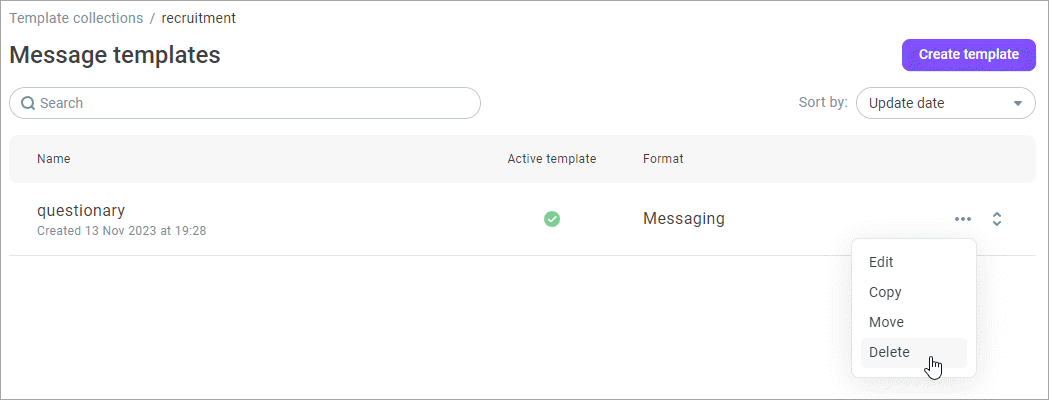
- You can edit, copy, or move the created template. Select the required template and click the Action menu icon.
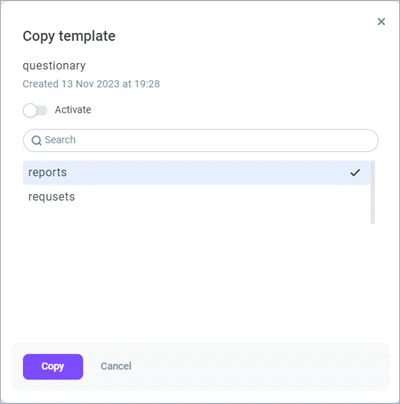
When copying the template, enable the Activate switch to make the template copy visible for agents in the Workspace. You can copy templates up to 5 collections. You cannot copy the template if you have only one collection.
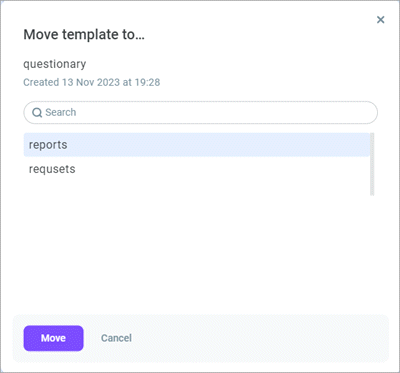
When moving the template to another collection, select the collection to locate the template. You can move the template to one collection only. You cannot move the template if you have only one collection.
- Delete the template if you no longer need it. Select the template from the list, click the Action menu icon, and select Delete.
Using templates in the Workspace
When an inbound message from a customer arrives, you can use the created message template in your Workspace.
While processing messages, agents see active templates from the collections assigned to their groups only.
- Click the Use template icon in the chat window.
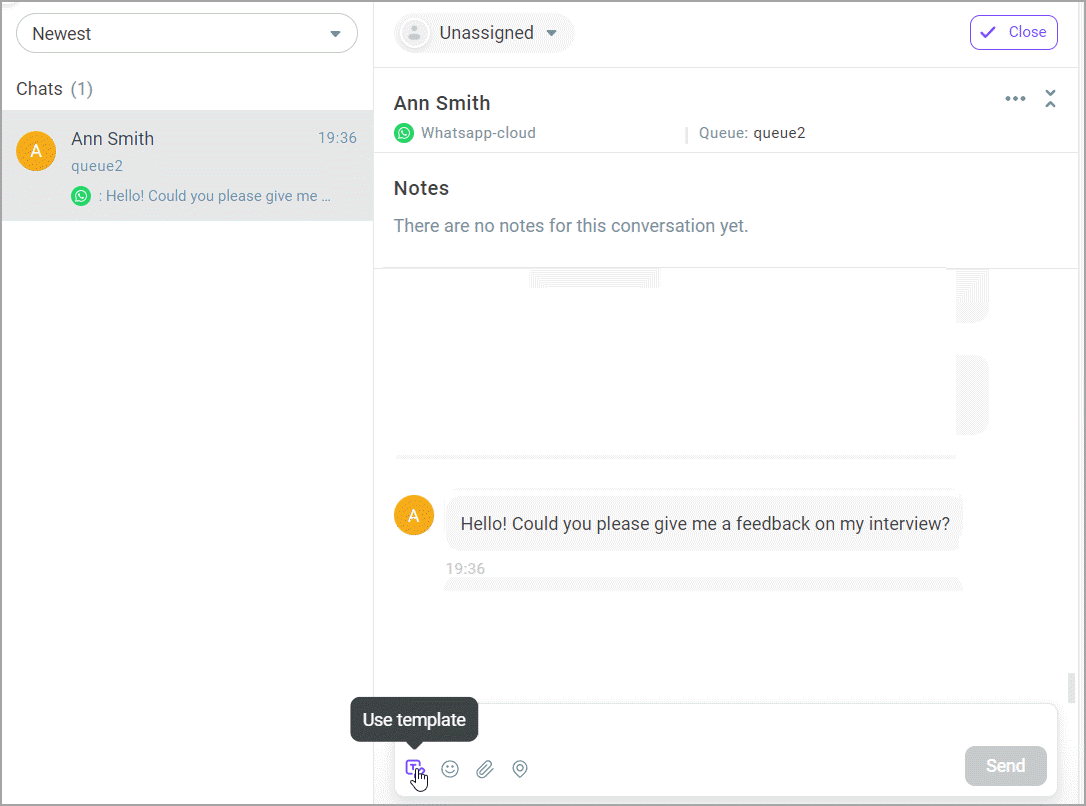
- Use the search field to find the template you need. The search works both by name and content of the template. Recently used templates display in the Recent section.
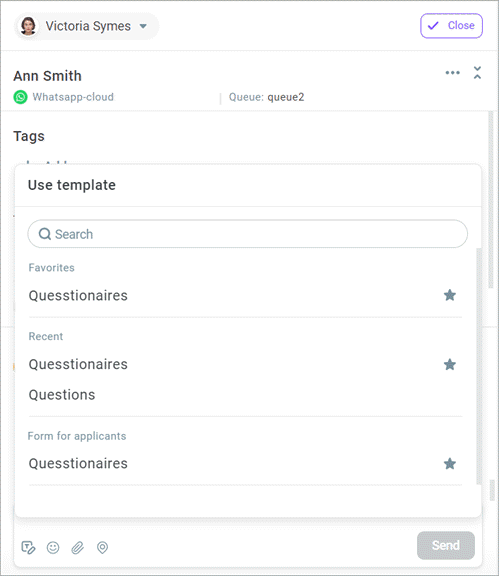
- If necessary, add a template to Favorites (up to 5 templates) by clicking the star to the right of the template name.
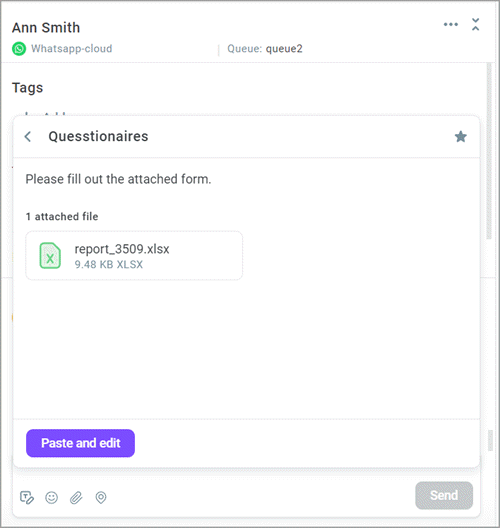
- Click the template row to preview the template.
- Click Paste and edit to insert the template into your message and edit it if needed.
- You can paste the template without a preview by clicking the Paste button in the template row.
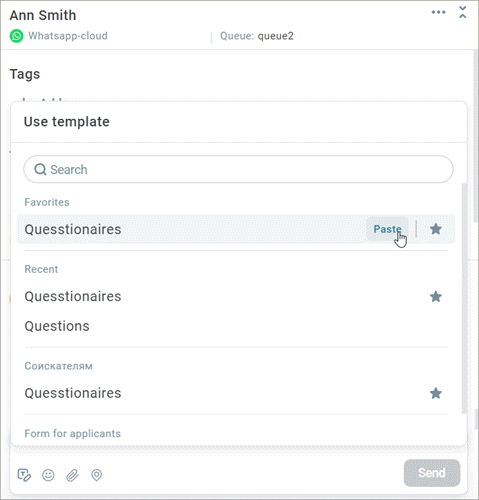
You can paste several templates at once. The system places each new template after the previous one.
