Setting up SAML authentication
Security Assertion Markup Language (SAML) is one of the most widely used open standard for authentication and authorizing between multiple parties. SAML is an open protocol that enables you to access multiple applications using one set of login credentials. At its core, SAML is a means to exchange authorization and authentication information between services.
SAML offers the ability to:
Manage a password policy across multiple applications
Access multiple applications securely
Reduce the risk of lost or forgotten passwords
Let us define some SAML terminology:
User - The user trying to authenticate.
Identity provider - An Identity provider, frequently abbreviated as IdP, is the service that serves as the source of identity information and authentication decision. Think of identity providers as databases for identity information. Identity providers authenticate users and return identity information to service providers (see below).
Service provider - Service providers frequently abbreviated as SP, are the services that request authentication and identity information about the user. Service providers take authentication responses received from identity providers and use that information to create and configure user sessions. Voximplant Kit is the service provider in this case.
Here is the standard flow of the SP-initiated SAML authentication:
The user attempts to log in to Voximplant Kit.
The user is redirected to the Identity provider.
SAML authentication begins.
The IdP prompts the user for login data (username or email, password, or 2FA).
The IdP verfies the login information.
If the login information is correct, the IdP authenticates the user, takes the user's identity and returns it back to Voximplant Kit as assertion.
Voximplant Kit receives the identity information from the IdP and allows the user to create a user session.
Adding SAML clients
To create a SAML client, do the following:
- Log in to your Voximplant Kit account.
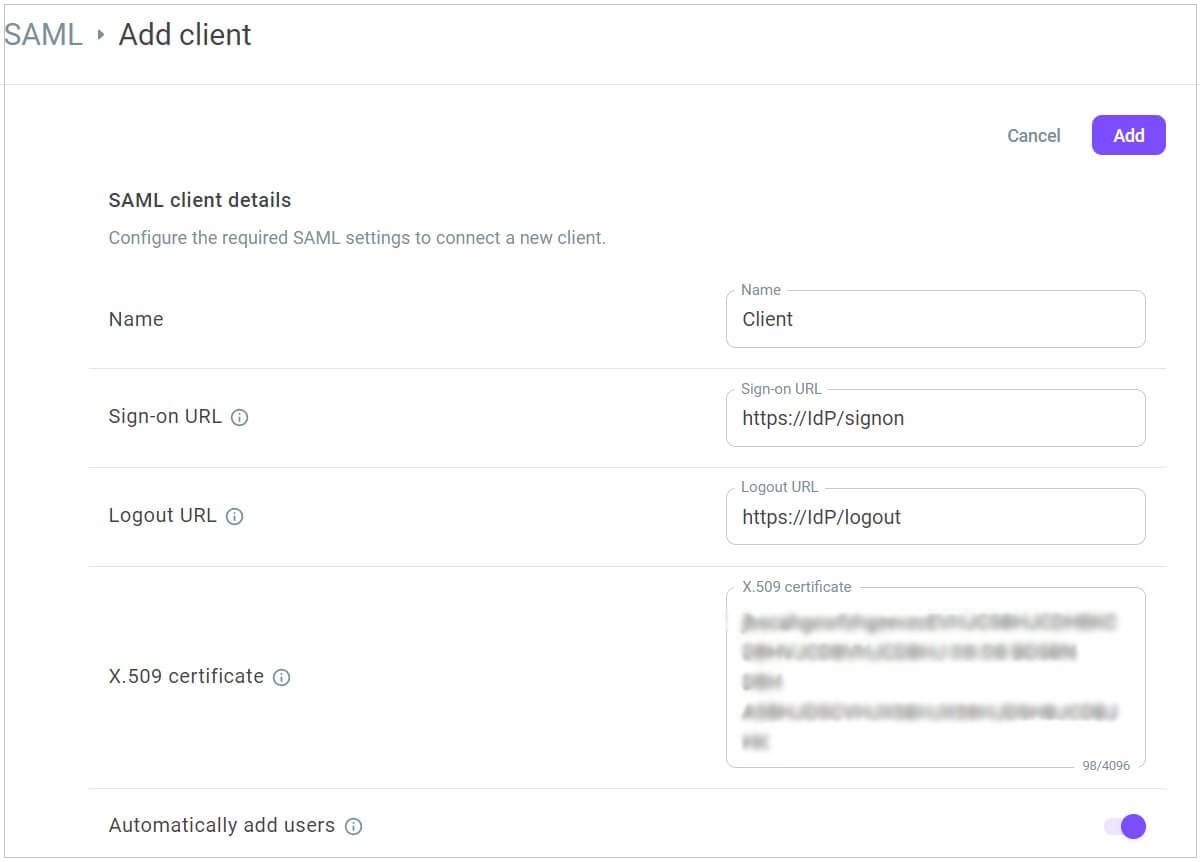
- Go to Administration > Security > SAML.
- Click Add client.
- Enter the name for the client in the Name field.
- In the Sign-on URL field, enter the IdP sign-on URL where Voximplant Kit will send SAML requests for authenticating users.
- Optionally, enter the URL where users are redirected when they logout from Voximplant Kit in the Logout URL field.
- In the X.509 certificate field, paste the content of the IDP X.509 certificate. This is the IdP certificate that the SAML configuration uses.
When the IdP informs Voximplant Kit that a user has been authenticated, it signs the message with the certificate. In order Voximplant Kit to verify this certificate, add it to your client.
- Enable the Automatically add users switch to allow Voximplant Kit to automatically add non-existent users when they are given access via IDP. Otherwise, you need to manually add each new user.
- Click Add.

If you have a SAML metadata document from the SAML Identity provider you are connecting to, you can fill in most of the fields above using that.
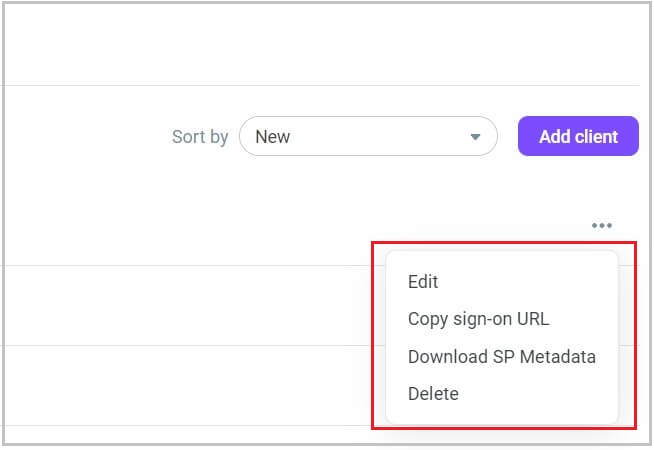
- Once you add the new SAML client, you can edit or delete it. You can also copy the Sign-on URL, if required, or download the Service provider (Voximplant Kit) metadata for your organization.

