Using Dialogflow
Dialogflow is a virtual agent that handles conversations with your end users. It is the natural language processing (NLP) tool that supports real-time media streaming. Dialogflow understands the nuances of human language which makes it as similar to a real person as possible.
You can use it in your scenarios by connecting the Dialogflow connector block.
Setting up an agent
- Create a Dialogflow agent in your Google account.
- Configure your Dialogflow agent using Intents, Events, and Entities.
While configuring, add the end_of_conversation intent, otherwise a scenario might get caught in an endless loop.
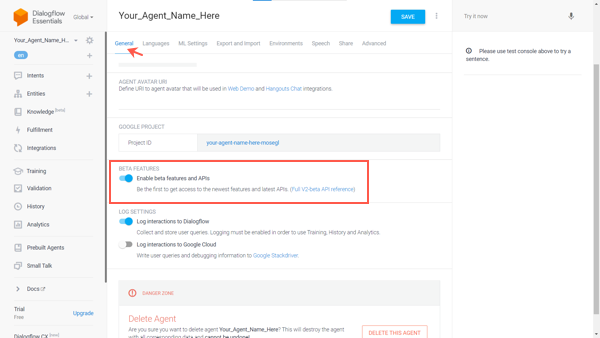
- In your Dialogflow agent, open the settings section and click the General tab.
- In the Beta features section, toggle the Enable beta features and APIs switch.
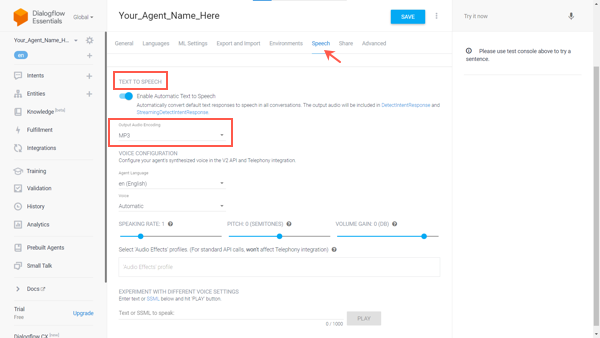
- Click the Speech tab.
By default, speech synthesis is disabled, so you need to enable this feature manually.
- In the Text-to-speech section, enable the Automatic text-to-speech switch.
- Select an .MP3 file from the Output audio encoding drop-down list.
- Select one of the available voices. We recommend you to use WaveNet-powered voices, since they sound much better than standard voices.
- Click Save.
Generating a service keys
A service key is a credential for your agent, which you use for the connector module in a Voximplant Kit scenario. Create the service key in the Google Cloud account and download it to your local device for further integration setup.
- In your Dialogflow agent, open the settings section and click the General tab.
- In the Google project section, click your Project ID. A new tab or window opens with Google Cloud Console displayed.
- In Google Cloud Console, go to the APIs section and click Go to APIs overview.
- In the left sidebar, select the Credentials section and click + Create credentials at the top of the page.
- Select Service account from the drop-down list.
- Enter the name and description of your service account. For example, Voximplant Kit integration, and then click Create and continue.
- Click + Add Role and select Owner role in a pop-up window. After the system adds the role, click Continue.
- Skip step 3 and click Grant users access to this service account.
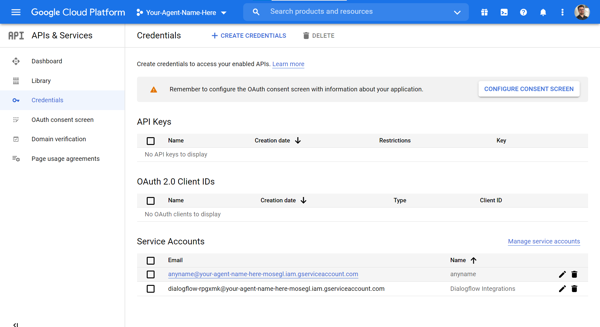
- Click Done.
The system generates the service account, and you can view it in the list on your Service accounts page.
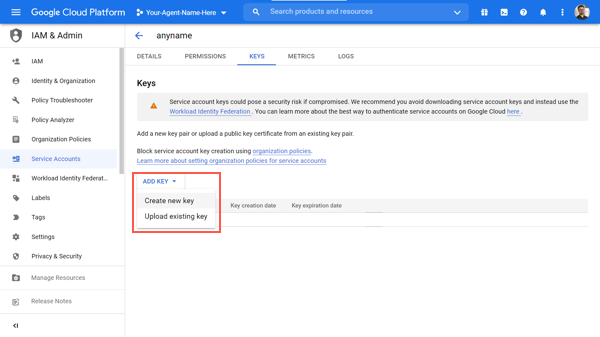
- Click your service account name.
- Select the Keys tab.
- Click Add Key > Create new key.
- Then click JSON > Create.

- Save the file to your local device. This key is necessary for your Voximplant Kit scenario.
Adding an agent
- Log in to your Voximplant Kit account.
- Go to Administration > Integrations > Dialogflow.
- Click Add agent and upload the service account JSON file of your agent you have previously created and downloaded from Google Cloud.

- Click Open.
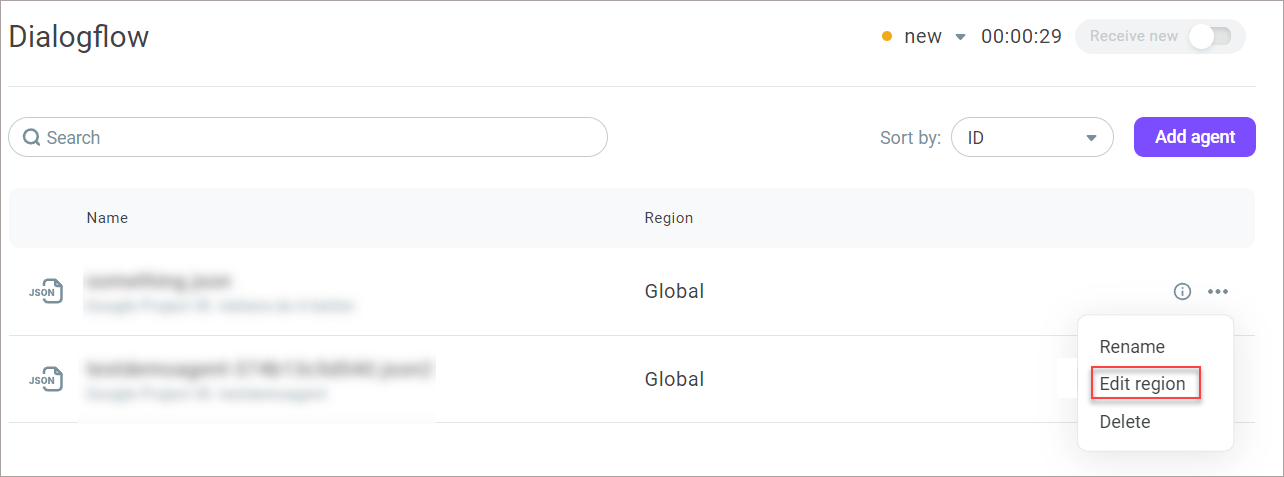
When creating an agent in Google you can specify the region to keep your data physically on Google servers. In Voximplant Kit, when you add your agent to the integrations, the system automatically assigns it the Global region. If in Google you selected a different region, you need to adjust it in Voximplant Kit. For that, click the Action menu icon and select Edit region. Select the location you need and save the changes. For more information on Dialogflow regionalization and data residency, go here.
How to use the Dialogflow Connector block in your scenario, learn here.
